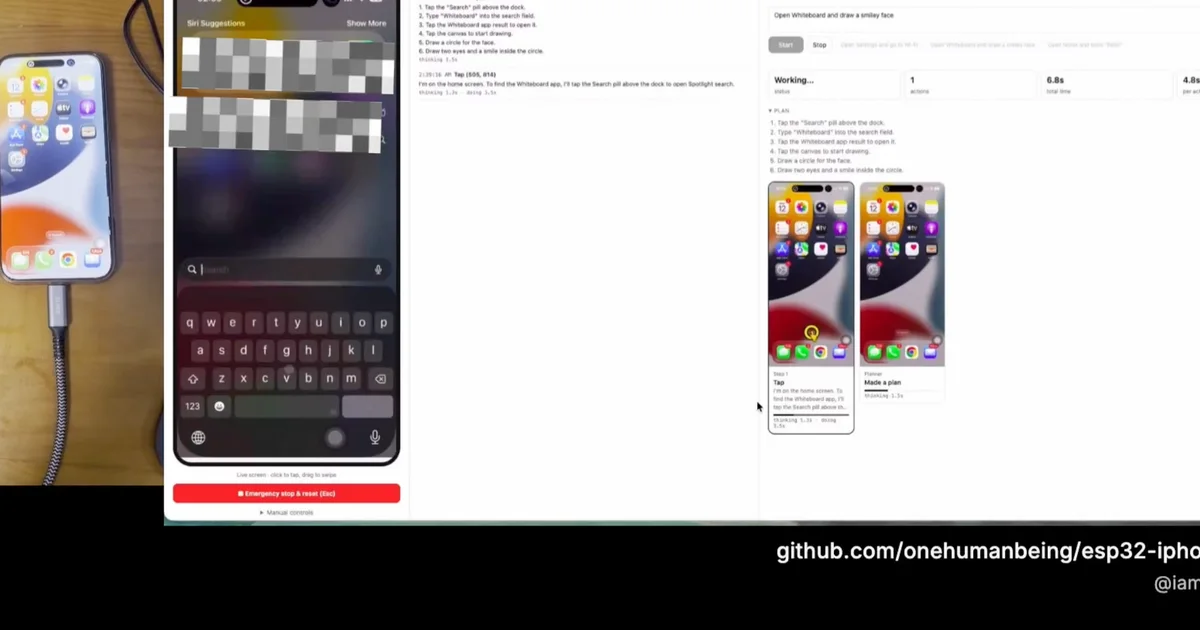
Driving an iPhone with software usually means XCTest and WebDriverAgent: a Mac, Xcode, a signed helper app, and an Apple developer account whose free signature expires every seven days. ESP32 iPhone Agent (onehumanbeing/esp32-iphone-agent) skips all of that. It uses the same paths a person uses — the screen and a pointer. A roughly $7 ESP32-S3 board plugs into the phone's USB port and shows up as a standard USB mouse and keyboard; the phone mirrors its screen to your computer over AirPlay; any OpenAI-compatible vision model plans the taps and swipes. The phone needs nothing installed — no developer mode, no helper app, no jailbreak. This tutorial flashes the board, starts the server, and puts the phone through its first task.
Install arduino-cli and the ESP32 core (3.x), then copy the secrets template and edit in your 2.4 GHz Wi-Fi credentials and the IP of the computer that will run the server:
cp hardware/hid_bridge/secrets.example.h hardware/hid_bridge/secrets.h
# edit secrets.h: Wi-Fi name/password, and the server computer's IP
hardware/flash.sh            # optional: [serial port] [--debug]
The board holds no logic — the README spells out its one-command-per-line protocol (ping, home, move <dx> <dy>, click, scroll <v> <h>, type <text>, key <combo>), so you can sanity-check it over TCP if anything misbehaves.
The computer runs UxPlay (the AirPlay receiver) and the agent server:
# macOS:
brew install uxplay
# Debian / Ubuntu:
sudo apt install uxplay gstreamer1.0-plugins-good gstreamer1.0-plugins-bad gstreamer1.0-libav

cd server
python3 -m venv .venv && .venv/bin/pip install -e .
cp .env.example .env   # set LLM_BASE_URL / LLM_MODEL / LLM_API_KEY
set -a && . ./.env && set +a && .venv/bin/python -m hidagent
Open http://<computer-ip>:8890 in a browser.
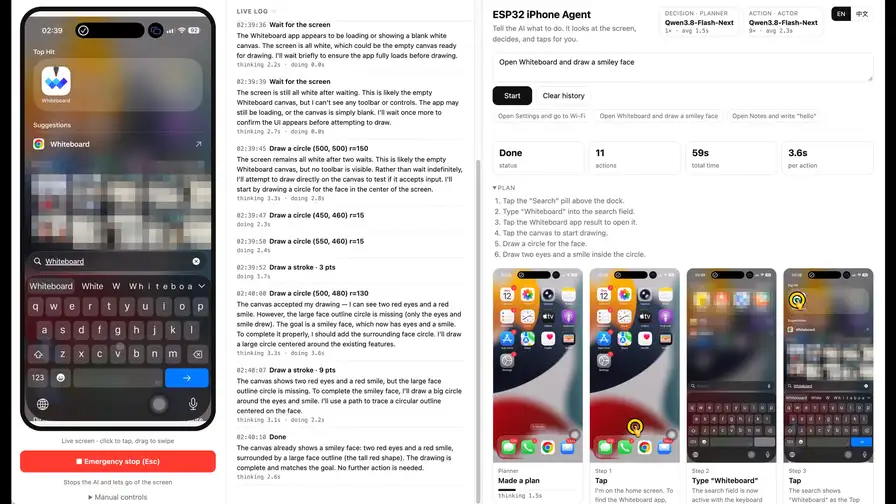
Type a goal — for example Open Settings and go to Wi-Fi — and press Start. Try the canonical demo: Set an alarm for 7:00 AM that repeats every day, then save it. The agent opens Clock, types 0700 into the time wheel, ticks the days under Repeat several taps at a time, and saves. Every step's screenshot stays on the step wall with the tap or stroke drawn on top, plus the model's reasoning and timings.
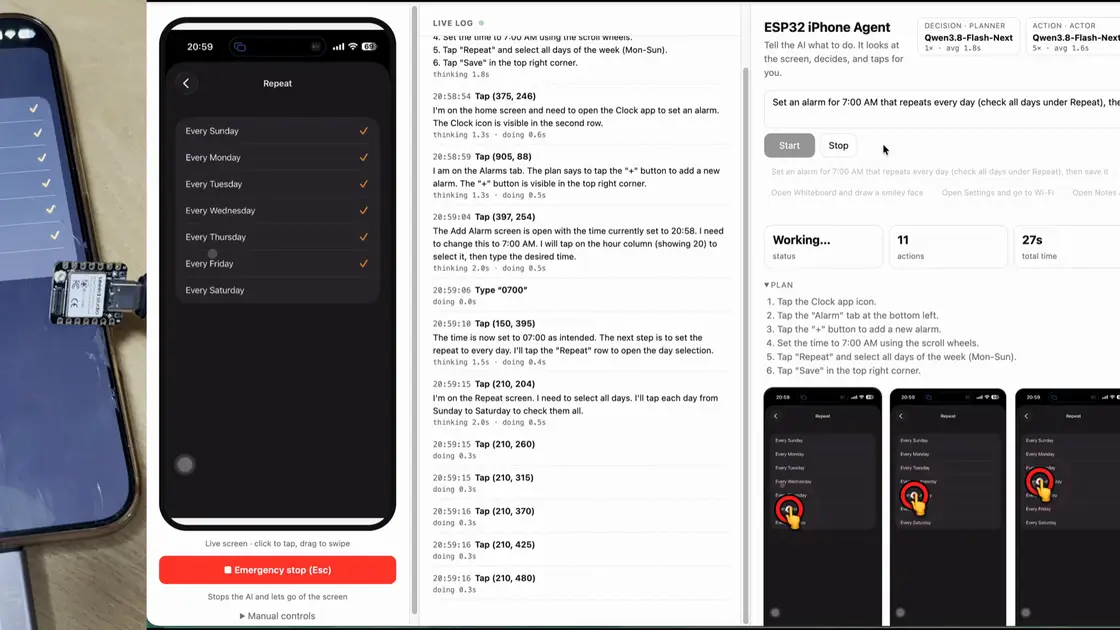
A planner model writes a short plan from the goal and the current screen; an actor model looks at each new screenshot and picks the next action: tap, swipe, draw a path, type, press a key, go home, or finish. Both roles can be the same model. The closed loop is what makes it robust: the pointer is relative, so before each tap the server wiggles it, finds it on the mirrored screen, and corrects any miss — and after each action it checks whether the screen actually changed, retrying a missed tap instead of building on it.
Turn on HIDAGENT_DEBUG=1 to save one folder per run under ~/.hidagent/traces/ — every model call (prompt, raw reply, latency) in steps.jsonl plus the screenshot each call saw. That's the cheapest way to understand why the agent did what it did.
A computer-use loop for a real iPhone: AirPlay as the eyes, a $7 ESP32-S3 as the hands, and any vision model as the brain — with a web UI for manual driving, a live log, a step wall, and an emergency stop (Esc) that halts the agent and releases the pointer.