Let your coding agent click real apps — without screenshots: hands-on with agent-desktop
agent-desktop (vercel-labs/agent-desktop, Apache-2.0, 9,703 GitHub stars) is a Rust CLI and C library that lets a coding agent read and operate macOS, Windows and Linux apps through the operating system's accessibility tree. This guide installs v1.0.2 with npm, checks permissions with agent-desktop status, snapshots Finder by ref, drills into a dense app with --skeleton and --root, clicks and types, verifies by re-snapshotting, and teaches an agent the loop with the bundled skills, with the retry and privacy rules the docs insist on.
- Who: agent-desktop, by Vercel Labs (vercel-labs/agent-desktop on GitHub): a Rust CLI and C library for computer use by AI agents.
- What: A snapshot returns JSON with a ref for every element an agent can act on; the agent acts on a ref and snapshots again to verify, with no pixel matching. It ships 60 command names, 56 of them operational.
- When: Repository created 19 February 2026. At research time on 2 November 2026: 9,703 GitHub stars; npm release 1.0.2, verified for this tutorial. Apache-2.0 licence.
- Needs: A Node.js package manager (npm, pnpm, Yarn or Bun) and a coding agent that can run shell commands. macOS needs Accessibility permission; Linux needs a graphical session with at-spi2-core, with Ubuntu 24.04+ as the primary target. No API key or model account for the native CLI.
- Loop: Observe, act on a ref, observe again. Refs belong to their snapshot; a changed interface returns STALE_REF or AMBIGUOUS_TARGET, and an action is retried only when error.disposition.retry is safe.
- Caution: Snapshots, clipboard reads, screenshots and command output can contain private desktop content, so keep them out of public logs and uploads. Ref actions are headless by default; the --headed flag allows physical input.
Why this matters now
Most computer-use setups work by guessing. A model looks at a screenshot, estimates where a button is in pixels, clicks, and hopes the window did not move. It works until it does not, and every look costs a full image. agent-desktop asks the operating system instead. The accessibility tree already knows every button, text field, checkbox and menu item, its name, its role and its state, because that is the structure the system maintains for assistive technology. Reading it is exact where a screenshot is approximate, and it returns as structured JSON a model can reason about.
The consequence is a different division of labour. agent-desktop contains no model and makes no decisions: it is a tool, not an agent. It ships as a CLI and a C library for macOS, Windows and Linux, and it ships 60 command names, 56 of them operational. A snapshot returns JSON with a ref for every element the agent can act on. The agent acts on a ref and snapshots again to check, with no pixel matching, and the loop stays in your agent. Every CLI call runs in its own process and prints one JSON envelope, then exits. This guide installs it, runs the loop by hand once so you can see what the agent sees, and then hands the loop to an agent properly.
What you’ll need
- A desktop computer running macOS, Windows or Linux. On Linux, run inside your graphical session: a TTY or SSH shell without that session’s bus, display and runtime environment cannot see its apps.
- A Node.js package manager: npm, pnpm, Yarn or Bun. The package bundles native binaries and platform helpers for x64 and ARM64.
- A coding agent that can run shell commands. The agent drives the CLI; the CLI does not drive itself.
- The platform permission: Accessibility on macOS, and
at-spi2-coreinstalled on Linux. Windows needs no grant for apps at your terminal’s integrity level. - No API key and no model account for the native CLI. It does not require a remote model service; the optional JEV helper that sends screen descriptions to a provider is separate, and this guide does not use it.
Step 1: Install the CLI and prove the version
Install globally with npm, then ask the tool for its version:
npm install -g agent-desktop
agent-desktop version
Checked for this tutorial on Linux, the version command answered with a JSON envelope reporting version 1.0.2 on linux / x86_64. That envelope is the contract for everything after this: every command prints one JSON object with ok and either data or error. If you would rather keep it local, a plain npm install agent-desktop without -g puts the command in ./node_modules/.bin, so run it with npx agent-desktop or install globally. Bun, Yarn and pnpm can install the same package. For a direct native executable without a JavaScript launcher, download the matching archive from GitHub Releases and keep its helper beside the executable.
Two install details are worth knowing before you script this. First, the official Homebrew and Scoop packages are being submitted and are not yet available in the default catalogs, and the repository no longer maintains a custom Homebrew tap or Scoop bucket, so npm is the install path that exists today. Second, the npm package’s postinstall script replaces the Node launcher with a link to the native binary, about 21 ms per call. If your package manager blocks install scripts, as npm 12 does by default, the Node launcher runs instead at about 146 ms per call. Approve the script with npm install-scripts approve agent-desktop, or install with --allow-scripts, if that difference matters to you.
Step 2: Check status and grant the one permission that matters
Before the first snapshot, check what the tool can see:
agent-desktop status
agent-desktop permissions --guide
status reports the platform, the permissions and supported_surfaces. permissions reports the state without prompting; --request asks for what is missing, and --guide opens System Settings at the missing permission with an on-screen guide. On macOS the permission that matters is Accessibility, and it belongs to the app that launches agent-desktop, so grant it for the terminal or IDE that hosts your agent, not for some other shell. Screenshots also need Screen Recording, and opening Notification Center needs Automation permission for System Events. On Windows, no grant is needed for apps at your terminal’s integrity level, but an app running as administrator can be read while only an elevated agent can send it input, and the binary is unsigned, so a browser download may draw a SmartScreen warning or an antivirus quarantine; the npm install path does not trigger SmartScreen.
On Linux, the requirements are a graphical session with at-spi2-core installed, Ubuntu 24.04+ with GNOME 46 as the primary target and a glibc 2.35 floor. agent-desktop status activates and checks the accessibility bus. The failure mode is refreshingly plain: run on a headless Linux box with no desktop session, status answered ok: true with accessibility denied and the suggestion that no D-Bus session bus was reachable, and to run inside a desktop session. If status says that, fix the session first; no snapshot will work until the bus is there.
Step 3: List your apps and take your first snapshot
Any app name from list-apps works as a snapshot target. The README’s example uses Finder on macOS:
agent-desktop list-apps
agent-desktop snapshot --app Finder -i
The -i flag keeps interactive elements only. The README’s example snapshot, trimmed, looks like this: a window titled Downloads, snapshot id s8f3k2p9, 59 refs, and a tree item named Documents carrying the ref @s8f3k2p9:e8 with the available action Click.
{
  "version": "2.6",
  "ok": true,
  "command": "snapshot",
  "data": {
    "app": "Finder",
    "window": { "id": "w-204749", "title": "Downloads" },
    "snapshot_id": "s8f3k2p9",
    "ref_count": 59,
    "complete": true,
    "tree": {
      "role": "window",
      "name": "Downloads",
      "children": [
        { "role": "treeitem", "name": "Documents", "ref_id": "@s8f3k2p9:e8", "available_actions": ["Click"] }
      ]
    }
  }
}
Read that JSON the way an agent does: the ref is the address, and everything else is context. Refs are qualified, @<snapshot_id>:e<N>, and they belong to their snapshot. A bare @e8 is rejected with INVALID_ARGS. When the interface changes, an action returns STALE_REF or AMBIGUOUS_TARGET: take a new snapshot and use its refs. If several windows match, you get AMBIGUOUS_TARGET with the candidate window ids in the error details, and you pass one with --window-id. One more field to check on large apps: a snapshot that runs out of its observation budget does not error. It returns ok: true with complete: false, truncated: true and the tree it did observe, so read data.complete before you trust a tree is whole.
Step 4: Drill into a dense app instead of reading everything
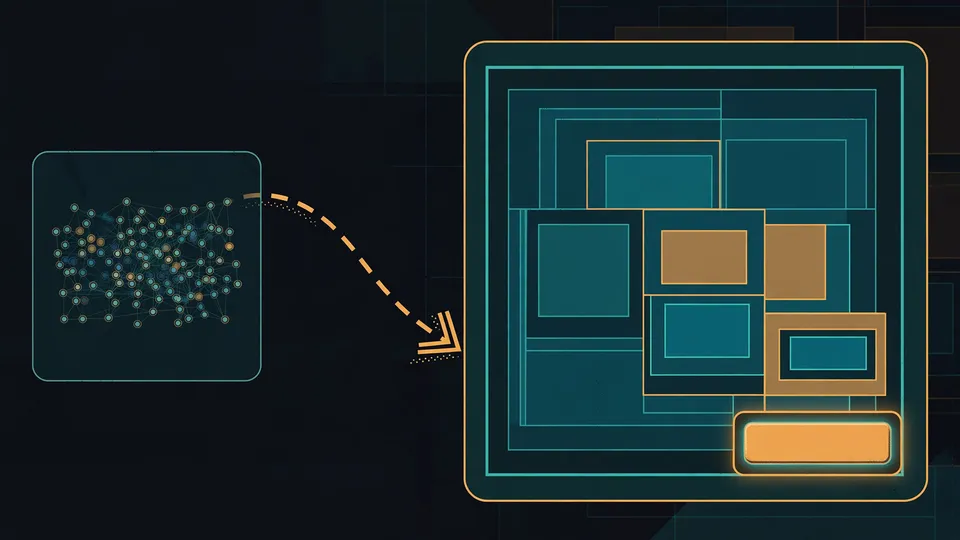
A small app needs no ceremony: take a full snapshot -i. A dense app does, because reading its whole tree on every step is where the cost and the confusion live. Map it shallowly first, then drill into the one region you care about. The README’s pattern, with Slack as the dense example:
agent-desktop snapshot --skeleton --app Slack -i --compact
agent-desktop snapshot --root @s8f3k2p9:e3 -i --compact
The skeleton pass returns a shallow overview with a child count on the branches it cut, and the --root drill reads one region in full. A --root drill adds its refs to the same snapshot id, but refs already inside the drilled subtree are replaced, so an old ref there returns STALE_REF. Two details from the bundled skill save real debugging time. First, -i drops a row’s static-text label, so to tell which row a repeated button belongs to, drill that row’s container with --root and leave -i out. Second, never skeleton a surface such as a menu, sheet or alert: a surface is already focused, and an action that opens one lists it in data.surfaces, which is your cue to target that overlay next.
Step 5: Click, type, then snapshot again to verify
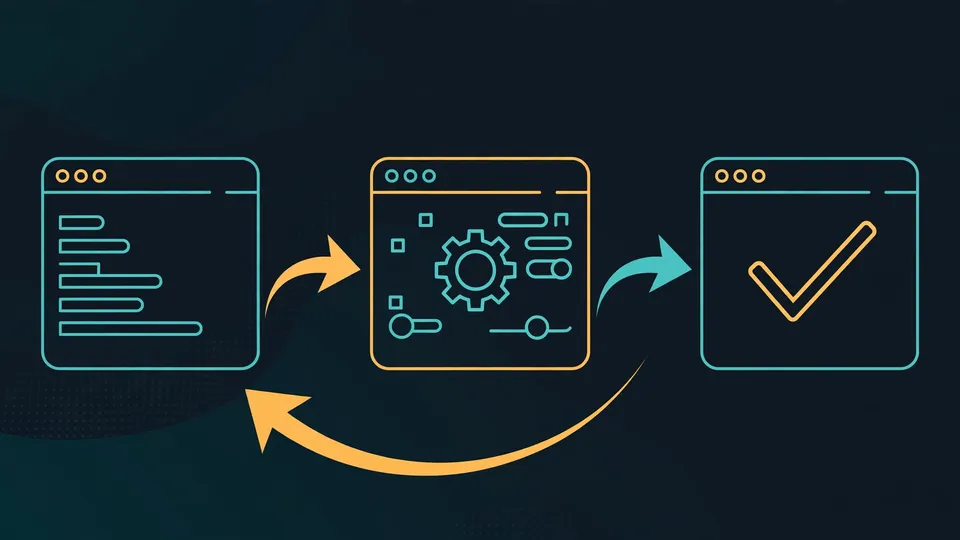
Now the loop itself. Observe, act on a ref from that snapshot, observe again. The README’s commands, with the snapshot id from Step 3:
agent-desktop snapshot --app Finder -i      # interactive elements, each with a ref
agent-desktop click @s8f3k2p9:e8            # act on a ref from that snapshot
agent-desktop snapshot --app Finder -i      # observe again to verify
Typing takes the same shape, with the ref first and the text second:
agent-desktop type @s8f3k2p9:e12 "Quarterly report"The ref and text above are shapes, not values to paste: use the ref your own snapshot assigned, and the field your snapshot shows. When you know the role or the exact name of what you want, skip the full snapshot and use find, which matches by role, name, value, text content or description, with --exact when you need an exact match:
agent-desktop find --app Finder --role button --name "<exact name from your snapshot>"After an asynchronous step, use wait rather than a fixed sleep, which the skill calls a race. And treat the result envelope as the verdict, not the exit code alone. Action results carry data.disposition and errors carry error.disposition, each with delivery and retry. Retry or substitute an action only when disposition.retry is safe; only not_delivered is safe. Any other delivery value means the action may have landed, and repeating it can click, type or submit twice, while repeating a toggle can undo itself. On a result that is not safe, read the live state with get, is or a fresh snapshot and decide from that. Branch on error.code and error.disposition, not on the message text, which can change.
Stay headless unless you have a reason not to. Ref actions go through the accessibility API without moving the pointer or taking focus, and the global --headed flag is what allows physical input. The skill is explicit: use --headed only when the user explicitly permits physical input, such as a double-click, hover, drag or focus, and never switch to headed mode to recover from a headless failure. In PowerShell, quote every ref, because a bare @token is the splatting operator.
Step 6: Teach your agent the loop, in its own docs
Everything above is what the agent needs to do, and the binary carries its own docs, matched to its version, so teach it from those instead of from memory. Load the core skill and the platform skill for the operating system the binary runs on, and use --help for one command’s flags, which the skill deliberately does not repeat:
agent-desktop skills get desktop      # the loop, refs, verification and retry rules
agent-desktop skills get platform     # what differs on the OS you run on
agent-desktop <command> --help        # flags for one command
Install the skill into an agent harness with:
npx skills add https://github.com/vercel-labs/agent-desktop --skill agent-desktopOr add these lines to your AGENTS.md, exactly as the README gives them:
Use `agent-desktop` to see and operate desktop apps. Before the first use, run
`agent-desktop skills get desktop` and `agent-desktop skills get platform`, and follow them.
Deeper references load only when you need them: agent-desktop skills get desktop <reference> opens the observation, interaction, system and workflows references. If you are calling the tool from a program instead of shelling out for every command, each release also ships libagent_desktop_ffi, the C library, so a host can call it in process. The README’s Python sketch shows the shape:
import ctypes
lib = ctypes.CDLL("./lib/libagent_desktop_ffi.dylib")
lib.ad_adapter_create.restype = ctypes.c_void_p
lib.ad_adapter_destroy.argtypes = [ctypes.c_void_p]
assert lib.ad_init(7) == 0  # AD_RESULT_OK when the header's AD_ABI_VERSION_MAJOR matches the library
adapter = lib.ad_adapter_create()
lib.ad_adapter_destroy(adapter)
Use agent-desktop skills get ffi for the entry points, memory ownership and threading rules before you build on it.
What you built, and where it stops
What you built is a loop your agent can run on real software: list the apps, snapshot one, act on a ref, snapshot again, and only retry when the disposition says the action never landed. The command surface behind that loop covers observation, acting on refs, keyboard and mouse, apps and windows, notifications, the clipboard, waiting, sessions and system commands, including launch, list-windows, focus-window, clipboard-get and clipboard-set. Run agent-desktop <command> --help for the flags of the one you need, and read the skill reference for the semantics, because the skill does not repeat flag lists and this guide does not invent them.
Where it stops is the part to respect. The tool does not decide anything, so a careless instruction plus an Accessibility grant is a real click in a real app: grant the permission deliberately, start with a throwaway app and a harmless action, and keep snapshots, clipboard reads, screenshots and command output out of public logs and uploads, because they can contain private desktop content. The platform gaps are real, too. On Windows and Linux, identical twin elements in one window have no ref path that proves uniqueness, and the ref is refused; only a headed mouse click by coordinates can choose one, and a Linux Wayland session refuses that. On macOS the ref carries the element’s own address, so identical twins each keep their ref. And the loop’s discipline is permanent: refs expire when the interface changes, snapshots can be partial, and the fix for both is the same, take a fresh snapshot and read what is actually there now.
Frequently asked questions
Does agent-desktop contain an AI model?
No. It is a tool, not an agent: there is no model inside it, the observe, act and verify loop stays in your agent, and the native CLI does not require a remote model service. It only reads the accessibility tree and acts on the refs your agent chooses.
Can I copy the refs from this article's examples?
No. Refs belong to the snapshot that created them, and your snapshot will assign different ones. A bare ref such as @e8 is rejected, and a ref from a changed interface returns STALE_REF or AMBIGUOUS_TARGET, so take a fresh snapshot and use its refs.
Do I need screenshots, or a Homebrew install?
No to both. The core workflow needs no screenshots or pixel matching; screenshot is a separate command, and screenshots on macOS need the Screen Recording permission. Install with npm: the official Homebrew and Scoop packages are being submitted and are not yet in the default catalogs.