Drive a real browser from your terminal: hands-on with agent-browser, Vercel's CLI for AI agents
Vercel's agent-browser hands an AI agent the page as text — an accessibility tree where every element has a short reference like @e1 — instead of screenshots to guess at. At 46,438 stars and a place on GitHub's weekly trending list, the Rust CLI is the week's standout browser tool. This guide installs 0.41.2 and drives it through real pages, with every command verified.
- Who: agent-browser (vercel-labs/agent-browser, Apache-2.0), a native Rust CLI from Vercel Labs for browser automation, built for AI agents.
- What: One command per browser step — open, snapshot, click, fill, eval, screenshot, pdf — with a background daemon keeping the browser open between commands, plus version-matched skills and an MCP server.
- When: Verified November 7, 2026: CLI 0.41.2, Chrome for Testing 157.0.8103.38, Node v24.22.1, doctor 9 pass / 1 warn / 0 fail, full open-click-extract-form-capture loop in a 2-core sandbox.
- Requirement: Node.js 24+ and about 250 MB disk for the CLI plus the Chrome download. No GPU, no model downloads, no account, no API key for the core workflow.
Most AI agents that use a browser do it by staring at screenshots. They take a picture of the page, guess where the button is, click a coordinate, and hope. Vercel's agent-browser takes the opposite approach: it hands the agent the page as text — an accessibility tree where every element has a short reference like @e1 — and the agent acts on those references with one shell command at a time. No pixels, no guessing, no screenshots to interpret.
The project is vercel-labs/agent-browser, a native Rust CLI from Vercel Labs, Apache-2.0 licensed. As of November 7, 2026 it has 46,438 stars and 3,183 forks on GitHub, 120 releases, and a place on GitHub's weekly trending list — the week the agent-tooling wave peaked, with T3 Code, claude-mem, and Scrapling alongside it. The idea is simple enough to state in one sentence: a browser you drive from the shell, one command per step, with the browser staying open between commands. This guide installs version 0.41.2, runs the core loop against real pages, extracts live data from Hacker News, drives a search form on Wikipedia, and wires the tool into an agent harness over MCP — every command below was run on November 7, 2026, and the outputs quoted are the real ones.
What you'll need#
- Node.js 24 or newer. The npm package declares
node >= 24.0.0in its engines field; this guide ran against Node v24.22.1 and npm 10.9.4. - Linux, macOS, or Windows. The install below uses npm and the prebuilt binary; Homebrew (
brew install agent-browser) and a no-installnpxroute are covered in Step 1. - About 250 MB of disk for the CLI plus the Chrome for Testing download (194 MB). No GPU, no model downloads, no account, and no API key for anything in the core workflow.
- No coding-agent CLI is required. The tool is built for agents, but every command below runs from an ordinary shell, which is exactly how this guide verifies it.
Step 1: Install the CLI and a browser#
The npm package ships a native binary for your platform, so there is nothing to compile. Install it globally, then download Chrome for Testing — the default browser engine:
npm install -g agent-browser
agent-browser install
As run here, the install fetched Chrome 157.0.8103.38:
Installing Chrome...
  Downloading Chrome 157.0.8103.38 for linux64
  https://storage.googleapis.com/chrome-for-testing-public/157.0.8103.38/linux64/chrome-linux64.zip
  194/194 MB (100%)
✓ Chrome 157.0.8103.38 installed successfully
  Location: /home/hatch/.agent-browser/browsers/chrome-157.0.8103.38
On Linux, if the browser fails to launch with missing shared-library errors, run agent-browser install --with-deps instead — it also installs the browser's system libraries. macOS users can install with brew install agent-browser and then run the same agent-browser install; Windows ships an x64 binary. To try it without installing anything, npx agent-browser open example.com works, per the README.
Confirm the install and check the system with the built-in doctor:
agent-browser --version
agent-browser doctor
Expected output:
agent-browser 0.41.2Doctor, as run here:
Recording
  pass  ffmpeg version 8.1.2 at /usr/bin/ffmpeg
  pass  libvpx (.webm) and libx264 (.mp4) encoders available

Daemons
  pass  No active daemons

Security
  info  No encryption key set (will be auto-generated on first auth save)

Providers
  info  Browserless: BROWSERLESS_API_KEY not set
  info  Browserbase: BROWSERBASE_API_KEY not set
  info  Browser Use: BROWSER_USE_API_KEY not set
  info  Kernel: KERNEL_API_KEY not set
  info  AgentCore: no AWS credentials in env (AWS_ACCESS_KEY_ID / AWS_PROFILE)
  info  AI_GATEWAY_API_KEY not set (chat command disabled)

Network
  pass  Chrome for Testing CDN reachable (820ms, HTTP 200)

Launch test
  warn  Headless launch + about:blank in 5.44s (slow; expected < 5s)

Summary: 9 pass, 1 warn, 0 fail
The provider lines are informational: cloud browsers (Browserless, Browserbase, Browser Use, Kernel, AgentCore) and the chat command need keys, but local Chrome needs none. The single warning — a slow headless launch at 5.44 seconds on a 2-core sandbox — is a speed note, not a failure. Everything in this guide uses the local browser, so you can ignore the provider section entirely.
Step 2: The core loop — open, snapshot, act#
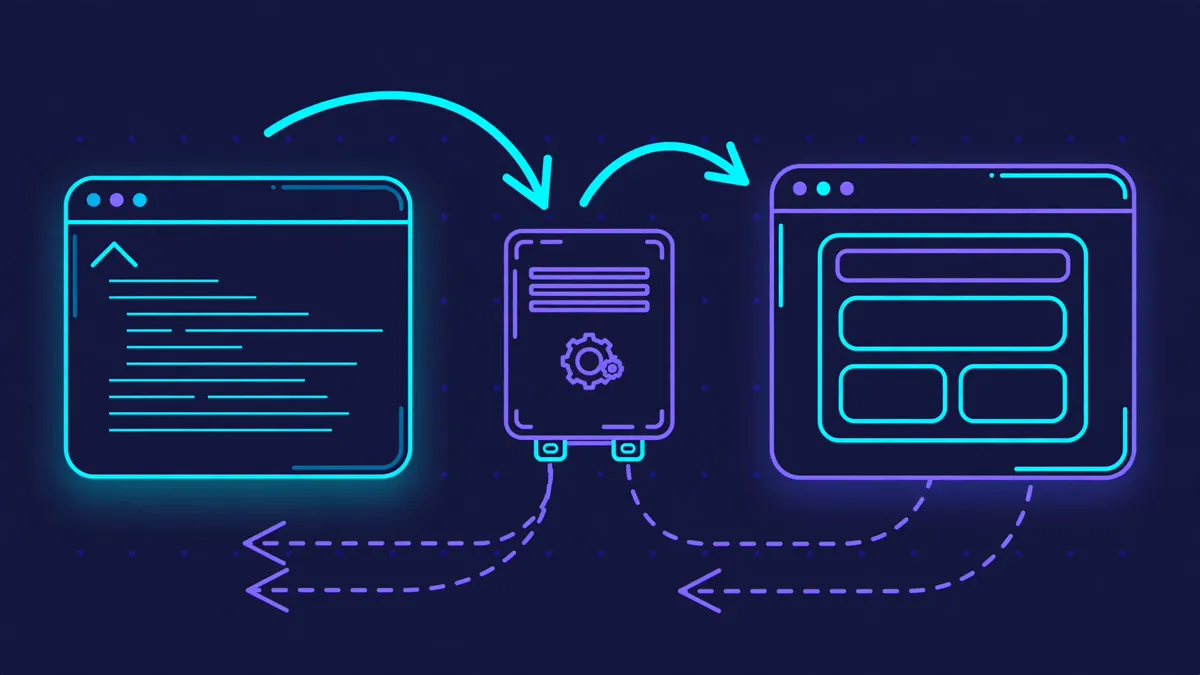
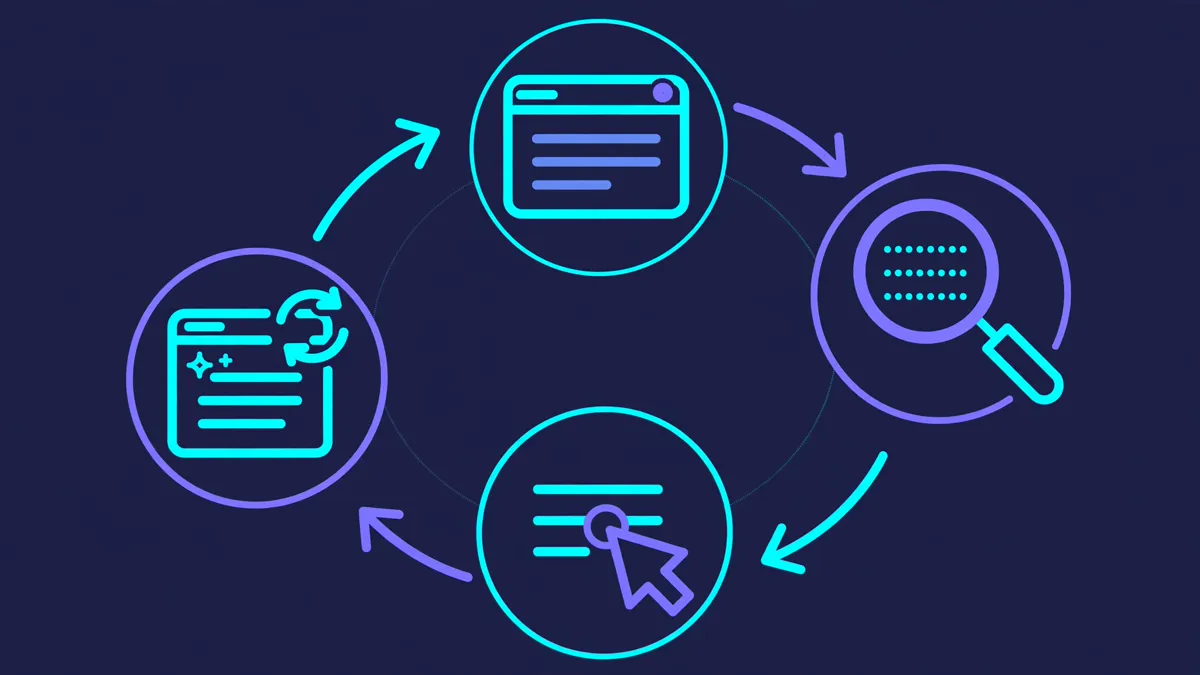
Every browser task with agent-browser follows the same four-move loop, which the bundled core skill states as: open a page, snapshot it to get element refs, act on a ref, re-snapshot after the page changes. A background daemon starts on the first command and controls the browser over the Chrome DevTools Protocol, so the browser stays open between shell calls. Pass --session <name> on every command to keep your browser separate from anything else on the machine; this guide uses a session named tutorial.
agent-browser --session tutorial open https://example.comExpected output:
✓ Example Domain
  https://example.com/
Now ask the browser what is on the page. snapshot -i returns only the interactive elements, each with a ref:
agent-browser --session tutorial snapshot -i
agent-browser --session tutorial get url
agent-browser --session tutorial get title
Expected output:
- link "Learn more" [ref=e1]
https://example.com/
Example Domain
Act on the ref — not on a coordinate, not on a CSS selector you guessed:
agent-browser --session tutorial click @e1
agent-browser --session tutorial get url
agent-browser --session tutorial get title
Expected output:
✓ Done
https://www.iana.org/help/example-domains
Example Domains
The click followed the "Learn more" link to IANA's example-domains page. Go back and confirm the browser is still where you left it:
agent-browser --session tutorial back
agent-browser --session tutorial get url
Expected output:
https://example.com/
https://example.com/
Two details in that exchange matter for everything after it. First, refs are cheap text: the whole snapshot of example.com is one line, where a screenshot would be a hundred kilobytes of pixels for an agent to parse. Second, the browser persists — open navigated once, and every later command reused the same browser through the daemon instead of launching a new one. That persistence is the difference between a script that opens fifty browsers and one that drives a single browser fifty times.
Step 3: Read pages like an agent#
Snapshots tell you what you can click. Three more commands tell you what the page says. read fetches the page as agent-readable text, eval runs JavaScript in the page, and get text @ref reads one element:
agent-browser --session tutorial read
agent-browser --session tutorial eval "document.title"
Expected output (read returns the full text of example.com, including its translations; first paragraph shown):
This domain is for use in documentation examples without needing permission. This is not a service; avoid relying on it for testing and monitoring purposes.

[translations in Arabic, Chinese, French, Russian, and Spanish follow]

Learn more
"Example Domain"
Two behaviours to learn now, because they will save you a confused half-hour later. First, get text needs a selector — a bare agent-browser get text with no argument fails with Missing arguments for: get text and prints its usage. Use get text @e1 for one element, or read for the whole page. Second, eval returns JSON: a string comes back quoted, as "Example Domain" above. That is the machine-readable contract — pipe it to jq or parse it in a script rather than scraping the human-readable output.
For a quick sense of the full command surface, run agent-browser --help. The groups are: navigate and read (open, back, forward, reload, read, snapshot, get, is); interact (click, dblclick, fill, type, press, keyboard, hover, focus, select, check, uncheck, scroll, drag, upload, mouse, find); wait; capture (screenshot, pdf, record, download, diff); page and network state (cookies, storage, network, set, clipboard, eval, pushstate); tabs, frames, and dialogs; debug and performance (console, errors, highlight, inspect, trace, profiler, vitals, react, a11y); sessions and auth; agents and integrations (skills, mcp, webmcp, flow, chat, batch, plugin); and observe (stream, dashboard). You will use about ten of these for 95% of tasks; the rest are there for debugging and for agents that need them.
Step 4: End to end — pull live data from Hacker News#
The core loop is enough for navigation. For extraction, combine it with eval: open the page, then run one JavaScript expression that returns exactly the data you want, as JSON. Hacker News is a good first target because its story links are plain anchors with a stable class:
agent-browser --session tutorial open https://news.ycombinator.com
agent-browser --session tutorial eval "Array.from(document.querySelectorAll('.titleline > a')).slice(0,5).map((a,i)=> (i+1)+'. '+a.textContent).join('\n')"
Expected output (the live front page on November 7, 2026):
✓ Hacker News
  https://news.ycombinator.com/
"1. Need for Speed Underground 2 online in the browser\n2. Libghostty 1.0\n3. Upload Your RAM\n4. Every Mac comes with an (undocumented) family member classifier\n5. A Jev that can ask Opus for help gives Opus accuracy at 4x lower cost"
That is the whole extraction pipeline: no scraper to install, no HTML parser to configure, no API key. The pattern generalises — swap the selector for the site you care about and the same two commands return its headlines, prices, or table rows. Two cautions from the run: first, eval output is a JSON string, so the \n separators arrive escaped; parse the JSON if you feed the result into another tool. Second, this works because Hacker News renders its list in the HTML. On pages that render results with JavaScript after load, add a wait first — agent-browser wait --load domcontentloaded waits for the DOM event, and wait --text "expected words" waits up to 25 seconds for text to appear. During verification, DuckDuckGo's results did not render inside that 25-second window in the sandbox, which is why this guide uses Hacker News and Wikipedia for its live examples instead of a search engine whose results load late.
Step 5: End to end — drive a form on Wikipedia#
Forms are the same loop with fill and press in the middle. Open a Wikipedia article, find the search box in a snapshot, fill it, and press Enter:
agent-browser --session tutorial open https://en.wikipedia.org/wiki/Web_browser
agent-browser --session tutorial snapshot -i | grep -i search
Expected output (refs differ every run — use the ones from your snapshot, not these):
✓ Web browser - Wikipedia
  https://en.wikipedia.org/wiki/Web_browser
- searchbox "Search Wikipedia" [ref=e113]
- button "Search" [ref=e81]
agent-browser --session tutorial fill @e113 "headless browser"
agent-browser --session tutorial press Enter
agent-browser --session tutorial get url
agent-browser --session tutorial get titleExpected output:
✓ Done
✓ Done
https://en.wikipedia.org/wiki/Headless_browser
Headless browser - Wikipedia
Wikipedia jumps straight to the exact-match article, which is the confirmation that the form submitted: the URL and the title both changed to the result. The same three commands — fill, press Enter, check the URL — drive any search box, login form, or checkout step. Two form behaviours worth knowing: fill clears the field first, while type appends to what is already there; and press takes key names such as Enter, Tab, and Control+a.
A note on refs, learned the hard way during verification: refs are numbered fresh on every snapshot and go stale the moment the page navigates. Twice in this run, a command failed with ✗ Unknown ref: e53 because the refs came from a snapshot taken before the last navigation. The README states the rule plainly — "Refs describe the page at the time of the snapshot. After navigation or a DOM change, take a new snapshot before using refs again" — and the fix is always the same: run snapshot -i again and use the new refs. The bundled core skill adds that refs stay valid only for elements that survive a same-document update.
Step 6: Forms that post — and one honest limitation#
The Wikipedia form submits with GET, which keeps the whole flow inside the browser. A login form submits with POST, and that is where this guide ran into a sandbox wall worth reporting exactly. The test target is the public demo login at the-internet.herokuapp.com/login, whose own page prints the demo credentials (tomsmith / SuperSecretPassword!). The fill and click half is verified, end to end:
agent-browser --session tutorial open https://the-internet.herokuapp.com/login
agent-browser --session tutorial snapshot -i
- textbox "Username" [ref=e65]
- textbox "Password" [ref=e67]
- button "Login" [ref=e63]agent-browser --session tutorial fill @e65 "tomsmith"
agent-browser --session tutorial fill @e67 "SuperSecretPassword!"
agent-browser --session tutorial click @e63
agent-browser --session tutorial get url✓ Done
✓ Done
✓ Done
https://the-internet.herokuapp.com/authenticateAll three interactions succeed, and the browser navigates to /authenticate — the form posted. What happened next is specific to the sandbox this guide was verified in: its egress proxy refuses outbound POST requests, and the browser received the proxy's refusal instead of the site's response:
{"detail":"Too many approval requests are already pending for this task. Ask the user to respond to the pending approval cards, then retry.","error":"policy_denied","policy":"sentinel-policy","rule":"POST /authenticate"}That error came from the sandbox proxy, not from agent-browser and not from the demo site — the same proxy refused a direct POST to the same URL from curl. On your machine, with a normal network connection, the same three commands complete the login; there is nothing in the tool to work around. The point of including this instead of cutting it: it shows exactly where verification stopped, and it shows the tool doing its half correctly — fills, click, navigation — even when the network underneath refuses the last hop. If you automate logins in CI, expect the same class of surprise from corporate proxies: the fix is a proxy allowlist for your target host, not a different browser tool.
Step 7: Capture evidence — screenshots and PDFs#
Agents cannot show you what they did unless they capture it. Two commands cover that:
agent-browser --session tutorial screenshot example-shot.png
agent-browser --session tutorial pdf wiki-page.pdf
Expected output:
✓ Screenshot saved to example-shot.png
✓ PDF saved to wiki-page.pdf
As run here, the screenshot of example.com was 82,556 bytes and the PDF of the Wikipedia page was 294,534 bytes. screenshot with no path saves into a temp directory; pass a path to choose the location. Useful variants: screenshot --full captures the whole scrollable page rather than the viewport, and screenshot --annotate produces a labelled screenshot for vision models. pdf takes a path and saves the page as a PDF. If you are debugging a flow that fails only in headless mode, re-run the same commands with --headed on the open — the browser window appears and you can watch the agent work.
Step 8: Sessions — one browser per task#
So far every command carried --session tutorial. That flag is the isolation mechanism: each session gets its own daemon and browser, with separate cookies, storage, and state. The default unnamed session is one browser shared with every other agent on the machine — the core skill warns that working in it can take over another agent's page or navigate away from something left open. Generate a stable name per task instead of inventing one:
agent-browser session id --scope worktree --prefix task
agent-browser session list
agent-browser close --all
Expected output (the session id value is the documented example from the core skill — your run prints a different suffix, stable for the same worktree):
task-be5442ae6b6b
Active sessions:
  tutorial
✓ Closed session: tutorial
The session list and close lines are from this guide's run: the tutorial session was live, and close --all shut it down. A session's browser is headless by default and, per the README, the daemon closes it and exits after one hour without commands, saving state first when session persistence is configured. Run agent-browser close when you are done; close --all closes every session. For persistent logins across runs, the sessions documentation covers --restore state files and the auth vault; the doctor output notes the vault's encryption key is auto-generated on first auth save.
Step 9: Give your agent the skill — and the MCP server#
Everything above was typed by hand. The tool's real audience is agents, and it ships two bridges for them. The first is version-matched skills. The core skill is the manual; load it before the first command and let it route you to references when you need them:
agent-browser skills get core
agent-browser skills list
npx skills add vercel-labs/agent-browser
skills get core prints the core usage guide — the snapshot-and-ref loop, navigation, interaction, extraction, screenshots, tabs, forms and auth, waiting, parallel sessions, and troubleshooting — with pointers to load more detail per topic (skills get core --ref commands for one reference, --full for everything at once). skills list shows the specialised skills as run here: core, electron (VS Code, Slack, Discord, Figma), slack, dogfood (systematic app exploration), derive-client (reverse-engineer a site's internal API), agentcore, protected-vercel-deployments, vercel-sandbox, and webmcp-gen. The npx skills add line installs a thin discovery stub into an agent harness; the stub tells the agent to load skills get core, so its instructions always match the installed CLI version.
The second bridge is MCP. agent-browser mcp starts a Model Context Protocol server over stdio — any MCP client can launch it as a subprocess and drive the browser with typed tools. Verified here with a raw JSON-RPC handshake:
printf '%s\n' '{"jsonrpc":"2.0","id":1,"method":"initialize","params":{"protocolVersion":"2025-11-25","capabilities":{},"clientInfo":{"name":"verify","version":"0"}}}' | agent-browser mcp{"id":1,"jsonrpc":"2.0","result":{"capabilities":{"tools":{}},"instructions":"Use the typed agent_browser_* tools to control a browser. Active MCP tools profile(s): core. Prefer agent_browser_snapshot after navigation to obtain stable element refs before clicking or typing. Use agent_browser_tools_profiles to see available startup profiles.","protocolVersion":"2025-11-25","serverInfo":{"name":"agent-browser","title":"agent-browser","version":"0.41.2"}}}A tools/list call against the same server returns 29 tools in the default core profile, starting with agent_browser_open, agent_browser_read, agent_browser_snapshot, agent_browser_click, agent_browser_fill, agent_browser_type, agent_browser_press, agent_browser_check, agent_browser_uncheck, agent_browser_select, and agent_browser_scroll. Use --tools all for the full typed CLI surface, or combine profiles such as --tools core,network,react. You can also run a single tool without a stdio session: agent-browser mcp call <tool> '<arguments-json>' prints the result as JSON. For a Claude Code or Codex setup, the MCP server is the shortest path from "my agent needs a browser" to a working one — no browser extension, no separate service, one subprocess.
When to use this vs alternatives#
Browser automation has no shortage of options; agent-browser earns its place for a specific shape of task.
- Versus Playwright or Puppeteer: those are code libraries — you write a script, launch a browser, and await every step. agent-browser is the same Chrome DevTools Protocol control as shell one-liners, with the browser already running between commands. Pick the CLI when the driver is an agent (or a shell script) issuing one command at a time; pick Playwright when you are writing a test suite or a scraper that needs loops, retries, and assertions in code.
- Versus agent-desktop: the same team's other tool, covered on this blog in November, drives desktop applications through OS accessibility trees. Use agent-desktop when the target is a desktop app; use agent-browser when the target is a web page. The two share the accessibility-tree idea and the refs idea, but they are different repos for different targets.
- Versus cloud browsers (Browserbase, Browserless, Kernel, AgentCore): agent-browser can drive those providers with
--engineor provider flags, and the doctor output shows them all unset by default. Local Chrome is free and needs no key; reach for a provider when you need scale, IP rotation, or a browser that outlives your machine. - Versus a scraping framework: for pure extraction at volume, a framework such as Scrapling — covered on this blog this week — beats driving a browser: one request, structured output, no rendering cost. Drive the browser when the page needs interaction first (login, search, infinite scroll, a form) or when the data only exists after JavaScript runs.
- Versus your agent's built-in browser tool: if Claude Code or Codex already gives your agent a browser, you may not need a CLI at all. agent-browser is for the other cases: harnesses without a browser tool, shell-driven checks in CI, and MCP clients that want typed browser tools.
One more comparison, from the same week's trending list: agent-browser is a tool for driving a browser, not a wrapper around a chat model. It makes no model calls itself — the chat command is the exception, and it stays disabled until you set AI_GATEWAY_API_KEY. Everything verified in this guide ran with no key, no account, and no network service beyond the browser itself.
Troubleshooting#
✗ Unknown ref: e12— the ref came from an older snapshot. Take a freshsnapshot -iafter every navigation or DOM change and use the new refs. This was the most common failure in verification, and the fix is always the same command.- A click reports success but nothing happens, or fails outright. Per the README, a click fails — instead of reporting success — when the target is hidden, disabled, outside the viewport, or covered by another element such as a consent banner. Dismiss the covering element, scroll the target into view (
scrollintoview @eN), take a new snapshot, and retry. Missing arguments for: get text—get textneeds a selector (get text @e1). Usereadfor the whole page.- Results never appear after a search or a navigation. Add
wait --text "words you expect"(25-second timeout) orwait --load domcontentloadedbefore reading. Some JavaScript-heavy pages render late; in this sandbox run, DuckDuckGo's results had still not appeared after 25 seconds, which is why the guide's live examples use Hacker News and Wikipedia. - Browser fails to launch on Linux. Re-run
agent-browser install --with-depsfor the system libraries, thenagent-browser doctor— the launch test at the end of its output names the problem. - Commands land in the wrong browser. You forgot
--sessionand fell into the shared default session. Useagent-browser session id --scope worktree --prefix <name>and pass the name on every command, or exportAGENT_BROWSER_SESSIONwhen every command runs in the same shell. - Behind a corporate proxy. Set
proxyand, if the proxy intercepts TLS,caCertin~/.agent-browser/config.json— per the configuration docs, a proxy given only on one command does not reliably persist to the next, while the config file applies to every command. That behaviour cost this guide a full hour of debugging:openwith a one-off proxy flag navigated fine, and the very next command hit the proxy wall.
The takeaway#
agent-browser's bet is that the accessibility tree is a better interface for agents than the screenshot, and after a morning of driving it, the bet holds up: a snapshot is a dozen lines of text where a screenshot is a hundred kilobytes of pixels, a ref is unambiguous where a coordinate is a guess, and one shell command per step means the browser fits into any harness, script, or MCP client without a framework. The install is two commands, the core loop is four, and the whole thing is free under Apache-2.0 with no key for local use. Start with npm install -g agent-browser, run the example.com loop from Step 2, and point it at a page you actually care about — the Hacker News extraction in Step 4 is a good second run, because it shows the shape of every browser-automation task you will ever do with it: open, snapshot, act, read the result.
Frequently asked questions
Do I need an API key?
No, not for the local browser. The core workflow — install, open, snapshot, click, fill, eval, screenshot, MCP — needs no key, no account, and no model call. Keys are only needed for cloud browser providers (Browserbase, Browserless, Kernel, AgentCore) and for the chat command, which stays disabled until AI_GATEWAY_API_KEY is set.
Which browsers can it drive?
Chrome for Testing by default, downloaded by agent-browser install (version 157.0.8103.38 in this guide). You can also attach to a running Chrome with --cdp, pick the Lightpanda or Obscura engine with --engine, drive Mobile Safari in the iOS Simulator, or use a cloud browser provider.
Why did my click fail with "Unknown ref"?
Refs belong to the snapshot that produced them. After a navigation or a DOM change, take a fresh snapshot and use its refs. Refs are also renumbered between snapshots, so never copy a ref from an earlier run of the same page.
Can it log into sites and stay logged in?
Yes for the interaction half: fill and click drive any login form, and sessions keep cookies and storage per session. Saved logins go through the auth vault, whose key is auto-generated on first save, and --restore state files carry a session across runs. Captchas and second factors still need a human.
How is this different from Playwright?
Playwright is a code library for scripts and test suites; agent-browser is the same browser control as shell one-liners with a persistent daemon browser between commands. Use the CLI when the driver is an agent or a shell, and Playwright when you are writing code with loops, retries, and assertions.
Sources
- vercel-labs/agent-browser — GitHub repository (README, install, quick start, command reference)
- agent-browser.dev — Quick Start (core workflow, common commands, waiting, chaining, JSON output)
- agent-browser.dev — Configuration (config file locations, proxy and CA certificates, sessions, security settings)
- GitHub Trending — weekly (agent-browser listed, November 7, 2026)