T3 Code: drive Claude Code, Codex and Cursor from your phone — hands-on with the 50K-star agent control surface
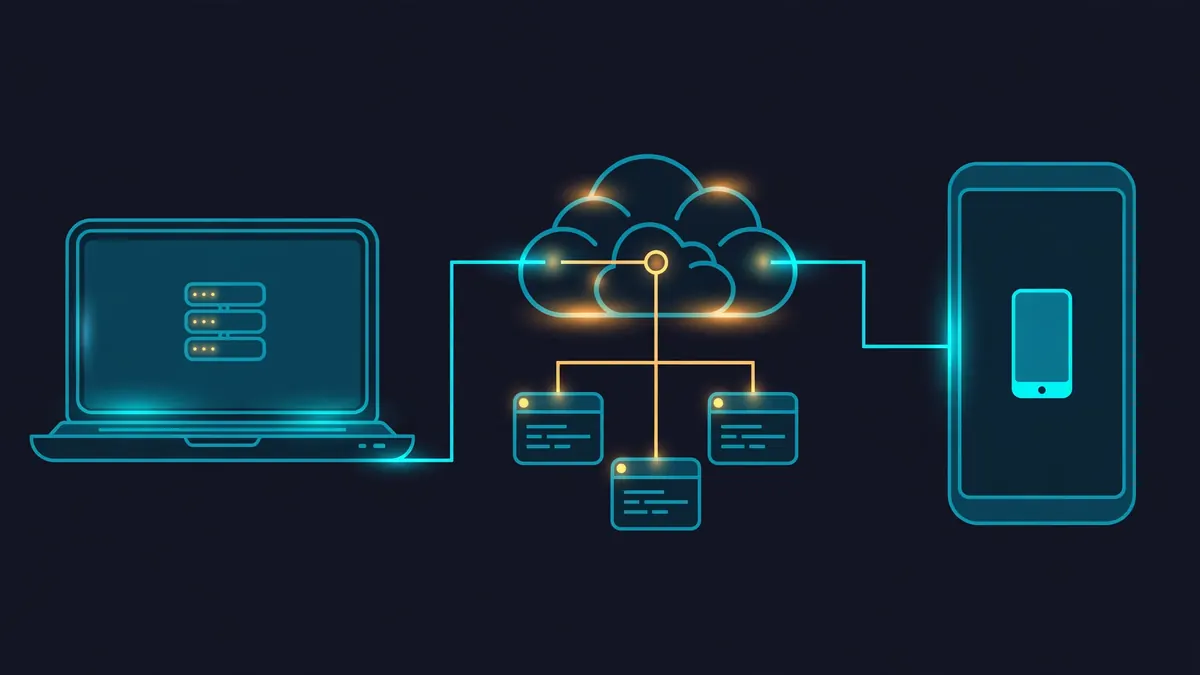
Your coding agent is running on your desktop. You are not. T3 Code closes that gap: a small server on the machine where your agents live, with a phone app, a web app, and a terminal command that all drive the same threads. It is the fastest-growing AI project on GitHub this week — and this guide installs it, wires up a provider, and runs a real thread, with every command verified.
- Who: T3 Code (pingdotgg/t3code, MIT), an “agent harness control surface” from the T3 Tools team. It does not replace your agents — it remote-controls the ones you already use.
- What: One server on your machine plus desktop, web, and mobile apps and a t3 CLI. Works with your existing subscriptions: Claude Code, Codex, Cursor, OpenCode, Grok Build, Antigravity, and fx.
- When: Verified November 7, 2026: t3 v0.1.7 (stable channel), installed from the official release, server listening on 127.0.0.1:3773, pairing and thread commands run in a 2-core sandbox.
- Requirement: macOS, Windows, or Linux; one installed and authenticated provider CLI before you can start a thread. No GPU, no model weights, no API key for T3 Code itself. T3 Code is free; model usage is billed by your provider.

Your coding agent is running on your desktop. You are not. That is the gap T3 Code closes: a small server on the machine where your agents live, with a phone app, a web app, and a terminal command that all drive the same threads. It is the fastest-growing AI project on GitHub this week — 50,042 stars on November 7, 2026, up 16,235 in the seven days to November 6 by GitHub's weekly trending count — and this guide installs it, wires up a provider, and runs a real thread, with every command verified in a sandbox.
T3 Code calls itself an "agent harness control surface." The distinction matters: it is not a model, and it is not a new coding agent. It is the remote control for the agents you already use — Claude Code, Codex, Cursor, OpenCode, Grok Build, Google Antigravity, and fx — so you can start a task at your desk, check on it from the train, approve a step from your phone, and come back to finished work. The project is MIT-licensed, the CLI is free, and you keep paying only your existing provider subscriptions. The README is blunt about its state — "We are very very early in this project. Expect bugs." — which is honest, and worth knowing before you depend on it.
What follows is the full setup, end to end: install the CLI, connect a provider, start the server, run your first thread, link your phone, and leave the server running as a background service. Every command below was run on November 7, 2026, against the stable release, and the outputs quoted are the real ones.
What you'll need#
- A machine that stays on while your agents work — macOS, Windows, or Linux. This is the host; your agents run here, not in T3 Code's cloud.
- One installed and authenticated provider CLI before you can start a thread: Claude Code, Codex, Cursor, OpenCode, Grok Build, Kiro, Pi, Muse Code, or fx. The login commands are in Step 2.
- About 10 minutes and roughly 365 MB of disk for the install, measured here. No GPU, no model downloads, no API key for T3 Code itself.
- A phone is optional but is the point of the tool: iOS and Android apps are free. Remote access from outside your home network uses a free T3 Connect account; on your own Wi-Fi you can pair directly with no account at all.
Step 1: Install the CLI#
The documented install is one command. It fetches the latest stable release archive from GitHub, verifies its checksum, and puts a t3 launcher in ~/.local/bin:
curl -fsSL https://t3.codes/install.sh | shIf your shell then reports command not found, ~/.local/bin is not on your PATH yet; the installer prints the line to add. To try it once without installing, run npx t3@latest instead — that needs Node.js for npx. To pin an exact release, set T3CODE_VERSION, or T3CODE_CHANNEL=nightly for the nightly train.
Verify the install:
t3 --versionExpected output, as run here on November 7, 2026:
t3 v0.1.7That is the stable release this guide was verified against. Run t3 --help to see the full command list: serve, app, pair, auth, environment, browser, project, thread, up, status, service, update, uninstall, theme, trace, doctor, policy, triage, and connect.
If you would rather run the desktop app, download it from GitHub Releases or your package manager: winget install T3Tools.T3Code on Windows, brew install --cask t3-code on macOS, a .deb on Debian and Ubuntu, yay -S t3code-bin on Arch, or the t3code package from nixpkgs. The desktop app includes the t3 command too — enable it under Settings → About. One platform gap: there is no t3 binary for Intel Macs, so on those machines you run the desktop app or build a server from source. Check the state of your install at any time with:
t3 statusOn a fresh machine this prints exactly what you would expect:
This machine
  Service        not installed
  T3 Connect     off
  Local network  off

Change access: `t3 up`.
Step 2: Connect a provider#
This is the gate most people trip over: T3 Code cannot start a thread until at least one provider is installed and authenticated on the host machine. The provider CLIs must be on the server's PATH — if T3 Code cannot find one, set its Binary path in the provider settings, which matters when you installed a CLI through a version manager.
Install and log in to at least one provider on the host, using the provider's own login. The table below is taken from T3 Code's install docs; the commands are the providers' own:
| Provider | Install and authenticate |
|---|---|
| Claude | Install Claude Code, then run claude auth login |
| Codex | Install the Codex CLI and run codex login, or connect with ChatGPT from T3 Code's provider settings |
| Cursor | Install the Cursor CLI, then run agent login |
| OpenCode | Install OpenCode, then run opencode auth login |
| Grok Build | Install the Grok Build CLI, then run grok login |
| Kiro | Install the Kiro CLI, then run kiro-cli login |
| Antigravity | No CLI needed — enable it in Settings, then use Install Antigravity and sign in with Google |
| Pi | Install Pi with Node.js 22.19 or newer, then run pi and /login |
| Muse Code | Install Muse Code on the server, run muse login, then enable it in Settings → Providers |
| fx | Install fx, then run fx login on the machine running the server |
Then open Settings → Providers in the web or desktop app, select the environment, and enable the provider you want. You can add a second instance of a provider for a separate account or configuration, each with its own environment variables, such as API keys or a custom base URL. Mark secret values as sensitive; after saving, T3 Code does not display their original values. T3 Code also warns when a provider version has known compatibility problems with your release, and the provider card offers an Update now button that runs the installer that owns the CLI.
For this guide, Claude Code is the example: install it, run claude auth login, complete the sign-in in your browser, and confirm the provider shows as connected in Settings → Providers before going further. Everything after this step is the same whichever provider you chose.
Step 3: Start the server and run your first thread#
From a terminal, t3 starts the server and opens the web app in your browser. t3 serve does the same without opening a browser, which is what you want on a headless machine or over SSH. Run it in the directory you want agents to work in:
cd ~/my-project
t3 serve
The server prints a line confirming where it is listening. As run here:
[05:20:39.304] INFO (#875): Listening on http://127.0.0.1:3773Port 3773 is the default. Open http://127.0.0.1:3773 in a browser and the web app loads — this was confirmed with an HTTP 200 and the full app shell. If you want a different port, set T3CODE_PORT in ~/.t3/service.env (covered in Step 5), or pass --port: t3 serve --port 4000.
Now register the project with the server so the CLI can address it:
t3 project add .Expected output (the ID will differ on your machine):
Added project cd00cd78-5306-4753-96df-a8a48ee4409f (t3-demo-project) at /tmp/t3-demo-project.List the project's threads — empty on a new project, which is the correct result:
t3 thread listThen start your first thread. Give it a concrete task, and pass --wait so the command blocks until the agent finishes and prints its reply:
t3 thread start . "Add a test for the login retry logic in auth.py" --waitt3 thread start prints the thread's ID, and with --wait it prints the agent's reply when the turn finishes. It exits 1 if the run fails and 2 if it ends waiting for an answer from you. Two flags worth knowing for real work: --worktree runs the thread in a new git worktree based on a branch, tag, or commit instead of the project folder, so agent experiments never touch your working tree; and --provider with --model pins a specific provider instance and model slug for the thread.
If you skipped Step 2, this is where you find out. Starting a thread with no provider configured fails cleanly with:
Pass modelSelection: the project has no default model. orchestrator_capabilities lists providers and models.That is the whole error — no crash, no partial run. Go back to Step 2, authenticate a provider, and run the command again.
While a thread is running, three commands cover the rest of the terminal workflow. t3 thread list shows threads newest first, t3 thread show prints a thread's state and latest messages, and t3 thread send sends a message to a thread — a busy thread receives it as its next turn, and nothing already running is interrupted.
Step 4: Drive it from your phone#

Install T3 Code on your phone from the App Store or Google Play. The Android listing, verified November 7, 2026, describes it as a companion app for controlling remote T3 Code environments, updated October 28, 2026, rated 4.76 from 100 ratings: once connected you get "pretty much the full power of the desktop app" — start agent runs, browse files, do version-control actions, review diffs, and use the terminal.
There are two ways to connect the phone to your host. The first is T3 Connect, the managed route, which needs no router configuration. On the host, run:
t3 upIt asks how your other devices reach the machine: T3 Connect, the local network, or both. Choose T3 Connect and follow the sign-in instructions. Over SSH, the CLI prints a browser link and a short code — open the link on any device, confirm the code matches, and approve. The CLI continues on its own; you do not need to forward an OAuth callback port. Then sign in to the same T3 Connect account on your phone and choose the environment. Each T3 Connect account can link up to 3 machines for free; a paid T3 Chat plan raises the limit to 10 machines with Pro, or 100 with Premier. Phones and browsers do not count against the limit.
The second way is direct pairing over your local network or a private network such as Tailscale, with no account at all. On the host, run:
t3 up --lanor, for a server already running in a terminal, t3 serve --lan. Either way the server accepts connections from your local network and tailnet. To link a phone, mint a fresh pairing link:
t3 pairAs run here, it prints a connection string and a pairing URL, and renders a QR code in the terminal:
Connection string: http://localhost:3773
Pairing URL: http://localhost:3773/pair#token=<redacted>
Scan the QR code on your phone, or paste the pairing URL into Add environment in the receiving app. Pairing authorizes that device for future connections, so use a fresh one-time link for each new device. Two warnings from the docs worth heeding: on a local network, a pairing code is all that keeps other devices on that network out, and anyone on the same network can reach the port — so do not enable LAN access on a network you do not trust. The hosted web app at app.t3.codes needs an HTTPS endpoint, so a plain HTTP LAN endpoint pairs from the desktop or mobile app, not from the hosted page. For Tailscale users, t3 serve --tailscale-serve exposes the backend over HTTPS on the tailnet instead.
Step 5: Keep it running in the background#
A server in a terminal dies when the terminal closes. On Linux and macOS, install it as a service for your user instead:
t3 service installOn Linux this creates a systemd user service and enables lingering, so T3 Code starts at boot and keeps running after logout. On macOS it starts the service when you log in and stops it when you log out — keep the Mac logged in and awake for unattended remote access. Windows background services are not supported: there, leave the desktop app running with its local environment enabled, or keep t3 serve running in a terminal, and note that closing the desktop app's last window stops its local server.
The service commands, all from the project's background-service docs:
t3 service status    # status and log location
t3 service restart   # restart the service
t3 service uninstall # stop and remove from startup
t3 update            # move to the newest release
t3 doctor            # inspect the data directory and repair it
Uninstalling the service leaves your projects, threads, and settings intact. t3 update downloads the newest release on your channel and switches the CLI and the service to it; it asks first, because restarting interrupts running agent turns, terminals, and remote clients. Pass --yes from a script, or an exact version such as t3 update 0.1.7 to pin one. t3 doctor reports the database size and the space it can reclaim, then asks which repairs to run; pass --fix to run the recommended ones without a prompt.
Service configuration lives in service.env under the T3 home directory, normally ~/.t3/service.env. Your projects, threads, and settings live under ~/.t3/userdata. A typical override:
T3CODE_PORT=3773
T3CODE_HOST=127.0.0.1
Run t3 service restart after changing the file, and restrict it with chmod 600 ~/.t3/service.env if it contains credentials. One more command worth running on a Linux host where agents run long jobs: t3 service protect asks for your sudo password and shields the server from the kernel's out-of-memory killer, so an agent that fills the machine's memory cannot take the server down with it. Its protection takes effect after t3 service restart, and t3 service status reports whether it is in place.
Step 6: The end-to-end loop — away from your desk#
Put the pieces together and the workflow looks like this. At your desk, start a thread in the web app or with t3 thread start — a bounded task, in a worktree if it touches code you care about. Leave the house. From your phone, watch the thread's status and messages; when the agent finishes a step and waits, you approve it or send a correction with t3 thread send from the terminal, or straight from the phone. Back at your desk, review the diff the agent produced, run the tests yourself, and merge. The agent did the typing; you kept the decisions.
Three habits make this loop work instead of backfiring. First, keep tasks small and checkable: one fix, one feature, one review — not "rebuild the auth system." Second, use worktrees for anything you have not reviewed yet, so a bad agent run cannot dirty your working tree. Third, remember the server is only as available as the host: the machine must stay on and reachable, and from v0.1.x the project itself warns it is early and to expect bugs, so do not point it at a repository with no backup and no tests.
When to use T3 Code — and when not to#
| Option | What you get | What you give up |
|---|---|---|
| T3 Code | One control surface for all your coding agents, from phone, web, and terminal; open source (MIT); runs on your hardware | Early project — expect bugs; the host must stay on; you still need provider subscriptions |
| Plain terminal CLIs | Full power of Claude Code, Codex, and the rest; nothing extra to install or maintain | No remote access at all — you must be at the machine or SSH in, with no mobile UI |
| First-party desktop apps | Polished, vendor-supported (Codex desktop app, Claude Desktop, Cursor) | One agent each, and closed source — you cannot self-host or fork the control plane |
| Claude Cowork / Manus | Agents run in the vendor's cloud, so they keep working when your computer is off | Cloud-run and subscription-gated; your code and data leave your machine by design |
| SSH + tmux | Free, universal, and already on every server you own | Manual everything — no thread history, no approvals UI, no diff review, no phone app |
T3 Code is the right call when you already live in one or more coding agents and want them reachable from anywhere without handing your code to a cloud service. It is the wrong call when you want a single all-purpose chatbot, a pure code library to embed in your own app, or a managed service that runs while your machine sleeps — for that last one, the cloud agents are the honest answer. It is also worth repeating the project's own framing: it was built because the authors wanted the best development experience with agents and found nothing that met their bar. That is a reason to try it, not a guarantee it meets yours — the MIT license is the guarantee that you can fork it if it does not.
The takeaway#
- Install the CLI:
curl -fsSL https://t3.codes/install.sh | sh, thent3 --version— v0.1.7 here. - Connect a provider first: install the CLI and run its login (
claude auth login,codex login,agent login), then enable it in Settings → Providers. No provider, no threads. - Start the server:
t3 servelistens on port 3773 by default;t3 project add .registers a project;t3 thread start . "your task" --waitruns the first thread. - Link your phone:
t3 upfor T3 Connect, ort3 pairfor a direct LAN link. A free T3 Connect account links up to 3 machines. - Make it permanent:
t3 service installon Linux or macOS,t3 updateto stay current,t3 doctorwhen something feels off. - Keep the loop small: one bounded task per thread, worktrees for unreviewed code, and you keep the merge decision.
The shift T3 Code represents is easy to miss behind the star count. Coding agents stopped being a terminal novelty months ago; the bottleneck now is reaching them when you are not at your keyboard. A control surface that is open source, multi-provider, and running on your own machine is the piece that was missing — and 50,042 stars in nine months, with the biggest weekly gain of any AI repo, says a lot of developers felt the same gap. Install it, point it at the agent you already pay for, and try one thread from your phone before deciding whether it earns a place in your workflow.
Sources: the T3 Code repository page and README (star and fork counts, install instructions, provider list, comparisons, read November 7, 2026); the GitHub API for pingdotgg/t3code (50,042 stars, 9,768 forks, 9,668 commits, 789 releases, MIT license, checked November 7, 2026); docs/user/install.md, docs/user/remote-access.md, and docs/user/background-service.md in the repository (install commands, provider login commands, T3 Connect and pairing flows, service management, read November 7, 2026); GitHub's weekly trending count via GitHub AI Repo (T3 Code +16,235 stars in the seven days to November 6, 2026, the largest gain of any AI repo that week); the Google Play listing for T3 Code (updated October 28, 2026, 4.76 from 100 ratings); and the verification runs quoted in Steps 1–5 (install, t3 --version, t3 status, t3 serve on port 3773, t3 pair, t3 project add, t3 thread list and t3 thread start outputs, all run November 7, 2026 in a 2-core sandbox). The official install.sh script could not complete its tar extraction in this sandbox due to a container ownership quirk, so the same official v0.1.7 release archive was extracted manually with its checksum verified; every command quoted after that point ran against that install.