Cinecode hands-on: make a short film entirely in code
AI video usually means a model, a queue, and a credits balance. Cinecode, a skill for Claude Code and Cursor that passed 1,600 stars in its first six days, takes the opposite route: the coding agent writes the script, draws every frame in code, designs the sound, and hands you a finished MP4. No model call, no render farm, no subscription — just a browser, ffmpeg, and an agent that can run tools.
- What: Cinecode — a skill for Claude Code or Cursor that turns the agent into a film crew; films are built frame by frame in code and delivered as an MP4.
- Repo: sarpstar/cinecode, MIT, created November 3, 2026; 1,676 stars and 301 forks by November 9, 2026.
- Needs: Claude Code or Cursor; Node.js 22+, Python 3.9+, ffmpeg, and Chrome, Chromium, or Edge; a GPU Chrome can use.
- Quick mode: one film.html, about 3 approvals, films up to about 3 minutes, max 2 revision rounds, −14 LUFS master.
- Film mode: 6 gated steps, 8 look presets, 58 style recipes; for documentaries and essays over 10 minutes.
- Cost: no paid service required; narration via a Gemini TTS key, or free offline voices — EMA Lightning is about 800 MB and runs on a CPU.

Why Cinecode, why now#
AI video usually means a model, a queue, and a credits balance. Cinecode takes the opposite route. It is a skill for Claude Code and Cursor that turns the coding agent into a film crew: the agent writes the script, draws every frame in code, designs the sound, and hands you a finished MP4. Nothing is generated by a video model, so there is no per-second cost, no queue, and no subscription — just a browser, ffmpeg, and an agent that can run tools on your machine.
Cinecode (sarpstar/cinecode, MIT) was created on November 3, 2026, and by November 9 it had 1,676 stars and 301 forks. It is a one-person project by Sarp Yıldız, built with Claude inside Claude Code and Cursor, with a README published in Turkish, English, Chinese, and Japanese.
The trick is that every frame is a pure function of time. The film lives in a single film.html — Canvas 2D or three.js for the picture, Web Audio for the soundtrack — and headless Chrome renders it frame by frame into an MP4. Re-render it and you get the same film, byte for byte. A video model gives you a different shot every time you roll the dice; Cinecode gives you a shot you can edit, line by line, until it is right.
The gallery runs from 15-second vertical ads to a five-minute documentary (Titanik, Son Saatler), plus short films, explainers, product films, and music videos cut to a song's beat grid. To study a film's form before building your own, start with our hands-on guide to rea-video, which reverse-engineers any video shot by shot.
What you'll need#
- Claude Code or Cursor. The regular chat at claude.ai cannot run tools on your computer; Claude Code can — desktop app, VS Code extension, or terminal. Cursor works too, through its Agent chat.
- Node.js 22+, Python 3.9+, ffmpeg, and Google Chrome (or Chromium / Edge). The agent checks the machine first and offers to install anything missing, with your OK. A GPU Chrome can use makes renders fast; without one, Chrome falls back to the CPU — fine for tests, slow for a whole film.
- Disk space. A few hundred MB is enough for Quick mode, which pipes frames straight into the MP4. Film mode needs a few GB per film while rendering.
- No account, no API key, no paid service. Narration is the only part that can cost anything: it uses Gemini TTS with your key, or the system voice as a stand-in. Free offline voices exist too — EMA Lightning is about 800 MB, runs on a CPU, and installs with one command.
- About an hour for your first short film. A 30–60 second Quick film usually takes 100–250 agent steps, and the first draft lands in minutes; most of the time goes to your own notes.
Step 1 — Install the skill#
Open Claude Code and ask it to install the skill. It clones the kit into ~/.claude/skills/cinecode with git — on a Windows machine without git, it installs git first, after your OK — then open a new chat so the skill loads.
git clone https://github.com/sarpstar/cinecode.git ~/.claude/skills/cinecodeOr say it in words, which does the same thing:
Install the cinecode skill from https://github.com/sarpstar/cinecodeIn Cursor, install into ~/.cursor/skills/cinecode instead:
git clone https://github.com/sarpstar/cinecode.git ~/.cursor/skills/cinecodeInstall it in one place only, so the agent never sees two copies. Later, saying "update cinecode" pulls the newest version. The skill wakes on everyday phrases — "make a short film", "product video", "ad" — so after the install you mostly just describe the film you want.
Step 2 — Check the toolchain#
Before the first film, confirm the four tools are present. The agent does this silently beside its first questions, but it is worth seeing the checks yourself:
node -v        # 22 or newer
python3 -V     # 3.9 or newer
ffmpeg -version
node ~/.claude/skills/cinecode/scripts/capture.mjs --probe   # names your GPU, or warns about software rendering
If something is missing, install it with your platform's command — the agent offers this in the same question round, one option per tool:
brew install node ffmpeg
brew install --cask google-chrome
# Linux
sudo apt install nodejs ffmpeg chromium
# Windows (PowerShell)
winget install OpenJS.NodeJS Gyan.FFmpeg Google.Chrome Python.Python.3.12
Two details from the README matter. The kit's guard hooks — checks that stop a few mistakes as they happen — need a recent Claude Code (2.1.295 or newer); on an older client the guard may not register and the film still runs. And on Windows, a program winget installs only reaches apps started after it, so close and reopen Claude Code once after installing, then say "continue".
Step 3 — Start your first film#
Open an empty folder in your agent and start Claude Code there:
mkdir filmim && cd filmim && claudeThen write your idea. One sentence is enough — the idea is the only required input, and the agent asks for the rest:
Let's make a film with cinecode: a lighthouse keeper who counts the ships
that never come, in one minute, for Instagram vertical.

Length: 60 seconds
Where it plays: Instagram vertical
Sound: narration on, music in code
Look: you suggest
Do not pick a mode: the agent suggests one from the size of the job — Quick under about 60 seconds, Film from about 60 seconds with several scenes or research. A Quick film can move to Film mode later, keeping its beats.
Step 4 — Answer the questions, approve the plan and two stills#
Quick mode asks a few questions in one round: the idea, the medium the film is made of (real lit 3D, 2D animation, paint, ink, paper, clay, motion graphics, or pixel), the length and format, the look, the voice, and the music — a real open-licence recording, your own track, written in code, or none. Each question marks its suggested answer with a star. Behind the scenes the kit predicts what a generic agent would make from your brief, crosses your idea with random real-world sparks, and checks the candidates against your own past films so it never hands you the same film twice.
Then comes the single text gate: the production card — a one-sentence summary, the film's turn, a second-by-second beat table with a named camera move per shot ("dolly in, 3 s, slow ease-in-out, toward the figure"), and a short director card you can change line by line. Approve it, change one line, or ask for more references.
Before anything else is built, the agent shows the look and two scenes as stills — the opening and the scene least like it — with python3 tools/make.py stills. If a frame could belong to another film, it gets redrawn before you see it. Say "continue" or give one note.

Step 5 — Render the draft#
Once the stills pass, the agent builds the whole film into one film.html and renders a half-size draft:
python3 tools/make.py draftThe draft renders, masters the audio to −14 LUFS, runs the quality checks, and answers in four lines plus one per alert. The checks are strict: a draft is held back if the sound is slop (too many whooshes, a designed sound on almost every cut), too thin (fewer than about one event sound every 4 seconds), too still, too repetitive, too dark, or has blank frames of 0.3 seconds or more. Each flag is either fixed with your notes or named as intentional in STATE.md — never silently fixed before you have seen the draft.
Watch the draft once, with sound, on a phone speaker as well as headphones — the README's own delivery note says the maker measured the mix but cannot hear it, so one listen on each is part of the job. An independent-viewer helper reads the finished draft cold and writes its three biggest problems to review/critique-vN.md; red items hold the final until a later draft clears them.
Step 6 — Revise, then render the final#
Send your notes in one batch. The kit saves them verbatim to notes/round-N.md — starting with a "Keep" section for what you praised — and each note becomes a number before it becomes an edit ("title 78 px", "bed −4 dB after 12 seconds"). Quick mode allows up to two revision rounds, each landing as a new draft; after the second, the kit offers Film mode instead of a third.
When the draft is approved, render the final at full size with the finishing effects you opened (motion blur, print colour, film weave — all off by default):
python3 tools/make.py finalThe finished film lands at the top of the film folder as <title>.mp4, with a credits file beside it (<title>-credits.txt) for anything licensed — paste those lines into the video description, never onto the picture. Other aspect ratios come from the same command:
python3 tools/make.py final --size 1080x1080   # 1:1, beside the 16:9 final
# 9:16 is 1080x1920, 4:5 is 1080x1350
After the final, the kit asks two questions: clean up the intermediates, and save the format — look, type, sound, camera language, rhythm — so the next film in that format only needs a new idea. Formats live in ~/.cinecode/formats; API keys in ~/.cinecode/keys.env, entered once and never written into a film folder.
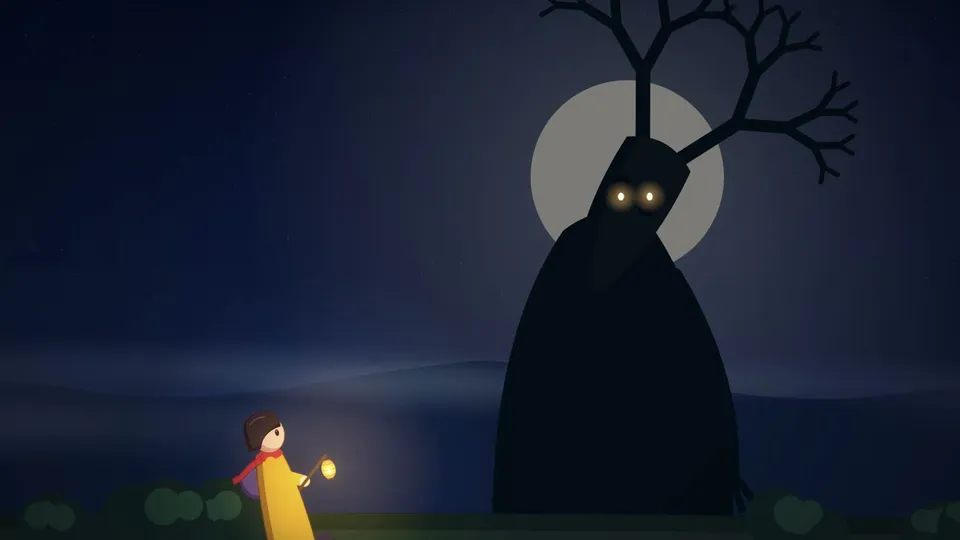
Quick mode vs Film mode#
Quick mode is the default for most first films: one file, about three approvals, a first draft in minutes, films up to about three minutes. Film mode is the studio process for longer work — documentaries and video essays over ten minutes, researched claims, archive material, a narrator over many chapters — in six gated steps: interview, roadmap, script, style frame, animatic, then a draft cut and the final, with helpers on independent parts in parallel.
Both modes share the same craft library: eight look presets (cinematic realistic, anime/cel, pastel storybook, claymation, paper cut/collage, retro/synthwave/VHS, bright advertising, handmade ink), 58 style recipes — 51 from LemoLab's lemo-opuscar collection and 7 the kit's own — and a named camera dictionary where every shot's camera is one line. Narration never ships raw: every line is treated for the film's medium and space and mixed about 10–15 dB above the music while speaking.
What it costs#
The film itself costs nothing — no model, no credits, no render farm. What it costs is agent time: a 30–60 second Quick film usually takes 100–250 steps, and every step re-reads the whole chat, so the bill grows with the conversation. The kit's answer is to keep chats short — when a step finishes and the chat has grown, it offers to continue in a new chat from STATE.md, and nothing is lost because the film lives in its files. python3 tools/usage.py shows each chat's token breakdown.
Narration has one real quota. A free Gemini key allows only a few TTS requests a minute and about ten a day, so with more lines than that the kit says so at the voice pick and offers fewer, longer lines, EMA Lightning, or billing. EMA Lightning installs with python3 tools/tts.py --install ema and runs with --engine ema — one clear voice, offline, on a CPU.
Honest limitations#
Code-drawn frames have a ceiling. Close-up faces work best stylised or in silhouette — a photorealistic talking head is not what this tool is for. If the shot genuinely needs real footage, use a different tool: our hands-on guide to OpenJutsu swaps the lead actor in any video on your own GPU.
Windows is supported — the kit runs in Claude Code's own PowerShell and the tests run on Windows on every push — but the README notes a whole film made on Windows has not been tried yet, so expect rough edges there first. The guard hooks are Claude Code only; Cursor runs the kit's own checks (make.py, qc.py) the same way. And a long film is a multi-session job: Film mode's 30-second film is usually several sessions, and most of the time is your notes — which is the point — but do not start a ten-minute documentary expecting it done in one sitting.
The takeaway#
Cinecode is the cheapest way to make a film that looks deliberate: one skill install, one sentence, a plan you can edit line by line, two stills you approve, a draft, a final. The output is an MP4 you own outright, built from code you can re-render, with a credits file for everything licensed. If you have ever bounced off a video model — the same prompt, a different shot, credits gone — this is the opposite workflow, and it is worth one evening. Install the skill, pick the smallest idea you care about, and make a 30-second film tonight.
Frequently asked questions
Do I need a video-generation model or credits to make a film with Cinecode?
No. Every frame is rendered in headless Chrome from code — Canvas 2D or three.js — so there is no model call, no queue, and no credits balance. The only part that can cost anything is narration, which uses Gemini TTS with your key or the system voice as a stand-in.
Can I make a film on Windows?
Yes. The kit runs in Claude Code's own PowerShell and its tests run on Windows on every push, but the README notes a whole film made on Windows has not been tried yet, so expect rough edges there first. On Windows, close and reopen Claude Code once after winget installs Node, ffmpeg, or Python.
How much does a film cost in agent time?
A 30–60 second Quick film usually takes 100–250 steps, and every step re-reads the whole chat. Keep chats short and continue from STATE.md when the kit offers — the film lives in its files, so nothing is lost. Run python3 tools/usage.py in the film folder to see each chat's token breakdown.