Run five coding agents in parallel without merge chaos: hands-on with Worktrunk
Coding agents can now run unsupervised for an hour — and five at once is where most setups fall apart. Worktrunk is a small Rust CLI that makes git worktrees as easy as branches: one name, one command, no paths to remember. It is the fourth most-trending repository on GitHub this week, and this guide installs v0.81.0 and runs two parallel branches through a real merge, with every command verified.
- Who: Worktrunk (max-sixty/worktrunk, MIT OR Apache-2.0), a Rust CLI for git worktree management, built for running AI agents in parallel.
- What: Seven commands — switch, list, remove, merge, step, hook, config — plus project hooks, LLM-generated commit messages, and agent plugins for Claude Code, Codex, OpenCode, Pi, and Gemini CLI.
- When: Verified November 7, 2026: wt v0.81.0, checksum-verified install, full switch-commit-merge-remove loop in a 2-core sandbox.
- Requirement: Git 2.15+ on Linux, macOS, or Windows. No GPU, no model downloads, no API key for the core workflow; pytest for the demo's pre-merge hook, an agent CLI only for -x launches and LLM commit messages.
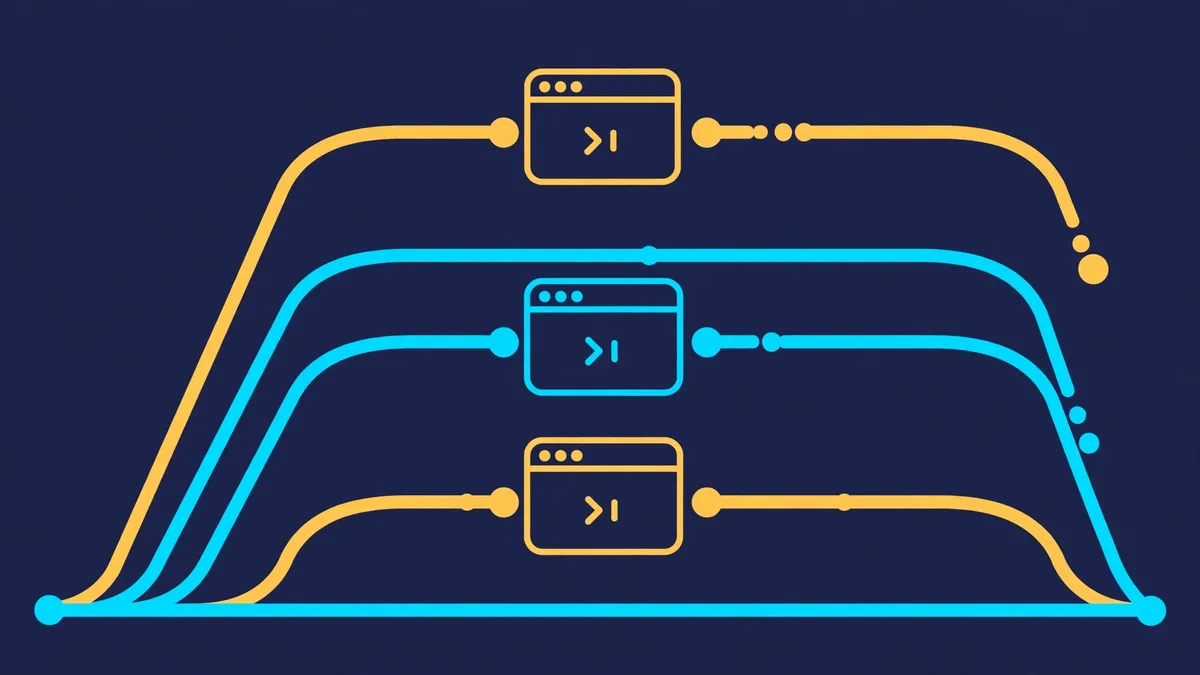
Your coding agent can now handle a task unsupervised for an hour. So can five of them at once — and that is where most setups fall apart. Five agents in one working directory step on each other's edits, fight over the same files, and leave you sorting out whose change broke the build. Git already solved the isolation half of this problem years ago: worktrees give every branch its own directory. What Git never solved is the ergonomics. Starting a worktree means typing the branch name three times, remembering where the directory went, and cleaning it all up by hand when the work lands.
Worktrunk is the tool that closes that gap. It is a small Rust CLI — wt — that treats worktrees the way Git treats branches: one name, one command, no paths to remember. It is the fourth most-trending repository on GitHub this week, with 11,841 stars as of November 7, 2026, and its current release is v0.81.0, published October 20, 2026. The project describes itself, in its README, as "the most popular git worktree manager," and the week's trending chart backs the claim up. This guide installs it, runs two parallel branches through a real merge, wires up hooks and LLM commit messages, and plugs it into an agent CLI — every command below was run on November 7, 2026, against v0.81.0, and the outputs quoted are the real ones.
What you'll need#
- Git 2.15 or newer (this guide ran against Git 2.43.0). Worktrunk is a layer over Git worktrees, not a replacement for Git.
- Linux, macOS, or Windows. The install below uses the prebuilt Linux binary; macOS and Windows have their own one-liners in Step 1.
- About 10 minutes and under 10 MB of disk for the binary. No GPU, no model downloads, no account, and no API key for anything in the core workflow.
- Python 3 with
pytestfor the demo project in Steps 3–7. On Ubuntu 24.04, install it withpython3 -m pip install --user --break-system-packages pytest— plainpip installis refused by PEP 668 on system Python, which is exactly the error this guide hit first. - A coding-agent CLI — Claude Code, Codex, OpenCode, or similar — is optional. It unlocks the agent launch in Step 6 and the LLM commit messages in Step 5, but every step up to that point works without one.
Step 1: Install the binary#
Worktrunk ships prebuilt binaries for every platform, so there is nothing to compile. Download the release archive for your platform from GitHub Releases and verify its checksum before you run anything — the release page publishes a .sha256 file next to every archive. On Linux x86_64, for v0.81.0:
curl -sL -o worktrunk.tar.xz https://github.com/max-sixty/worktrunk/releases/download/v0.81.0/worktrunk-x86_64-unknown-linux-musl.tar.xz
curl -sL -o worktrunk.tar.xz.sha256 https://github.com/max-sixty/worktrunk/releases/download/v0.81.0/worktrunk-x86_64-unknown-linux-musl.tar.xz.sha256
sha256sum worktrunk.tar.xz
cat worktrunk.tar.xz.sha256
The two hashes must match. As run here:
0c253f216985ce9cd7b202a11606b5ce6aa934b1019fd1fbb9b7ce2b47b1c74a  worktrunk.tar.xz
0c253f216985ce9cd7b202a11606b5ce6aa934b1019fd1fbb9b7ce2b47b1c74a *worktrunk-x86_64-unknown-linux-musl.tar.xz
Extract it and put the binary somewhere on your PATH:
mkdir -p ~/.local/bin
tar -xJf worktrunk.tar.xz -C /tmp/wt-extract
cp /tmp/wt-extract/worktrunk-x86_64-unknown-linux-musl/wt ~/.local/bin/
wt --version
Expected output:
wt v0.81.0If you prefer a package manager, the project's documented installs are brew install worktrunk on macOS and Linux, cargo install worktrunk if you have a Rust toolchain, winget install max-sixty.worktrunk on Windows (which also installs it as git-wt, since wt collides with Windows Terminal), sudo pacman -S worktrunk on Arch, or conda install -c conda-forge worktrunk. The release page also ships a shell installer script. Whichever route you take, wt --version reporting v0.81.0 is the check that matters.
Step 2: Install shell integration#
This step is easy to skip and expensive to skip. wt switch changes your working directory — and a child process cannot change its parent shell's directory. Worktrunk solves that with a small shell function. Install it:
wt config shell installOn a machine with a ~/.bashrc, the output is:
✓ Added shell extension & completions for bash @ ~/.bashrc
↳ Skipped zsh; ~/.zshrc not found

✓ Configured 1 shell
↳ Restart shell to activate shell integration
Restart your shell (or start a new terminal tab), and wt becomes a function that wraps the binary. Verify with type wt, which should report wt is a function. Without shell integration, wt switch still creates worktrees — it just prints the target directory instead of moving you there, which was confirmed here by running the raw binary in a clean subshell: the command succeeded and the shell stayed put. If you ever need the integration code without the installer, wt config shell init bash prints it (fish, zsh, Nushell, and PowerShell are supported too), and you can source it directly.
Step 3: Create your first worktree#
Set up a small demo project to work in. It needs just enough substance for the later steps: a module, a test, and an env file template.
mkdir ~/wt-demo && cd ~/wt-demo
git init -b main
cat > app.py <<'EOF'
"""Tiny demo app: greet a user."""


def greet(name: str) -> str:
    return f"Hello, {name}!"
EOF
cat > test_app.py <<'EOF'
from app import greet


def test_greet():
    assert greet("Ada") == "Hello, Ada!"
EOF
printf 'APP_ENV=dev\n' > .env.example
printf '.env\n__pycache__/\n.pytest_cache/\n' > .gitignore
git add -A && git commit -m "Initial commit: demo app with tests"
Now the core command. One name, one flag:
wt switch --create feature-authExpected output:
✓ Created branch feature-auth from main and worktree @ ~/wt-demo.feature-auth
↳ To customize worktree locations, run wt config create
That is the whole ceremony. Worktrunk created the branch, created the worktree as a sibling directory named after the repo and the sanitized branch (~/wt-demo.feature-auth), and moved your shell into it. Compare with plain Git, which needs the branch name three times: git worktree add -b feature-auth ../wt-demo.feature-auth, then a manual cd. The default layout is configurable — wt config create writes a documented starter config where you can set worktree-path to a template such as .worktrees/{{ branch | sanitize }} for worktrees inside the repo, or ~/worktrees/{{ repo }}/{{ branch | sanitize }} for a central directory.
Check the state of everything with wt list. With a second branch in play it looks like this (from the run below, after Step 4's second worktree exists):
  Branch              Status      HEAD±     main↕    main…±    Remote⇅  Path                           Commit    Age  Message
@ main                    ^                                             .                              965ab28   now  Add Worktrunk project config
+ feature-auth            ↑                 ↑1        +5                ../wt-demo.feature-auth        9eb23f6   now  Changes to auth.py
+ feature-pagination      ↑                 ↑1        +7                ../wt-demo.feature-pagination  5dd0963   now  Changes to pagination.py

○ Showing 3 worktrees, 2 ahead
Read it left to right: @ is the worktree you are in, + means the branch has changes relative to its base, ↑1 is one commit ahead of main, and +5 / +7 are added lines against main. git worktree list shows paths only; this is the status board you actually want when five agents are running. Three shortcuts cover the navigation you will use daily: wt switch ^ jumps to the default branch, wt switch - returns to the previous worktree, and wt switch @ names the current one. Run wt switch with no argument and you get an interactive picker instead.
Step 4: Hooks — setup that runs itself#
Worktrees are only useful if each one is ready to work in the moment it is created. That is what hooks are for: shell commands that run at points in the worktree lifecycle. They live in project config (.config/wt.toml, checked in and shared with the team) or user config (~/.config/worktrunk/config.toml, personal). Add this to the demo project:
mkdir -p .config
cat > .config/wt.toml <<'EOF'
# Project config shared with the team (committed).
[pre-start]
setup = "cp .env.example .env"

[pre-merge]
test = "python3 -m pytest -q"
EOF
git add -A && git commit -m "Add Worktrunk project config"
Two details matter here, and both were verified by watching files appear — or not — after a switch.
pre-start blocks; post-start does not. The pre-start hook above runs before the worktree is handed to you, so .env exists the instant the switch returns. The output proves the ordering — the hook runs first, then the creation message:
◎ Running pre-start project:setup
  cp .env.example .env
✓ Created branch feature-auth from main and worktree @ ~/wt-demo.feature-auth
By contrast, a post-start hook runs in the background: the switch returns immediately and the hook finishes a moment later. In this guide's first run, .env was missing in the instant after a post-start switch and present three seconds later. The docs say the same thing in plainer terms — prefer post-start for long jobs like dev servers and builds, and use pre-start when a later step needs the work completed first. If your agent starts the moment the worktree exists and needs .env or installed dependencies on arrival, that means pre-start.
Project hooks need a one-time approval. The first time a project hook runs, Worktrunk asks you to approve the command, and approvals are saved to ~/.config/worktrunk/approvals.toml. Check the state any time with wt config approvals list — in this guide's run it showed both project commands as unapproved, because every invocation here passed -y:
UNAPPROVED
❯ post-start setup:
  cp .env.example .env
❯ pre-merge test:
  python3 -m pytest -q
Passing -y (or --yes) approves for that run only; it does not persist the approval, which is the right default for a file a teammate committed. wt config approvals add records approvals permanently, wt config approvals clear removes them, and if a command's text changes, a fresh approval is required. --no-hooks skips hooks entirely on the commands that run them. And note the pre-merge hook above: it runs the test suite after rebase and before the merge lands, so a failing test blocks the merge. Step 7 shows that happening.

Step 5: Commit messages, with and without an LLM#
Do some work in the new worktree, then commit it the Worktrunk way:
cat > auth.py <<'EOF'
"""Token authentication for the demo app."""


def make_token(user: str) -> str:
    return f"tok-{user}-demo"
EOF
wt step commit
Expected output, with no LLM configured:
▲ Auto-staging 1 untracked path:
  auth.py
◎ Committing changes with default message... (1 file, +5)
↳ Using fallback commit message. For LLM setup guide, run wt config --help
  Changes to auth.py
✓ Committed changes @ 9eb23f6
wt step commit stages everything by default and commits. Without an LLM configured it builds the message from the staged file names — Changes to auth.py — and says so plainly. That is the honest fallback, and it works with no account and no API key.
To get real messages, point Worktrunk at an agent CLI in your user config. The documented commands are Claude Code (claude -p --no-session-persistence --model=haiku …), Codex (codex exec -m gpt-6-luna …), OpenCode (opencode run -m anthropic/claude-haiku-4.5 --variant fast), llm, or aichat — set under [commit.generation] in ~/.config/worktrunk/config.toml. The generation path was verified here with a stub command standing in for the LLM, so the mechanics are observable without spending a single token:
WORKTRUNK_COMMIT__GENERATION__COMMAND="printf 'feat: add farewell helper\n'" wt step commitThe command receives the diff on stdin and its stdout becomes the message:
◎ Generating commit message and committing changes... (1 file, +5)
  feat: add farewell helper
✓ Committed changes @ 9f3242b
Two useful details. First, wt step commit --dry-run renders the prompt, prints the command that would run, and shows the generated message — without staging, running hooks, or committing. The prompt is a structured template (task, format, style, diffstat, full diff, recent commits) that you can override with your own template or extend with template-append. Second, the message generation only fires when there is something to commit or squash: a merge of a single clean commit keeps the commit's existing message, as Step 7 shows. Do not expect a merge to rewrite history's wording for you.
Step 6: Run agents in parallel#
Create the second worktree from main and give it its own change:
wt switch main
wt switch --create feature-pagination
cat > pagination.py <<'EOF'
"""Cursor pagination helpers."""


def page(items, size, cursor=0):
    chunk = items[cursor:cursor + size]
    nxt = cursor + size if cursor + size < len(items) else None
    return chunk, nxt
EOF
wt step commit
wt switch main
Two branches, two directories, zero interference. The auth work lives in ~/wt-demo.feature-auth, the pagination work in ~/wt-demo.feature-pagination, and main is untouched. This is the shape the whole tool is built for: one agent per worktree, each with its own checkout, its own .env from the hook, and its own test run.
To launch an agent straight into a fresh worktree, use -x. The documented pattern starts Claude Code with a prompt in the new worktree:
wt switch -x claude -c feature-auth -- 'Add user authentication'The -x program starts in the worktree whether or not your shell followed it there, and everything after -- is passed to the program as its arguments. The runnable form of the same mechanism was verified here with a shell command, which proves the program really starts inside the new worktree:
wt switch --create feature-exec -x sh -- -c 'pwd; ls auth.py pagination.py'◎ Executing (--execute):
sh -c 'pwd; ls auth.py pagination.py'
~/wt-demo.feature-execThree worktrees, three agents, one line each:
wt switch -x claude -c feature-a -- 'Add user authentication'
wt switch -x claude -c feature-b -- 'Fix the pagination bug'
wt switch -x claude -c feature-c -- 'Write tests for the API'
Each agent gets its own directory, its own branch, and its own hook setup. When you want to know what is happening everywhere, wt list is the board — and for scripts, wt list --format json emits a schema-versioned JSON envelope with every worktree's branch, head commit, status, and path, which is how the agent plugins in Step 9 track sessions.
Step 7: Merge it back — tests run first#
Merging is where Worktrunk earns its keep. Unlike git merge, which merges the target into your branch, wt merge merges your branch into the target — the local equivalent of clicking "Merge pull request" on GitHub. From the feature worktree:
wt switch feature-auth
wt merge
Expected output, with the pre-merge test hook from Step 4 in place:
◎ Running pre-merge project:test
  python3 -m pytest -q
.                                                                        [100%]
1 passed in 0.01s
◎ Merging 1 commit to main @ 9eb23f6 (no commit/squash/rebase needed)
  * 9eb23f6 Changes to auth.py
   auth.py | 5 +++++
   1 file changed, 5 insertions(+)
✓ Merged to main (1 commit, 1 file, +5)
◎ Removing feature-auth worktree & branch in background (same commit as main, _)
○ Switched to worktree for main @ ~/wt-demo
The pipeline, in order: commit anything uncommitted, squash the branch's commits into one (the default, like GitHub's squash-merge), rebase onto the target, run the pre-merge hooks, fast-forward the target, run the pre-remove hooks, and remove the worktree and branch — then switch you back to main. One command replaces a sequence most developers type from memory and get wrong under pressure.
The second merge shows the rebase step, because main has moved since the pagination branch was created:
◎ Rebasing onto main...
✓ Rebased onto main
◎ Running pre-merge project:test
  python3 -m pytest -q
.                                                                        [100%]
1 passed in 0.01s
◎ Merging 1 commit to main @ 5ac9da9 (no commit/squash needed)
  * 5ac9da9 Changes to pagination.py
   pagination.py | 7 +++++++
   1 file changed, 7 insertions(+)
✓ Merged to main (1 commit, 1 file, +7)
And the guardrail works. With a deliberately broken test in a third branch, the merge refuses — exit code 1, nothing merged, the branch left intact for fixing:
FAILED test_app.py::test_greet - AssertionError: assert 'Hello, Ada!' == 'Hel...
1 failed in 0.02s
✗ pre-merge command failed: test: exit status: 1
↳ To skip pre-merge hooks, re-run with --no-hooks
That is the point of the pre-merge hook: the check that used to live only in remote CI now runs locally, before the branch lands, every time. A rebase conflict stops the merge with the rebase left open in the worktree, so you resolve or abort it there. Useful flags: --no-squash preserves the branch's commit history, --no-ff creates a merge commit instead of fast-forwarding, --no-remove keeps the worktree after merging, and --stage controls what gets swept into the squash commit (all, tracked, or none).
v0.81.0 adds one more merge route: wt merge --branch <name> merges another worktree's branch without leaving the current worktree. Verified from main: wt merge --branch feature-pagination rebased the branch, ran the pre-merge pytest in the source worktree (1 passed), merged the single commit, and removed the worktree and branch — all without switching away from main.
Step 8: Clean up#
Merged branches clean themselves up, as Step 7 showed. For the rest, wt remove defaults to the current worktree:
wt switch --create feature-docs
echo "docs" >> README.md
wt step commit
wt switch main
wt remove feature-docs
◎ Removing feature-docs worktree in background
↳ Branch unmerged; to delete, run wt remove -D feature-docsWorktrunk removes the worktree but keeps an unmerged branch — deleting a branch with unmerged work is a separate, deliberate act, wt remove -D. It is equally careful with dirty work. Removing a worktree with uncommitted changes fails, exit code 1:
✗ Cannot remove worktree: feature-dirty has uncommitted changes
   M README.md
↳ Commit or stash changes first, or to lose uncommitted changes, run wt remove --force feature-dirty
--force removes it anyway, and --reap kills processes started in the worktree first — dev servers and watchers that would otherwise keep running with their directory deleted from under them. wt step prune sweeps up any worktrees whose branches have already merged into the default branch, for the weekly tidy.
Step 9: Plug it into your agent#
Worktrunk ships a plugin for each supported agent CLI. For Claude Code, the install is one command:
wt config plugins claude installThe manual equivalent, if you prefer it, is claude plugin marketplace add max-sixty/worktrunk followed by claude plugin install worktrunk@worktrunk. The Codex twin of the same command was the one verified end to end here — Codex is installed in this guide's sandbox, Claude Code is not — and it installed cleanly:
◎ Adding Codex plugin marketplace...
◎ Installing plugin...
✓ Codex plugin installed
OpenCode, Pi, oh-my-pi, and Gemini CLI have their own one-line installs (wt config plugins opencode install, wt config plugins pi install, wt config plugins omp install, and gemini extensions install https://github.com/max-sixty/worktrunk). What you get depends on the agent: every plugin adds a configuration skill the agent reads when you ask worktrunk-related questions, and activity tracking — wt list shows 🤖 while an agent is working in a worktree and 💬 while it waits. Claude Code and OpenCode go further, with worktree isolation (the agent's own worktree creation routes through wt switch --create), a /wt-switch-create skill that starts a task in a fresh worktree without leaving the session, a /wt-diff pane, and a statusline fed by wt list statusline --format=claude-code. Stale markers clear with wt config state marker clear.
When to use Worktrunk — and when not to#
| Approach | Best for | Costs |
|---|---|---|
| Worktrunk | Running several agents in parallel; hooks and tested merges as routine; teams that want one shared layout | One more CLI to learn; shell integration to install; project hooks need a one-time approval |
Plain git worktree | One-off worktrees; machines where you cannot install tools | Branch names typed three times; no hooks, no status board, manual cleanup |
Branches + git stash | Quick context switches inside one directory | Agents overwrite each other's files; no isolation at all |
| Separate clones | Full isolation including remotes and config | Disk and fetch overhead per clone; no shared object store; nothing coordinates them |
Worktrunk is the wrong tool when you work on one thing at a time: if you never have two branches alive simultaneously, plain branches are simpler and the tool adds nothing. It is also the wrong place to put heavyweight automation — hooks are shell commands, not a CI system, and a ten-minute build as a pre-merge hook will make you hate merging. Keep pre-merge hooks fast (tests, lint, typecheck) and push slow jobs to post-merge or real CI.
Two honest limits from this guide's run. First, wt step copy-ignored — the command that seeds git-ignored files and caches into a fresh worktree — failed in this sandbox with a filesystem permission error, even for a single file, so it was left out of the steps above; verify it on your machine before building a workflow on it. Second, the Claude Code plugin install was verified only through its Codex twin, since Claude Code was not installed in the sandbox; the command is the project's documented one, but run it yourself before assuming it in a script.
The takeaway#
Parallel agents do not need a platform. They need isolation, a status board, and a merge that refuses to land broken work — and Git already provides the isolation, badly packaged. Worktrunk is the packaging: one command to create a worktree and start an agent in it, one command to see all of them, one command to test, merge, and clean up. Install the binary, run wt config shell install, add a .config/wt.toml with a blocking pre-start hook and a pre-merge test hook, and the next five tasks your agents run will not step on each other. The 11,841 stars are not for a new idea. They are for the removal of a daily friction — and that is usually what a trending developer tool is actually measuring.
Sources#
- Worktrunk repository (max-sixty/worktrunk) — README, releases, star count, and license, read November 7, 2026.
- Worktrunk v0.81.0 release — published October 20, 2026; prebuilt binaries and checksums.
- Worktrunk hook documentation — hook types, blocking vs background execution, approvals.
- Worktrunk agent integration — plugin installs, activity markers, worktree isolation.
- GitHub Trending — weekly ranking, November 7, 2026.