Build a streaming AI chat app with the Vercel AI SDK and a local Ollama model — no API key needed
A complete streaming chatbot — Next.js, AI SDK 7, and a local Ollama model — with a working tool call and zero API keys. Every command verified end to end.
streamText, wire the page with useChat, then give the model a real tool and watch it call your code.- Verified versions:
ai7.0.173,@ai-sdk/react4.0.177,ollama-ai-provider-v24.1.0,zod4.6.7, Next.js 16.4.6, React 19.3.1, Ollama 0.40.x. - The full loop was run end to end on a 4-core CPU machine:
next buildclean, the chat route streaming real tokens, and agetTimetool call executed server-side and answered in the UI. - qwen3:0.6b is a 523 MB download (Q4_K_M), reports tool-calling and 40,960-token context, and answered a test question in about 0.1 seconds of model time.
- Watch out:
@ai-sdk/react4.0.177 requires React^19.2.1— React 19.2.0 fails install with a peer-dependency error. Pin React 19.3.1. - Swapping the local model for a hosted one is a one-line change to the
modelargument — nothing else in the app moves.
Every AI chat demo seems to start the same way: paste an API key, pick a model, watch the bill. That is fine for a weekend experiment, but it teaches you nothing about the shape of a real product — and it ties your app to one vendor's pricing page from day one.
There is a better first build. The Vercel AI SDK is the TypeScript toolkit for AI apps: one set of functions — streamText, generateText, useChat — that works identically across providers. Version 7 is the current major release, and its docs now list community Ollama providers alongside the hosted ones. Pair it with Ollama, and the model runs on your own machine: no key, no account, no per-token meter, and your prompts never leave your network.
That is what this tutorial builds: a real streaming chatbot in Next.js, with a working tool call, running entirely on localhost. Every command below was run and verified on a 4-core Linux machine with no GPU — the model answered, the tool fired, and the UI streamed. If it works there, it works on your laptop.
What you'll need#
- Node.js 20 or newer (this walkthrough used Node 24.22.1 with npm 10.9.4).
- Ollama 0.40.x — download it from ollama.com/download for your OS.
- About 600 MB of free disk for the qwen3:0.6b model, plus room for
node_modules. - 4 GB of RAM free while the model is loaded; the 0.6b model itself needs under 1 GB.
- No accounts, no API keys, no credit card. That is the point.
Step 1: Install Ollama and pull a small model#
Install Ollama for your platform, then start the server and pull a model small enough to run comfortably on a CPU. Qwen3 0.6b is the right starter: it is a 523 MB download, it reports tool-calling support, and it has a 40,960-token context window — generous for a chat demo.
ollama serve
ollama pull qwen3:0.6b
Keep ollama serve running in its own terminal — everything else in this tutorial talks to it on http://localhost:11434. Confirm the model is actually there and answering before you touch any JavaScript:
curl http://localhost:11434/api/tags
curl http://localhost:11434/api/chat -d '{"model":"qwen3:0.6b","messages":[{"role":"user","content":"What is 2+2? Reply with just the number."}],"stream":false,"think":false}'
You should see qwen3:0.6b in the tag list, and the chat call should come back with "content": "2". In this tutorial's verification run, that call returned in about 0.1 seconds of model time. If curl cannot connect, the server is not running — ollama serve first, everything else second.
Step 2: Scaffold the Next.js app#
Create a Next.js 16 project with the App Router and TypeScript:
npx create-next-app@latest ai-chatAnswer the prompts: TypeScript Yes, ESLint Yes, Tailwind CSS No, src/ directory No, App Router Yes, import alias @/*. Then install the AI SDK stack with the exact versions verified for this tutorial:
cd ai-chat
npm install [email protected] @ai-sdk/[email protected] [email protected] [email protected]
Two things worth knowing about that install. First, ollama-ai-provider-v2 is the provider the official AI SDK docs currently list for Ollama — it talks to Ollama's HTTP API directly and supports text, tools, and embeddings. Second, @ai-sdk/react 4.0.177 declares a peer dependency on React ^19.2.1. If your scaffold lands on React 19.2.0, npm will refuse with an ERESOLVE error; the fix is to pin React to 19.3.1, which is what this tutorial's verified install uses:
npm install [email protected] [email protected]Step 3: Write the chat API route#
The server side of the app is one file, app/api/chat/route.ts. It takes the chat history from the client, converts the UI messages into model messages, streams the response, and frames it in the format useChat expects. This is the exact code from the verified build — copy it as-is:
import {
  convertToModelMessages,
  createUIMessageStreamResponse,
  streamText,
  toUIMessageStream,
  type UIMessage,
} from 'ai';
import { ollama } from 'ollama-ai-provider-v2';

// Allow streaming responses up to 30 seconds
export const maxDuration = 30;

export async function POST(req: Request) {
  const { messages }: { messages: UIMessage[] } = await req.json();

  const result = streamText({
    model: ollama('qwen3:0.6b'),
    instructions: 'You are a helpful assistant.',
    messages: await convertToModelMessages(messages),
  });

  return createUIMessageStreamResponse({
    stream: toUIMessageStream({ stream: result.stream }),
  });
}
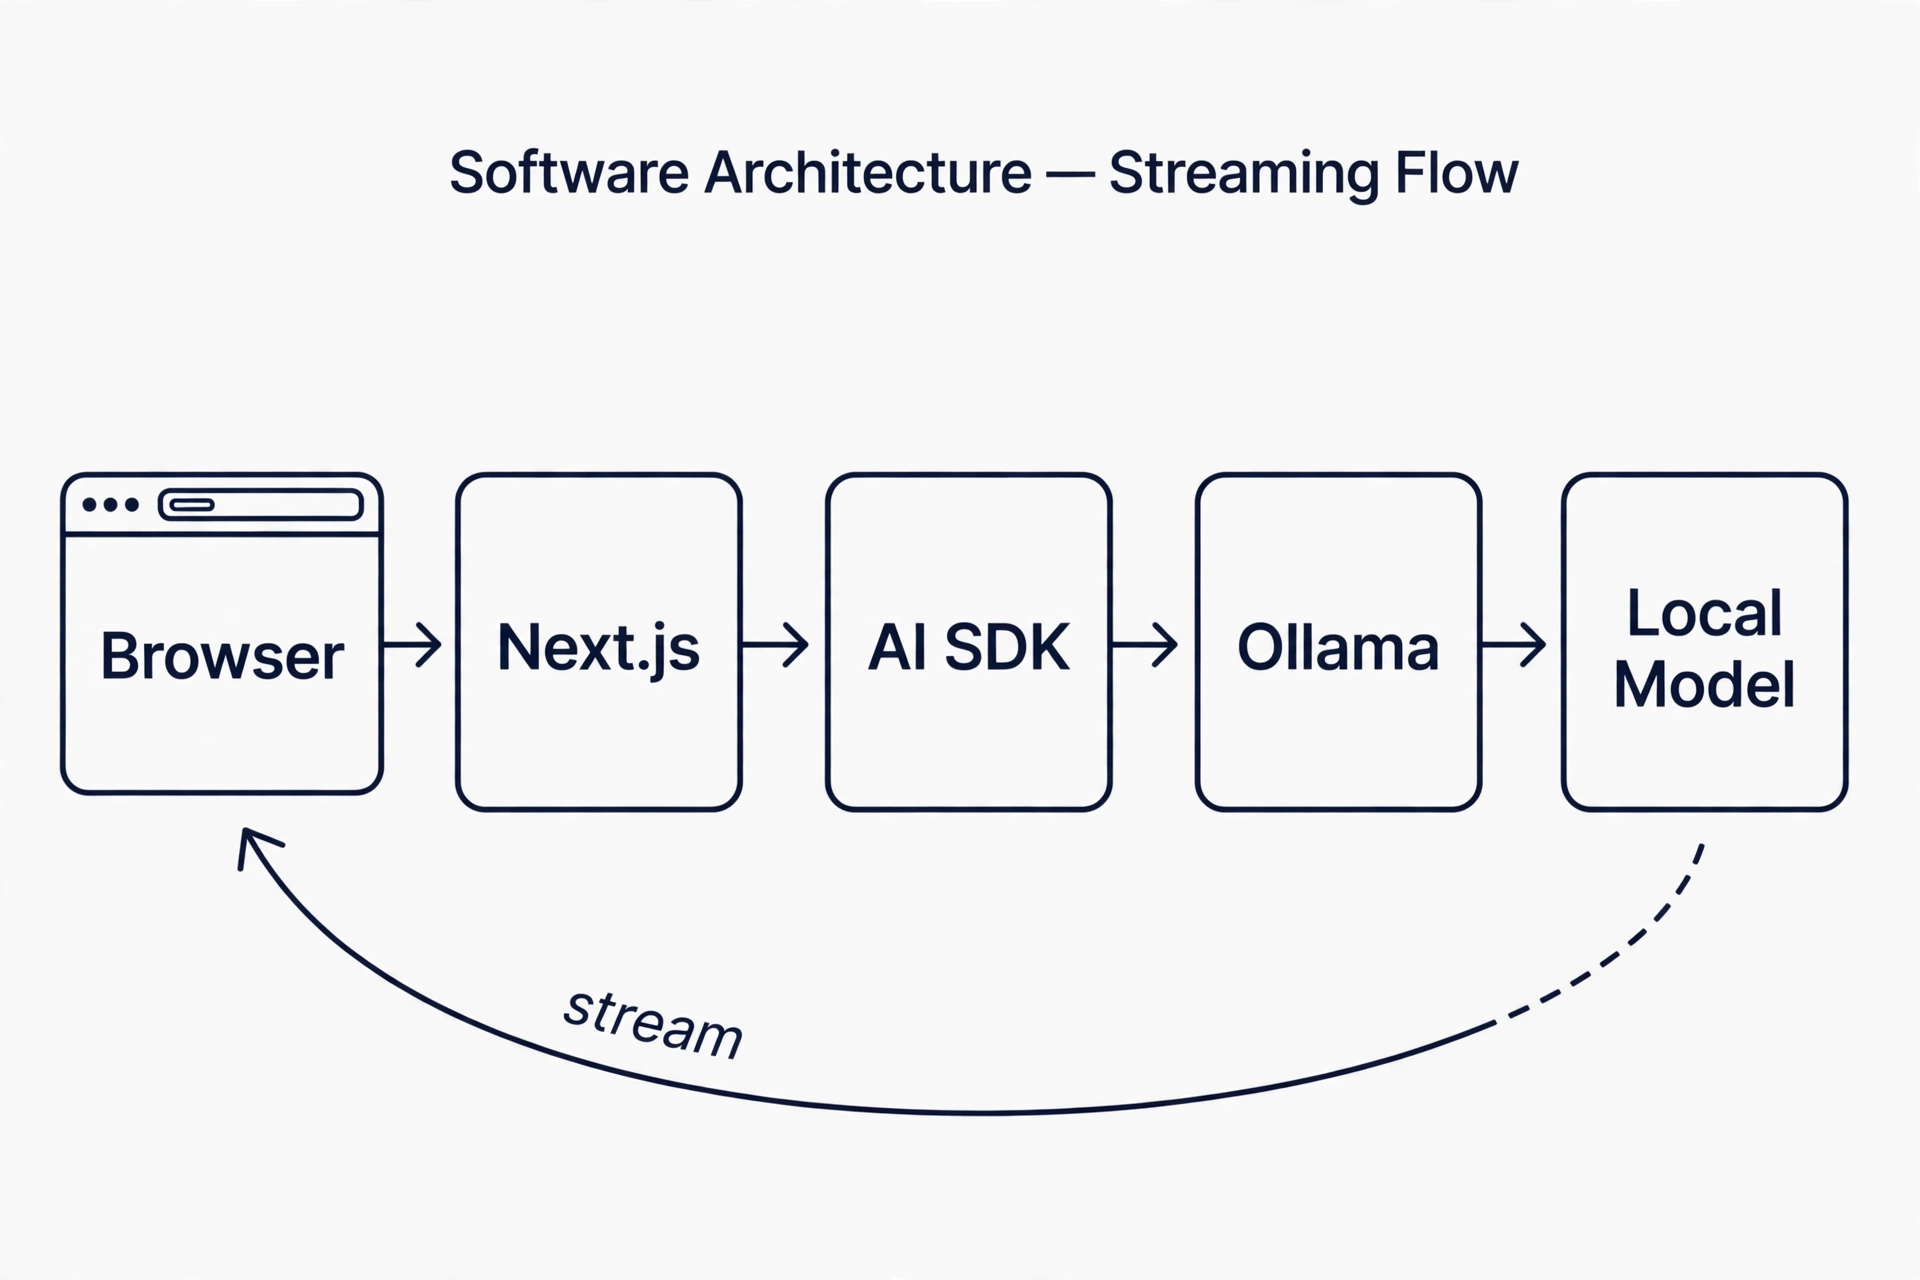
Three details matter here. convertToModelMessages translates the UI's message format — messages made of typed parts — into the plain role/content messages the model consumes. streamText starts generating immediately and returns a stream, not a finished answer; the route never waits for the full reply before responding. And createUIMessageStreamResponse + toUIMessageStream wrap that stream in the UI message protocol: a sequence of typed events (text-start, text-delta, text-end, finish) that the React hook knows how to apply incrementally.
Note what is not here: no API key, no base URL, no headers. The Ollama provider defaults to http://localhost:11434/api, and the model id is just the Ollama tag — ollama('qwen3:0.6b').
Step 4: Build the chat UI with useChat#
The client is app/page.tsx. The useChat hook from @ai-sdk/react owns the whole conversation: it posts to /api/chat, decodes the stream frame by frame, and appends tokens to the latest assistant message as they arrive. You own the input field yourself — that changed in AI SDK 5 and is still the pattern in v7, so the component keeps its own input state and calls sendMessage({ text: input }) on submit.
'use client';

import { useChat } from '@ai-sdk/react';
import { DefaultChatTransport } from 'ai';
import { useState } from 'react';

export default function Page() {
  const { messages, sendMessage, status, stop, error, regenerate } = useChat({
    transport: new DefaultChatTransport({
      api: '/api/chat',
    }),
  });

  const [input, setInput] = useState('');

  return (
    <main style={{ maxWidth: 720, margin: '0 auto', padding: 24 }}>
      <h1>Local AI Chat</h1>
      <p>Powered by the Vercel AI SDK + Ollama (qwen3:0.6b, running on this machine).</p>

      {messages.map(message => (
        <div key={message.id} style={{ marginBottom: 16 }}>
          <strong>{message.role === 'user' ? 'You: ' : 'AI: '}</strong>
          {message.parts.map((part, index) =>
            part.type === 'text' ? <span key={index}>{part.text}</span> : null,
          )}
        </div>
      ))}

      {(status === 'submitted' || status === 'streaming') && (
        <button type="button" onClick={() => stop()}>Stop</button>
      )}

      {error && (
        <div>
          <p>Something went wrong.</p>
          <button type="button" onClick={() => regenerate()}>Retry</button>
        </div>
      )}

      <form
        onSubmit={e => {
          e.preventDefault();
          if (input.trim()) {
            sendMessage({ text: input });
            setInput('');
          }
        }}
      >
        <input
          value={input}
          onChange={e => setInput(e.target.value)}
          disabled={status !== 'ready'}
          placeholder="Ask something — try “What time is it in Tokyo?”"
          style={{ width: '70%', padding: 8 }}
        />
        <button type="submit" disabled={status !== 'ready'}>Send</button>
      </form>
    </main>
  );
}
Render from message.parts, not from a content string — parts are how the SDK represents text, tool calls, and tool results in one typed array, and the tool step below depends on it. The status field tells you exactly where the conversation is: submitted (waiting for the stream to start), streaming (tokens arriving), ready (done — the input unlocks), or error (something failed, and regenerate() retries the last message).
Step 5: Run it and watch the stream#
Build first — the build is your type-check, and it catches every wrong import or renamed export before you ever open a browser:
npm run build
npm run start
The build should finish with ƒ /api/chat listed as a dynamic route. Then prove the stream works with curl before trusting the UI. POST a UI message — the same JSON shape useChat sends — and watch the event stream come back:
curl -X POST http://localhost:3000/api/chat \
  -H 'Content-Type: application/json' \
  -d '{"messages":[{"id":"m1","role":"user","parts":[{"type":"text","text":"What is 2+2? Reply with just the number."}]}]}'
The response is a stream of data: lines. In this tutorial's verification run, the relevant ones were:
data: {"type":"start"}

data: {"type":"start-step"}

data: {"type":"text-start","id":"v1c1aUA4edDVA5dY"}

data: {"type":"text-delta","id":"v1c1aUA4edDVA5dY","delta":"2"}

data: {"type":"text-end","id":"v1c1aUA4edDVA5dY"}

data: {"type":"finish-step"}

data: {"type":"finish","finishReason":"stop"}

data: [DONE]
That text-delta is the whole trick: the model produced 2, the server forwarded it the moment it existed, and the client appended it without waiting for anything else. Now open http://localhost:3000 in a browser and type a question. You will see the answer appear word by word — served by a model running on your own disk.
Step 6: Give the model a real tool#
A chatbot that only talks is a demo. A chatbot that can call your code is a product. Add a getTime tool to the route: a Zod schema describing the input, and an execute function that runs on the server. The model decides when to call it; your code decides what happens.
import {
  convertToModelMessages,
  createUIMessageStreamResponse,
  stepCountIs,
  streamText,
  toUIMessageStream,
  tool,
  type UIMessage,
} from 'ai';
import { ollama } from 'ollama-ai-provider-v2';
import { z } from 'zod';

export const maxDuration = 30;

export async function POST(req: Request) {
  const { messages }: { messages: UIMessage[] } = await req.json();

  const result = streamText({
    model: ollama('qwen3:0.6b'),
    instructions:
      'You are a helpful assistant. When the user asks for the time, use the getTime tool.',
    messages: await convertToModelMessages(messages),
    stopWhen: stepCountIs(5),
    tools: {
      getTime: {
        description: 'Get the current time in a given city',
        inputSchema: z.object({
          city: z.string().describe('The city to get the time for'),
        }),
        execute: async ({ city }: { city: string }) => {
          const zones: Record<string, string> = {
            tokyo: 'Asia/Tokyo',
            'new york': 'America/New_York',
            london: 'Europe/London',
            paris: 'Europe/Paris',
            sydney: 'Australia/Sydney',
            'los angeles': 'America/Los_Angeles',
          };
          const timeZone = zones[city.toLowerCase()] ?? 'UTC';
          const time = new Intl.DateTimeFormat('en-US', {
            timeZone,
            hour: 'numeric',
            minute: '2-digit',
            second: '2-digit',
          }).format(new Date());
          return `The current time in ${city} is ${time} (${timeZone}).`;
        },
      },
    },
  });

  return createUIMessageStreamResponse({
    stream: toUIMessageStream({ stream: result.stream }),
  });
}
stopWhen: stepCountIs(5) is the part people miss. Without it, the model calls the tool, the tool returns, and the generation ends — the model never gets to use the result. stepCountIs(5) lets the loop run up to five steps: call the tool, read the result, and answer. That is the whole agentic loop, in one option.
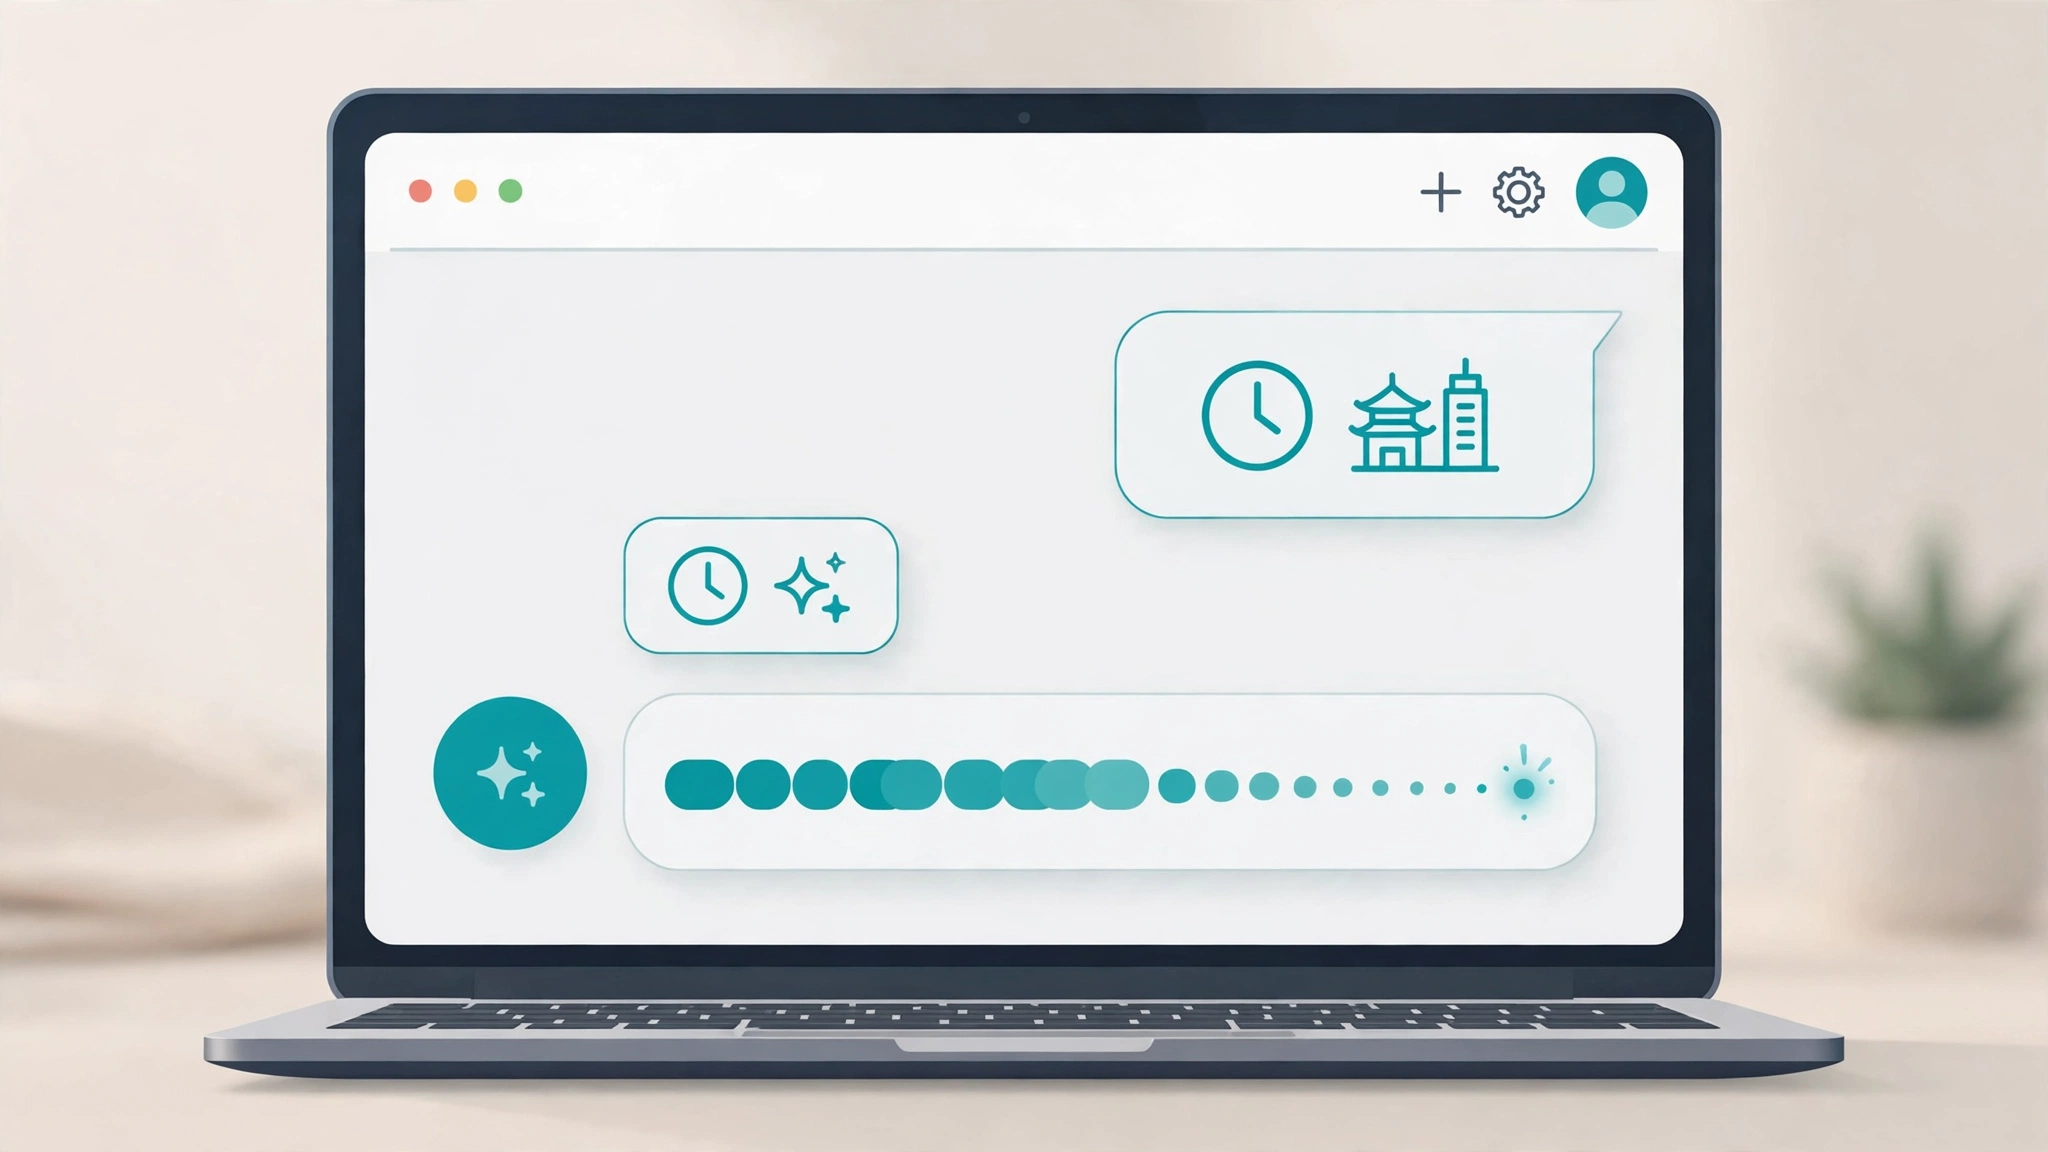
Ask the running app “What time is it in Tokyo right now? Use the getTime tool.” and the stream tells the story. In this tutorial's verification run, the events arrived in order: tool-input-start for getTime, the input streaming in as {"city":"Tokyo"}, then tool-output-available with "The current time in Tokyo is 9:20:27 PM (Asia/Tokyo)." — real time, from the server clock, through the model — followed by a second step in which the model streamed its answer: “The current time in Tokyo is 9:20:27 PM.” That second step is the proof stopWhen did its job.
Render the tool call in the UI by adding a case to the parts switch in page.tsx:
case 'tool-getTime': {
  if (part.state === 'input-available') {
    return <div key={index}>Checking the time…</div>;
  }
  if (part.state === 'output-available') {
    return <div key={index}>🕐 {String(part.output)}</div>;
  }
  return null;
}
Tool parts are typed by name — tool-getTime — and carry a state machine: input-streaming, input-available, output-available, output-error. Render each state and your users always know whether the model is thinking, calling, or done.
Step 7: Swap the model in one line#
This is where the SDK earns its keep. Everything you built — the route, the stream framing, the hook, the tool — is provider-agnostic. To run a bigger local model, change one argument and pull it:
ollama pull qwen3:4bmodel: ollama('qwen3:4b'),To switch to a hosted frontier model instead, install that provider's package and change the same line. The docs' own chatbot example uses the string form for this:
model: "anthropic/claude-sonnet-5.5",Same route, same UI, same tool. That is the reason to learn this stack rather than hand-rolling fetch calls against one API: the day you outgrow the local model, you change a string, not an architecture.
Troubleshooting#
npm error ERESOLVE ... peer react: your scaffold has React 19.2.0 and@ai-sdk/react4.0.177 needs^19.2.1. Runnpm install [email protected] [email protected].Failed to fetchin the browser, or an empty error state: Ollama is not running. Startollama servein its own terminal and confirmcurl http://localhost:11434/api/tagsresponds.model 'qwen3:0.6b' not found: you skipped the pull. Runollama pull qwen3:0.6band wait for the download to finish.- First token is slow, then it speeds up: normal on CPU — the model loads into memory on the first request. Later requests reuse the loaded model. If it stays slow, the model is too big for the machine; drop back to
qwen3:0.6bor add RAM. - The model ignores the tool: small models sometimes answer from memory instead of calling. The
instructionsline telling it to usegetTimehelps; a bigger model (qwen3:4bor up) is the reliable fix.
Which approach should you use?#
| Situation | Best choice |
|---|---|
| Learning the stack, $0 budget, any laptop | Local Ollama + qwen3:0.6b, exactly as built here |
| Real users, still self-hosted | Same app, model swapped to qwen3:4b or qwen3:8b on a machine with 8–16 GB RAM |
| Best answers matter more than cost or privacy | Same app, model swapped to a hosted frontier model — one line, plus an API key |
| Chat must remember past sessions | Add persistence: save messages to a database on each turn and load them into useChat |
| Tools that touch money, email, or deletion | Keep them server-side with an approval step — the SDK supports tools that pause for user confirmation before executing |
The takeaway#
You now own a streaming chatbot that runs entirely on your hardware: a Next.js route that streams tokens the moment they exist, a React hook that manages the whole conversation state, and a tool the model can actually call — all verified against a real local model, with no API key anywhere in the project. The same sixty lines scale in both directions: a bigger local model when you want more capability, a hosted frontier model when you want the best answers, and more tools whenever you want the model to do something instead of just saying something. Start with the tool. That is where a chatbot stops being a demo and starts being useful.