Transcribe anything on your own machine: a hands-on guide to faster-whisper
Ditch the transcription API. Install faster-whisper, pick the right Whisper model size, filter silence with VAD, and generate timestamped subtitles — all offline, all measured.
Every voice agent, meeting notetaker, and auto-captioning pipeline starts with the same unglamorous step: turning audio into text. The default way to do it is a cloud API — upload your audio, pay per minute, and trust that nobody interesting is listening on the other end. It works, but the meter never stops running, and your audio leaves your machine.
There is a better default for most jobs: transcribe it yourself. OpenAI's Whisper brought near-human speech recognition to open weights, and faster-whisper — SYSTRAN's reimplementation of Whisper on the CTranslate2 inference engine — made it practical on ordinary hardware. The project claims up to 4x faster transcription than the reference implementation at the same accuracy while using less memory, and the community has noticed: 25,600+ GitHub stars under the MIT license.
In this tutorial you will build a complete local transcription pipeline from scratch: install the library, run your first transcript, choose a model size using measured speed and accuracy numbers, strip silence with voice activity detection, extract word-level timestamps, export subtitles, and handle multiple languages. Every number below was measured on a 2-CPU virtual machine running faster-whisper 1.2.1 — no GPU, no API keys, no cloud.
What you'll need#
- Python 3.9 or newer. That is the documented floor; I ran everything below on Python 3.12.
- A terminal and about 30 minutes. A virtual environment is strongly recommended — model downloads and native dependencies stay contained.
- Disk space for models. Tens of megabytes for the small models, up to roughly 1.5 GB if you want the largest one in int8. Models download automatically from Hugging Face on first use.
- Any audio file. MP3, WAV, M4A, whatever you have — faster-whisper decodes through PyAV, which bundles the FFmpeg libraries, so you do not need a system FFmpeg install.
- No API keys, no accounts, no GPU. The whole tutorial runs on CPU.
Step 1: Install faster-whisper#
One package, one command:
python -m venv fw && source fw/bin/activate
pip install faster-whisper
python -c "import faster_whisper; print(faster_whisper.__version__)"
# 1.2.1
That is the entire dependency story. There is no separate FFmpeg step, no PyTorch install, no CUDA toolkit — CTranslate2 ships as prebuilt wheels and PyAV handles decoding. The first time you load a model, its weights download from Hugging Face automatically, so your first transcription takes a little longer while ~75 MB of weights arrive for the tiny model.
Step 2: Your first transcription#
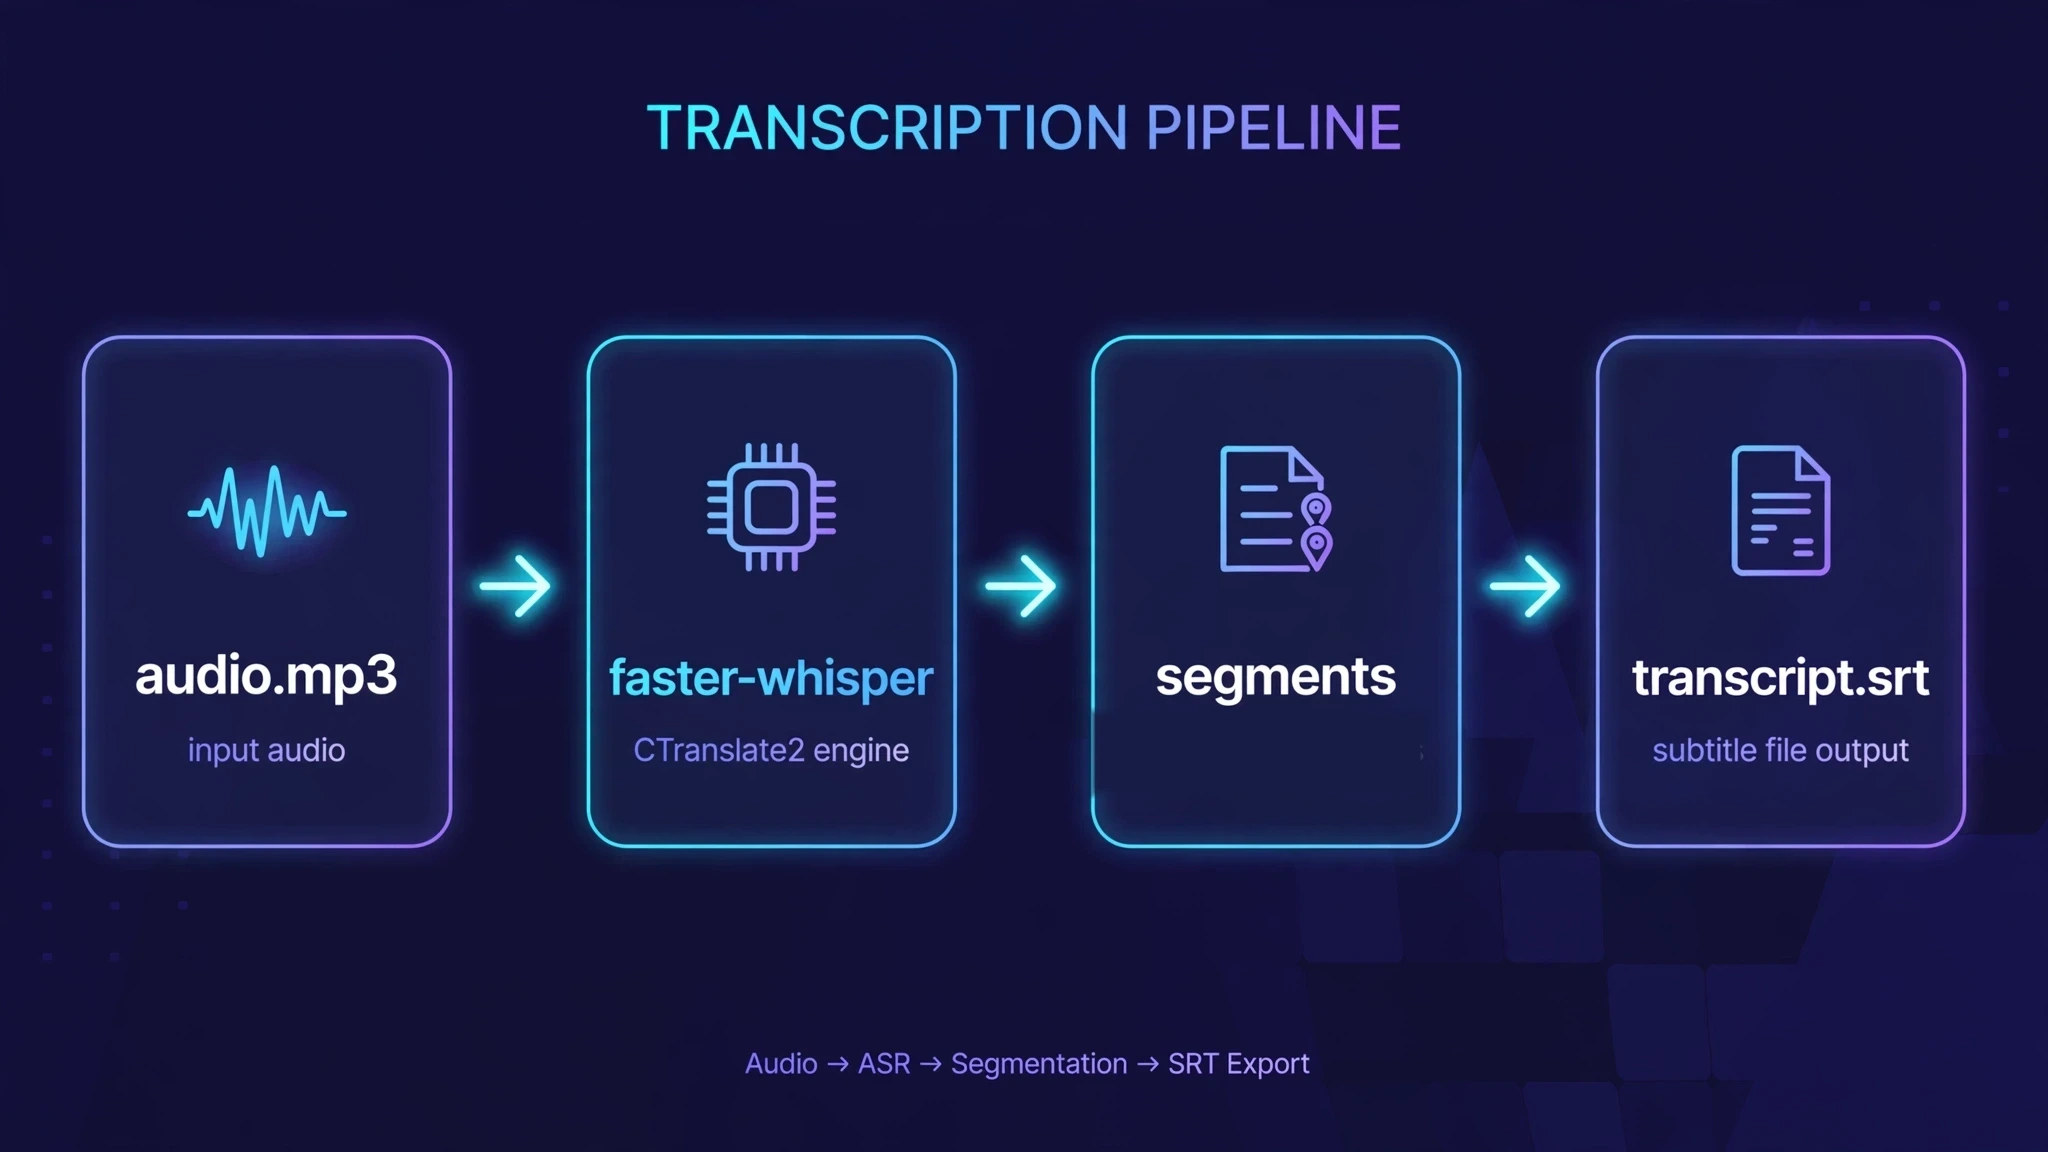
The core API is three lines. Load a model, transcribe a file, iterate the segments:
from faster_whisper import WhisperModel

model = WhisperModel("tiny", device="cpu", compute_type="int8")
segments, info = model.transcribe("audio.mp3", beam_size=5)

print(f"Detected language: {info.language} (p={info.language_probability:.3f})")
for s in segments:
    print(f"[{s.start:.2f}s -> {s.end:.2f}s] {s.text}")
Expected output on a 32-second English clip:
Detected language: en (p=0.999)
[0.00s -> 1.64s] Welcome to this hands-on tutorial.
[2.22s -> 5.56s] Today you will learn how to turn speech into text on your own computer,
...
Two things to lock in now. First, compute_type="int8" is the README's recommended CPU setting — 8-bit quantized inference is what makes the small models fly on a laptop. (On an NVIDIA GPU you would use device="cuda", compute_type="float16" instead.) Second, and this trips up everyone once: segments is a generator, not a list. Inference does not start when you call transcribe() — it starts when you iterate. If you call transcribe() and never touch segments, nothing runs at all: no error, no transcript, just silence. Loop over it, or materialize it with list(segments) if you need two passes over the results.
Step 3: Pick the right model size#
Whisper comes in six sizes. Here is the official lineup from OpenAI's model table, with parameter counts, memory requirements, and relative speed:
| Model | Parameters | Required VRAM | Relative speed |
|---|---|---|---|
tiny | 39 M | ~1 GB | ~10x |
base | 74 M | ~1 GB | ~7x |
small | 244 M | ~2 GB | ~4x |
medium | 769 M | ~5 GB | ~2x |
large / large-v3 | 1550 M | ~10 GB | 1x |
turbo | 809 M | ~6 GB | ~8x |
Two caveats on that table: the relative speeds were measured on an A100 GPU, so treat them as ordering rather than promises, and English-only .en variants exist for tiny through medium that tend to do slightly better on English audio. turbo is an optimized large-v3 that trades a little accuracy for a lot of speed.
Tables are nice; measurements are better. I transcribed the same 31.9-second English clip (94 words, known script, so I could score word error rate exactly) with tiny and base on 2 CPUs with int8 compute:
| Model | Time for 31.9 s of audio | Realtime factor | Word errors |
|---|---|---|---|
tiny | 15.8 s | 0.50x | 0 / 94 |
base | 20.5 s | 0.64x | 0 / 94 |
Both models transcribed the clip perfectly — zero word errors — and both ran at better than realtime on two modest CPU cores. On audio this clean, tiny is all you need, and it was ~30% faster here. Be honest with yourself about the caveat, though: this was clean, single-speaker, studio-quality speech. The gap between model sizes opens up on noisy, accented, or overlapping speech — that is where base and small earn their keep. My rule of thumb: start with tiny for drafts and scale up only when your transcripts tell you to.
Step 4: Strip silence with VAD#
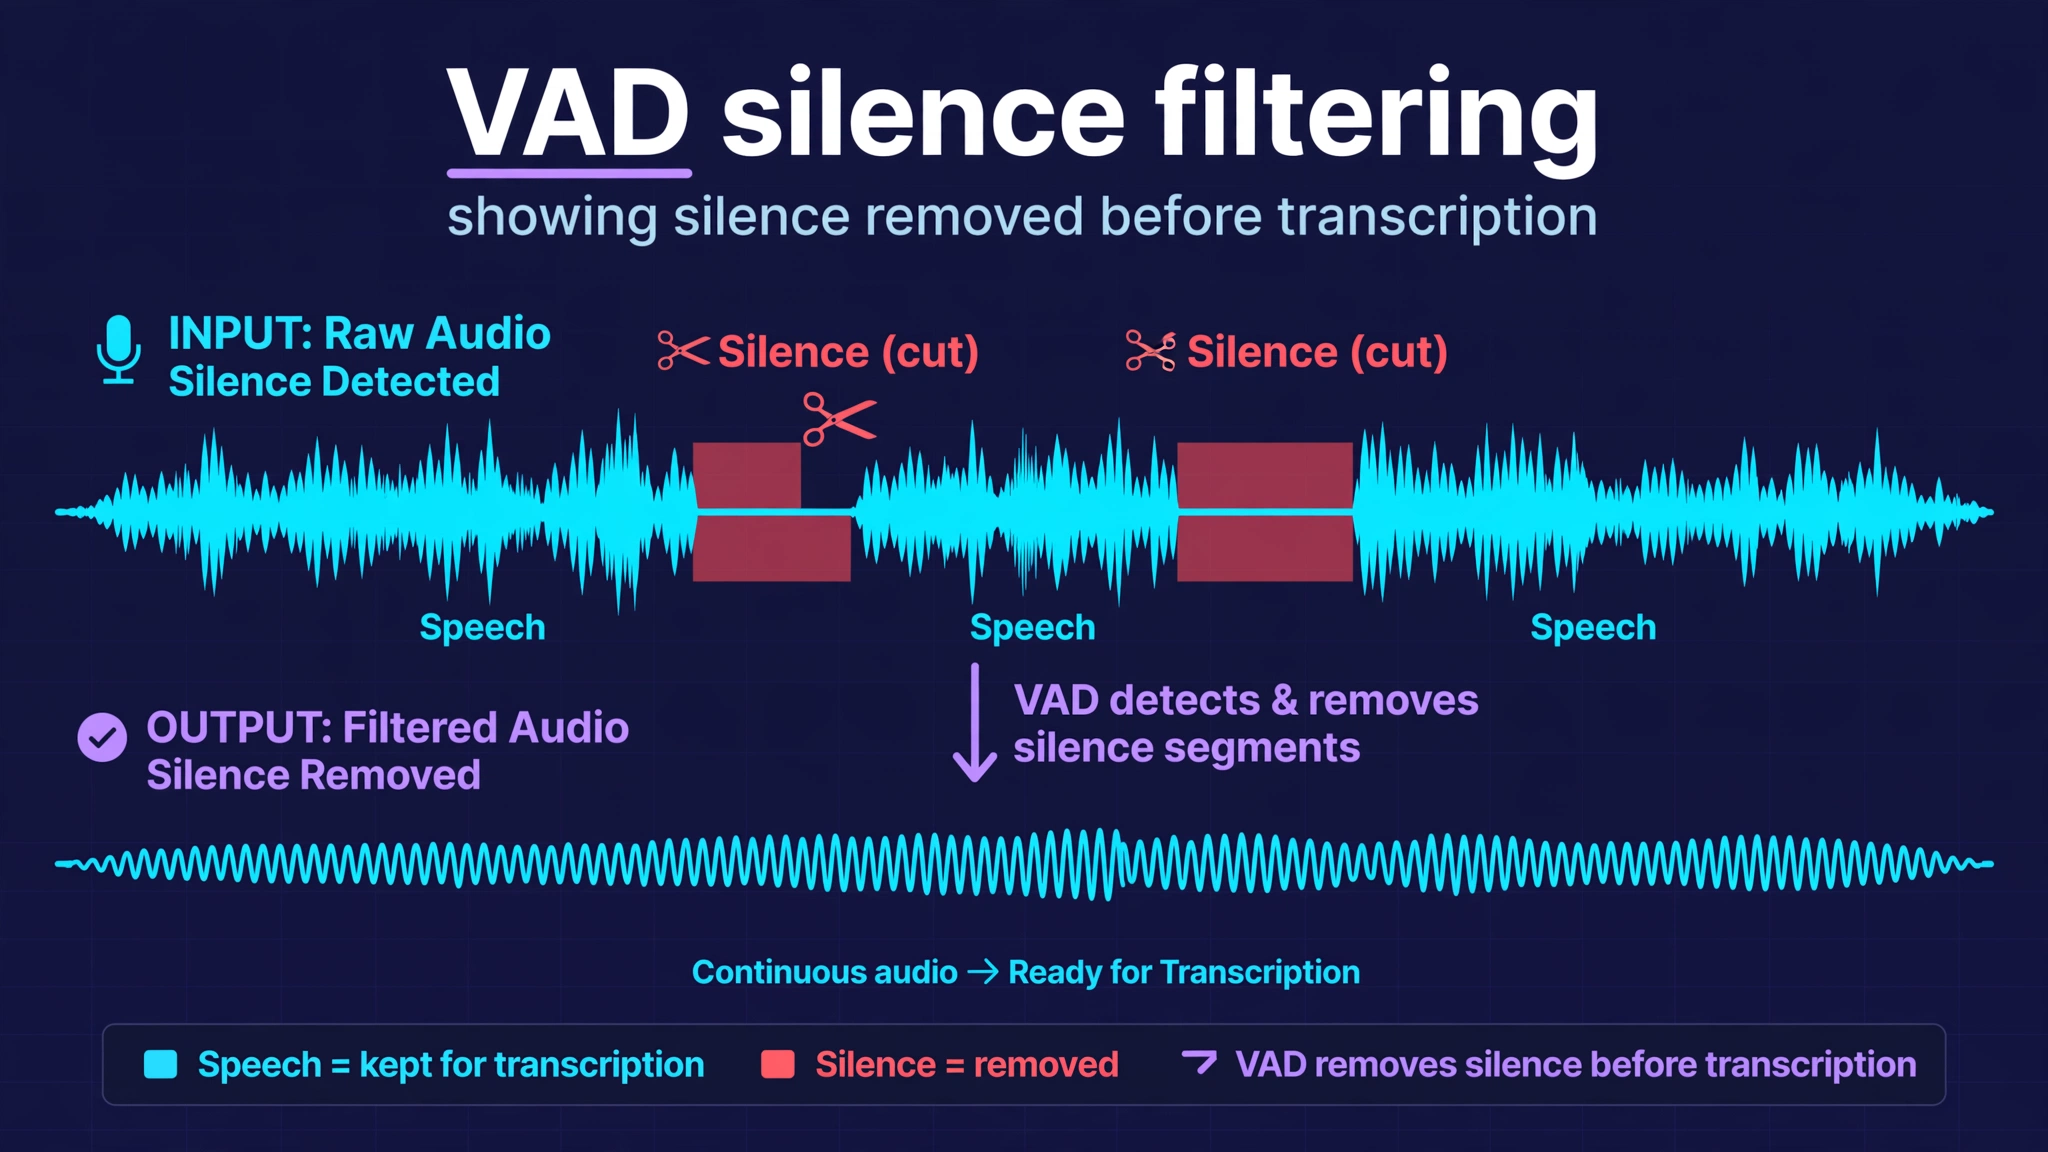
Real recordings are full of dead air — the pause before someone unmutes, the gap between questions, the tail after "bye". Transcribing silence wastes compute, and worse, it corrupts your timestamps. faster-whisper integrates the Silero voice activity detection model for exactly this: pass vad_filter=True and silent stretches are cut before transcription.
segments, info = model.transcribe("meeting.mp3", vad_filter=True)

# Tune how aggressive the silence cutting is:
segments, info = model.transcribe(
    "meeting.mp3",
    vad_filter=True,
    vad_parameters=dict(min_silence_duration_ms=500),
)
The default is deliberately conservative — the README notes it removes silence longer than about 2 seconds — so short natural pauses survive. To see what it actually does, I built a 39.9-second test file: 4 seconds of silence, 31.9 seconds of speech, 4 more seconds of silence. The difference is stark:
| Setting | Segments | First segment starts | Last segment ends |
|---|---|---|---|
| No VAD | 9 | 0.00 s | 35.44 s |
vad_filter=True (default) | 6 | 3.79 s | 35.79 s |
vad_filter=True, 500 ms | 6 | 3.79 s | 35.79 s |
Without VAD, the model absorbed the 4 seconds of leading silence into its timing — the segments run 0.00 s to 35.44 s on a 39.9-second file, meaning every timestamp is shifted and no longer lines up with the real audio. With VAD, the silence is correctly excluded: the first segment starts at 3.79 s, right where the speech begins, and the timestamps stay anchored to the original file. One honest note: on this clip, the aggressive 500 ms setting produced identical output to the default — the default was already catching the long silences. Tune the threshold down for choppy audio with short pauses, but do not expect miracles on every file; measure it on yours.
Step 5: Word timestamps and subtitles#
Segment timestamps get you paragraphs; word timestamps get you karaoke-style highlighting, precise subtitle sync, and searchable audio. Enable them with one flag, then walk segment.words:
segments, _ = model.transcribe("audio.mp3", word_timestamps=True)

for s in segments:
    for w in s.words:
        print(f"{w.word} ({w.start:.2f}s - {w.end:.2f}s)")
Measured output on the test clip — 95 words, each with start and end times:
 Welcome (0.00s - 0.44s)
 to (0.44s - 0.58s)
 this (0.58s - 0.80s)
 hands (0.80s - 1.04s)
-on (1.04s - 1.24s)
 tutorial. (1.24s - 1.64s)
...
From there, subtitles are a twenty-line formatting exercise. faster-whisper gives you the data; the SRT container is just numbered blocks of start --> end plus text:
def to_srt(segments, path):
    def fmt(t):
        ms = int(round(t * 1000))
        h, ms = divmod(ms, 3600000)
        m, ms = divmod(ms, 60000)
        s, ms = divmod(ms, 1000)
        return f"{h:02d}:{m:02d}:{s:02d},{ms:03d}"

    with open(path, "w") as f:
        for i, seg in enumerate(segments, 1):
            f.write(f"{i}\n{fmt(seg.start)} --> {fmt(seg.end)}\n{seg.text.strip()}\n\n")

segments, _ = model.transcribe("audio.mp3", beam_size=5)
to_srt(segments, "audio.srt")
The resulting audio.srt drops straight into any video editor or player:
1
00:00:00,000 --> 00:00:01,640
Welcome to this hands-on tutorial.

2
00:00:02,220 --> 00:00:05,560
Today you will learn how to turn speech into text on your own computer,
Step 6: Other languages#
Whisper is multilingual, and faster-whisper inherits that. Language is auto-detected on every transcription — the info object tells you what it found and how confident it was. I tested a 15-word French sentence: detected fr with probability 0.993, transcribed with zero word errors.
segments, info = model.transcribe("audio_fr.mp3")
print(info.language, info.language_probability)
# fr 0.993
If you already know the language, say so — it skips detection and avoids misfires on very short clips:
segments, info = model.transcribe("audio_fr.mp3", language="fr")One exception to know about: the distil-large-v3 distilled variants are English-only. The README's own example pins language="en" and condition_on_previous_text=False for them — use a full-size model if you need other languages.
Gotchas worth knowing#
Three things I learned the hard way while measuring this tutorial:
1. initial_prompt can backfire. The prompt parameter biases the decoder toward expected vocabulary — useful for jargon and proper nouns. But it is a bias, not a hint. With initial_prompt="faster-whisper is a fast speech-to-text library by SYSTRAN.", the model transcribed the product name as "FasterWisper" — one garbled word. Without the prompt, it correctly wrote "Faster Whisper". Use initial prompts for domain vocabulary, then verify the effect on your audio instead of assuming it helped.
2. Clean audio flatters every model. My 0.000 word error rates were measured on clean, single-speaker, studio-quality speech. Real-world audio — accents, background noise, crosstalk, bad microphones — is harder, and that is exactly where the larger models justify their cost. Treat my tiny-vs-base numbers as a best case, not a promise.
3. There is no CLI in the package. The README documents the Python API only — do not go looking for a faster-whisper command; it does not ship one. The twenty-line script above is the interface, which is honestly fine: transcription is three lines, and everything interesting (VAD, timestamps, subtitles) is a parameter away.
Which approach should you use?#
| Situation | Pick |
|---|---|
| Laptop, quick drafts, private by default | faster-whisper, tiny or base, device="cpu", compute_type="int8" |
| Best accuracy on CPU, long files | faster-whisper, small or medium, int8 |
| NVIDIA GPU available | faster-whisper, device="cuda", compute_type="float16", large-v3 or turbo (needs cuBLAS for CUDA 12 and cuDNN 9 per the README) |
| Already deep in PyTorch, want the reference | openai-whisper — simpler API, but slower and hungrier than faster-whisper |
| Need speaker diarization, streaming, or have no local machine | A managed API — you pay per minute and your audio leaves your machine |
The takeaway#
One pip install buys you the whole pipeline: language detection, segmentation, silence filtering, word-level timestamps, and subtitle export — free, offline, and private. Start with tiny on CPU, turn on vad_filter for anything with pauses, and only reach for bigger models when your transcripts tell you the small one is struggling. Your audio never leaves the machine, the meter never runs, and the next time someone proposes a transcription API, you will know exactly what you are paying for: convenience, not capability.