Pi-Remote: drive your pi coding agent from your phone
Pi-Remote mirrors your live pi coding-agent session to any browser, so you can watch runs, answer prompts, and send commands from your phone — through a relay you run yourself. This guide sets it up end to end: pi, the relay, the extension, and the QR phone link.
- The project: Xpropel/Pi-Remote — 327 stars, 10 forks, MIT license, created October 28, 2026; latest release v2.1.20, published November 9, 2026. TypeScript; needs Node ≥ 22.18.
- The agent it drives: pi (earendil-works/pi) — 121,125 stars, MIT; npm package
@earendil-works/pi-coding-agentis at version 1.5.1. Pi-Remote is a companion built on pi's official extension API; it does not modify pi's source. - The plumbing: a Node relay on ports 7001 (extension channel) and 7002 (web UI). Three tokens — local, viewer, admin — all in gitignored config files.
- The phone link:
attach --linkshows a QR code and pairing code; scan it, check the 2-digit code, approve with the admin token. Serverless mode (setup --local) needs no cloud server; away from home, a Cloudflare Tunnel gives a temporary public URL that changes on every start. - Honest limit: Pi-Remote works with pi only — not Claude Code, Codex, or Cursor. Long transcripts are not virtualized (latest 300 messages load first), and it is single-user by design.

Three ways to drive an agent from your phone
The question is not whether your coding agent can run while you are away from the desk — it can, and has for years. The question is what the phone gets to do about it: watch, steer, or just hang on through SSH. Three tools answer that three ways, and the right one depends entirely on which agent you run.
| Pi-Remote | T3 Code | SSH + tmux | |
|---|---|---|---|
| Agents | pi only | Claude Code, Codex, Cursor, Grok Build, OpenCode, Antigravity, fx | Any terminal agent |
| What you install | pi + a cloned repo + a relay | T3 Code server + provider CLIs | An SSH server — usually already there |
| Cost | $0, self-hosted | $0; T3 Connect free for up to 3 machines | $0 |
| Away from home | Cloudflare Tunnel on demand, temporary URL | T3 Connect (t3 up) or Tailscale | SSH from anywhere the port is reachable |
| Who holds the session | Your machine, always | Your machine, via T3's relay | Your machine, direct |
| Best for | pi users who want zero cloud | Multi-agent users on Claude Code and Codex | Anyone who already lives in a terminal |
Pi-Remote is the newest of the three — created October 28, 2026, and already at its v2.1.20 release on November 9. The rest of this tutorial sets it up end to end.
Pi-Remote: the self-hosted mirror
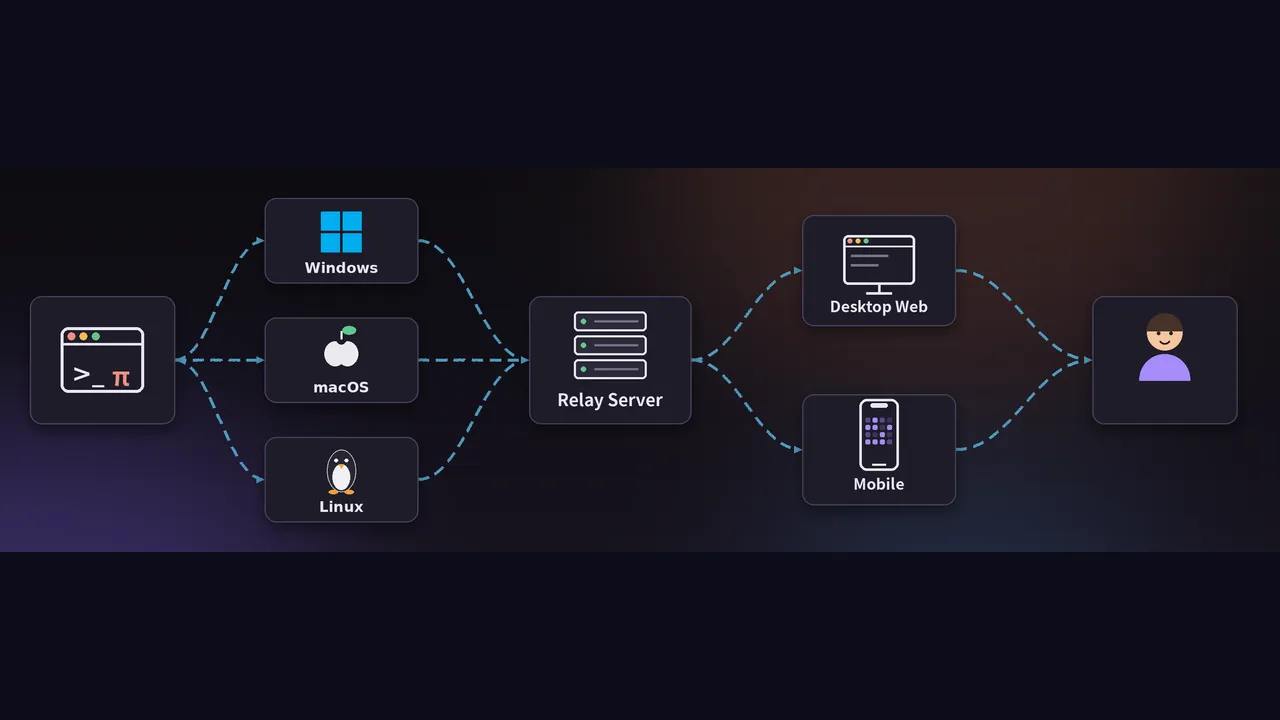
Pi-Remote is a companion for pi, Earendil's terminal coding agent — the 121,125-star, MIT-licensed agent we covered in our hands-on pi tutorial. It attaches to a running pi session through pi's official extension API: it does not modify pi's source and does not take over the terminal. The session stays in the local pi process at all times; the browser shows a real-time mirror and can send messages and commands back. Three pieces do the work: a sync extension inside the pi process, a Node relay, and a web UI.
What you'll need
- Node.js 22.18 or newer — check with
node --version. Both pi and Pi-Remote need it. - A machine that stays on while you're away — a desktop, a laptop that doesn't sleep, or a small home server. The relay and pi both run on it.
- A phone with a camera, for the QR link. No app to install: the phone side is a web page.
- A model provider configured for pi — an API key, or a local endpoint. Our pi tutorial covers the
models.jsonsetup; this guide picks up once pi itself runs.
Step 1: Install pi
Pi-Remote is a companion, not a replacement: it needs pi installed and running first.
npm install -g @earendil-works/pi-coding-agentThat pulls the current release — 1.5.1 at the time of writing. Start pi once and confirm it opens; if it asks for a model, point it at your provider first. Nothing else in this guide works until pi itself runs.
Step 2: Clone Pi-Remote and install it
git clone https://github.com/Xpropel/Pi-Remote.git
cd Pi-Remote
npm install
The repo is small and MIT-licensed — TypeScript throughout, a relay/ directory for the server, a ui/ directory for the web interface, and a deploy/ directory with the scripts the next steps use.
Step 3: Start the relay
npm run relayThat starts two channels: port 7001 for the extension and port 7002 for the web UI. The extension channel binds to 127.0.0.1 by default — only processes on this machine can reach it. Keep this terminal open; the relay has to stay up for as long as you want the phone to work.
Step 4: Point the setup at the relay and install the sync extension
node deploy/setup.cjs ws://127.0.0.1:7001
deploy/sync-extension.sh
The first command writes the relay address into the local configuration. The second installs the sync extension into ~/.pi/agent/extensions/ — the piece that forwards session events out of pi and executes remote messages and commands inside it. On Windows, the same steps use the .cmd and .ps1 scripts in deploy/.
Step 5: Attach the device and start pi
deploy/attach.shThis opens the attach window, and the device comes online. Then, in a second terminal:
deploy/start-pi.shPi starts with the sync extension loaded. The relay now has a live session to mirror — and the device is only reachable while the attach window stays open. Close the window and the phone disconnects immediately; that gating is deliberate.
Step 6: Open the UI and link your phone
On the machine itself, open http://127.0.0.1:7002 and enter the viewer token from your .env. You should see the live session — output, tool calls, and status, updating as pi works.
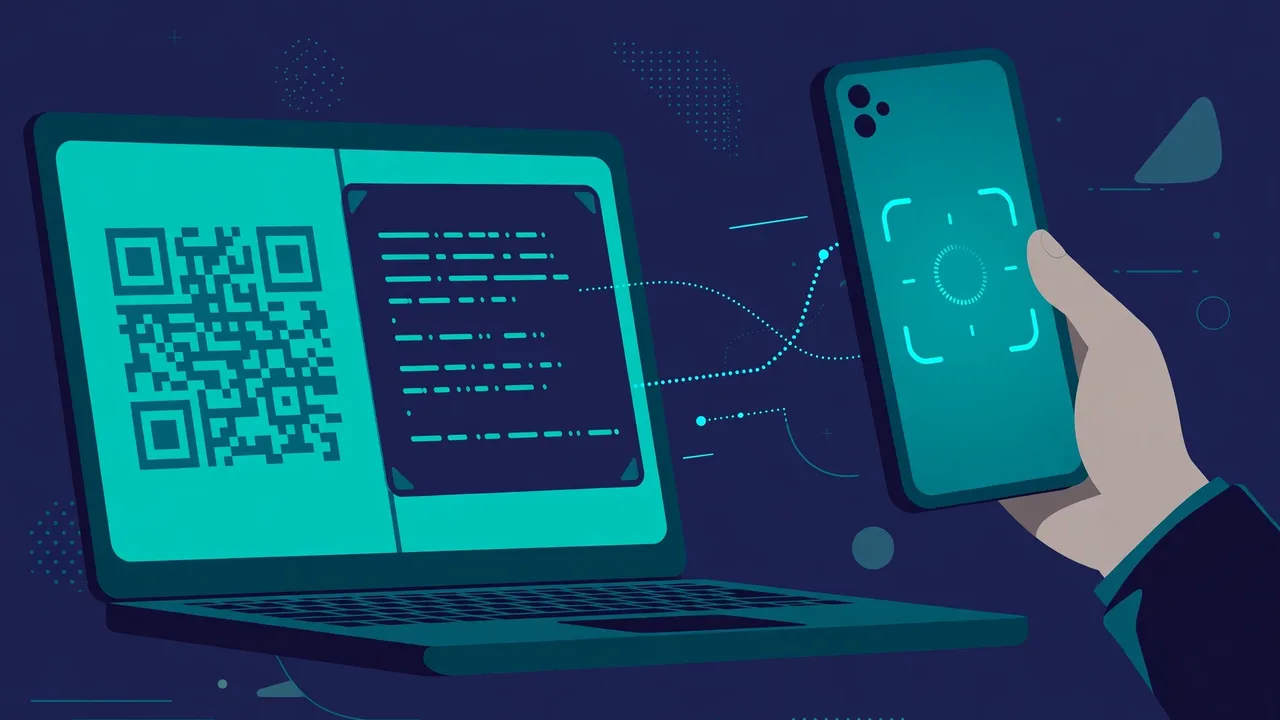
To link the phone, run attach --link on the machine that runs pi. The terminal and a local window show a QR code and a pairing code. Scan it with the phone, verify the device info and the 2-digit check code on the confirmation page, and approve with the admin token. The device token is then written to the local .env automatically; the manual pairing-code flow still exists if the camera can't read the code.
Step 7: Take it outside the house
At home, nothing else is needed: serverless mode runs the relay on your own computer — a one-time setup --local — and the phone connects over the same Wi-Fi. Away from home, turn on a Cloudflare Tunnel on demand and open a temporary public URL by QR code. The URL changes on every start, and closing the attach window stops everything.
For a permanent setup, the relay also runs as a single Docker Compose service, or as a systemd unit on a server. The server guide lives in deploy/README.md — note it is written in Chinese, while the main README and quick start are in English.
What you can do from the phone
- Watch everything: output, tool calls, and status changes sync to the browser in real time, with incremental catch-up after a reconnect.
- Answer and steer: send messages to the session; while pi is busy, messages queue or steer, and delivery is confirmed.
- Run commands: switch model and thinking level, compact context manually, create, fork, or clone sessions, navigate the session tree, and inspect usage.
- See the cost: token and cost usage update with the session and show in the UI status area.
- Use several machines: several machines can share one relay, and the UI lists each device, its online state, and its sessions — and can start a new session on a chosen device.
- Make it yours: six skins — Cursor, Claude, and Codex looks, each in dark and light.
Security, in one paragraph
The extension and the web UI use separate tokens — local, viewer, admin — and all three live in gitignored config files. The viewer token is the one to guard: anyone holding it can send messages to a session, and pi runs with tool permissions, so treat it as a password. Port 7002 serves the page and WebSocket only and exposes no file endpoints, but it is plain HTTP by default, so use it on a trusted network, a tunnel, or behind TLS — never expose 7002 directly to the internet. Remote bash is disabled by default and must be enabled explicitly, its working directory restricted to session directories and registered projects. Conversation content is not persisted by default; persistence is opt-in, with 30-day retention.
Where it falls short
Three honest limits, all from the project's own README. Long transcripts are not virtualized: the UI mounts the most recent 300 messages and loads older ones page by page, so a very long session gets paginated. The relay needs a server you manage — the local loop mode excepted — so this is not a zero-infrastructure tool, just a zero-cloud-account one. And it is single-user by design: there is no multi-user permission system. The fourth limit is scope: Pi-Remote drives pi, and only pi. If your agent is Claude Code, this is the wrong tool — which is where the next contender comes in.
T3 Code: the multi-agent remote
If Pi-Remote is the pi-only answer, T3 Code is the multi-agent one. It is a free, open-source (MIT) control surface that drives Claude Code, Codex, Cursor, Grok Build, OpenCode, Antigravity, and fx from a phone, browser, or desktop app — 54,126 stars as of November 9, 2026, with its v0.1.8 release the same day Pi-Remote shipped v2.1.20. A server on your machine starts the provider CLIs and normalizes their events into one interface; remote access runs over T3 Connect (t3 up), LAN pairing (t3 pair), or Tailscale, and the free T3 Connect tier links up to 3 machines. The trade: you adopt T3's account and relay instead of running your own, and you need each provider CLI installed and authenticated. Our full hands-on is in T3 Code: drive Claude Code, Codex and Cursor from your phone.
SSH + tmux: the baseline that never breaks
The third option needs no new software at all. Run the agent inside a tmux session on the machine, then attach to it from the phone over SSH whenever you want: ssh user@host -t 'tmux attach -t agent'. It costs nothing, works with any agent, and has no relay, no tokens, and no account. What it gives up is everything the other two add: no live mirroring UI, no usage view, no one-tap model switching, no session tree — just an 80-column terminal and your own discipline. It is the right answer when the session is short and the phone is a fallback, and the wrong one when the phone is the plan.
The verdict
If you run pi, Pi-Remote is the obvious pick: free, self-hosted, no account, and the QR pairing takes minutes. The session never leaves your machine, the relay is yours, and the phone gets the full picture — output, tool calls, cost, and control. If you run Claude Code or Codex, T3 Code is the equivalent, and it is the better tool for anyone juggling several agents. And if you already live in tmux, nothing here beats free — but you give up the phone UI, the usage view, and the model switch. The real story is the timing: two phone-remote tools shipped releases on the same day, November 9. The phone stopped being a second-class terminal for coding agents — and for pi users, the remote is now a ten-minute setup.
What you built: a self-hosted relay mirroring your live pi session to any browser, with your phone linked by QR code, able to watch runs, answer prompts, switch models, compact context, and check token cost — from the couch or from another city.