Spec-driven development with GitHub Spec Kit: make your AI agent build what you actually meant
Every agentic coding session eventually produces the same disappointment: the code works, the tests pass, and it is not what you asked for — an edge case you never mentioned handled the wrong way, an architecture decision the agent made in passing. GitHub's Spec Kit is the industry's answer, and it has become the most-starred project in its category: write the specification first, then let the agent implement it, with every artifact — constitution, spec, plan, tasks — as versioned Markdown in your repo.

The failure mode is familiar to anyone who has handed a coding agent a feature request. You write two paragraphs. The agent writes four hundred lines. Somewhere in the middle, it decided how errors are reported, which library to use for parsing, and what the command-line flags are called — none of which you asked for, all of which you now have to unpick in review. The agent didn't misbehave. It filled silence with plausible invention, because that is what language models do when a prompt leaves decisions open.
Spec-driven development inverts the relationship. Its premise, stated verbatim in Spec Kit's methodology document: "Specifications don't serve code — code serves specifications." The specification becomes the primary artifact; the plan, the task list, and the code are generated from it. You still get the agent's speed — but the decisions it is allowed to make are the ones you already recorded.
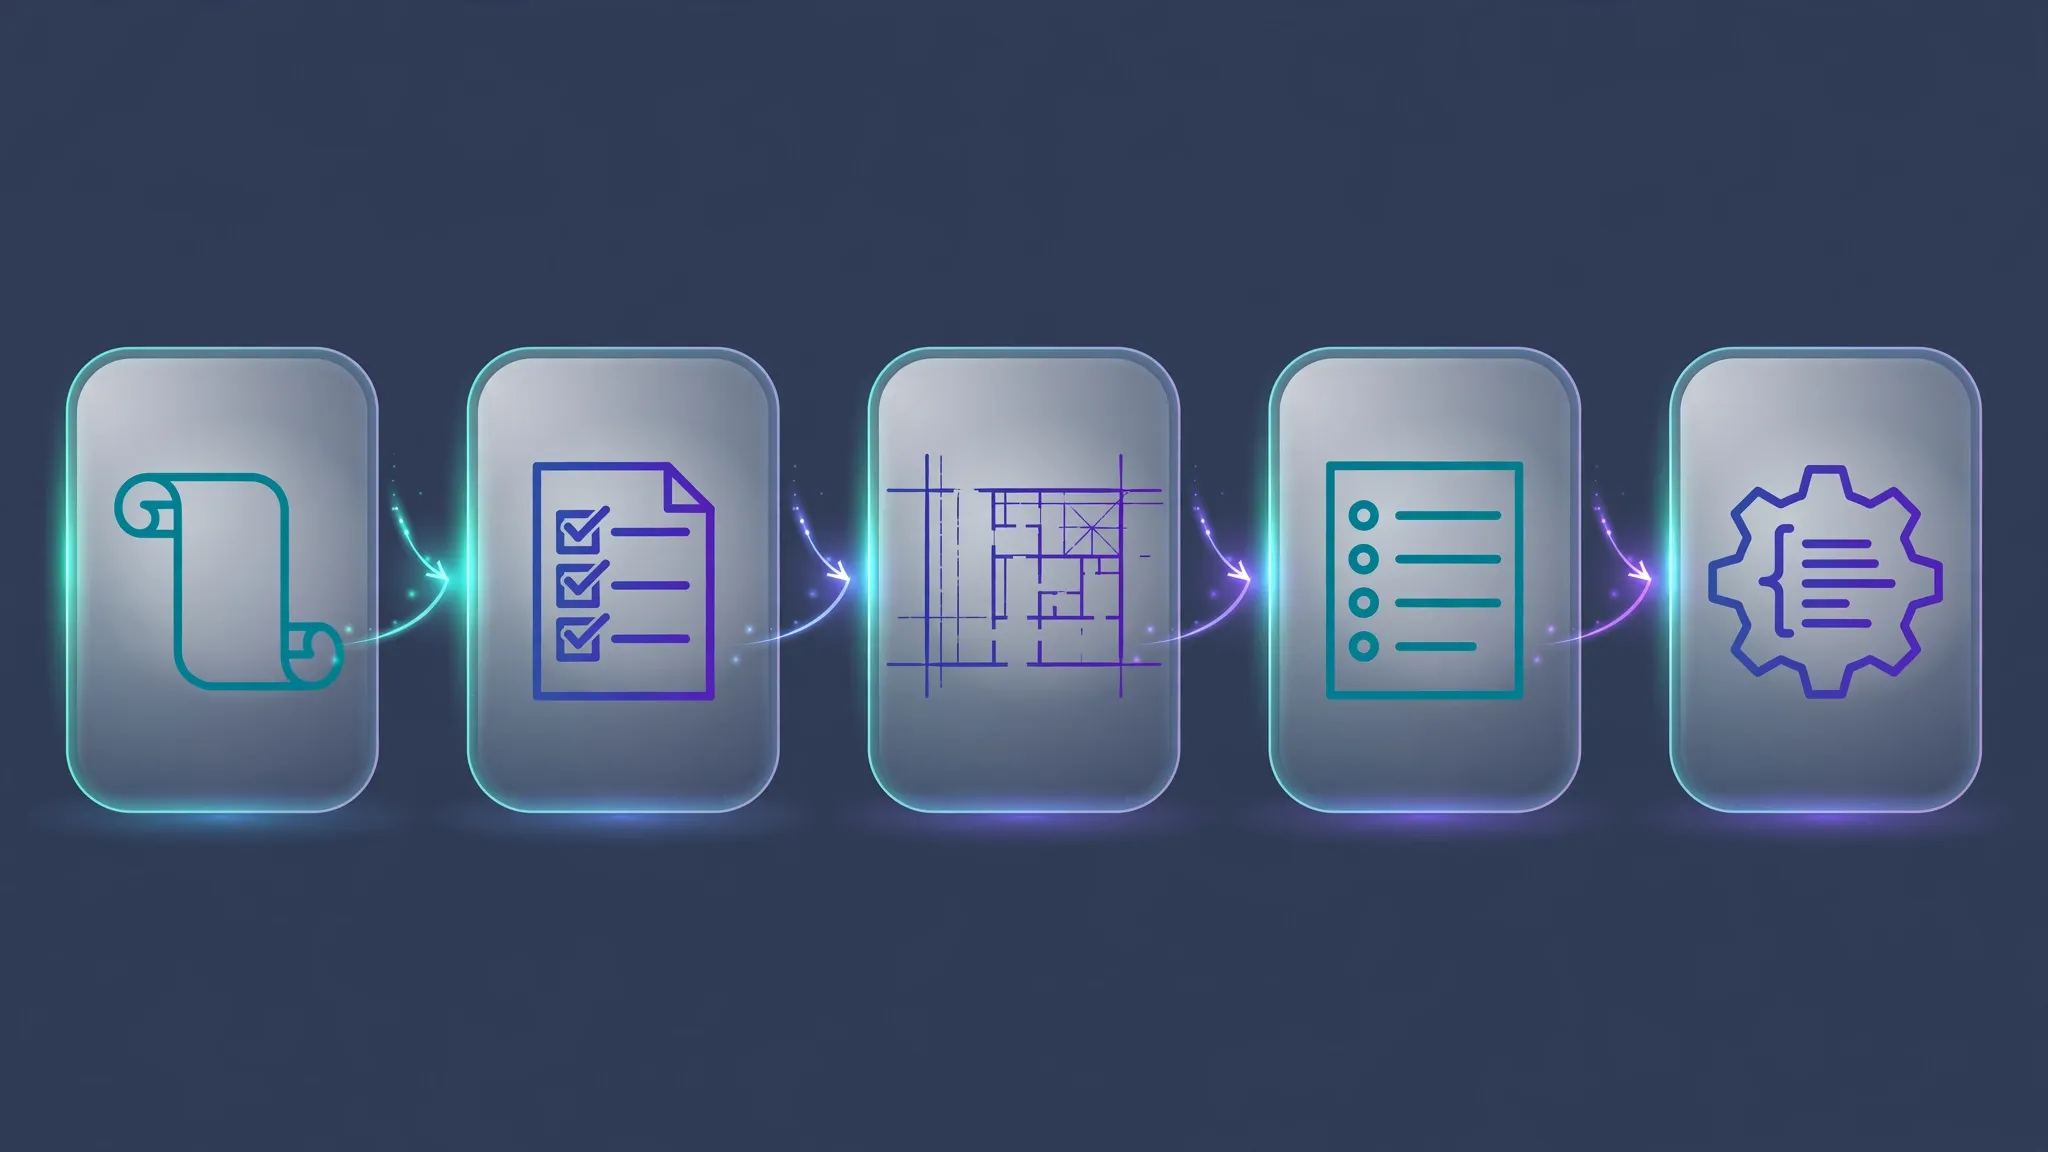
Spec Kit is GitHub's open-source toolkit for the method, and it has become the reference implementation: an independent comparison puts it at roughly 133,000 stars and 12,000 forks as of September 2026, the most-starred project in its category by more than two to one, MIT-licensed, maintained under the github organization. A specify CLI scaffolds the workflow into your project, and a set of agent commands — slash commands or skills, depending on your tool — walks a feature through five stages: constitution, specification, plan, tasks, implementation. This tutorial installs the CLI (version 1.0.12, tested for this article), scaffolds a real project, and produces every artifact, step by step.
What you'll need#
- A terminal with
uv(Astral's Python package manager — install from astral.sh if you don't have it). The Specify CLI installs as a singleuv tool, no virtualenv juggling. - An AI coding agent — Claude Code is the reference integration, but Spec Kit supports more than thirty agents, from GitHub Copilot and Gemini CLI to Cursor and Codex CLI. Steps 1–7 of this tutorial are fully testable without an agent; only the final implementation step runs inside one.
- A worked example. We'll build changelog-gen: a small CLI that reads a repo's conventional-commit history and writes a
CHANGELOG.mdin Keep-a-Changelog format. Small enough to finish, real enough that the artifacts have teeth. - About 30–40 minutes. No API keys, no servers, no cost — the CLI, templates, and scaffolding are all local and offline.
What spec-driven development actually is#
Strip away the tooling and the method is five artifacts, produced in order, each one constraining what the next stage may invent:
| Artifact | Answers | Written |
|---|---|---|
constitution.md | What principles every feature must honor (testing discipline, architecture rules, constraints) | Once per project, amended rarely |
spec.md | What the feature does — user stories, acceptance scenarios, edge cases. No implementation. | Per feature, with the agent |
plan.md (+ research.md, data-model.md, contracts/) | How it will be built — tech choices, structure, interfaces | Per feature, with the agent |
tasks.md | Ordered, checkable implementation steps grouped by user story, with parallelizable ones marked | Per feature, generated from plan |
| The code | The expression of the specification in a particular language | Executed task by task |
The key design decision is that ambiguity is an explicit, named state, not something the agent silently resolves. When the spec-writing step hits a question it cannot answer, it writes a [NEEDS CLARIFICATION: ...] marker instead of guessing — and a dedicated clarify step interviews you to resolve every marker before planning begins. There is also a constitution check: the plan must pass a gate verifying it honors the constitution before research begins, and re-check after design. These two mechanisms — marked ambiguity and a constitutional gate — are what separate spec-driven development from "write a good prompt and hope."
Step 1: Install the Specify CLI#
The specify CLI is a Python package distributed on PyPI. Install it as an isolated tool so it never touches your project environments:
uv tool install specify-cliI ran this for the article and it installed specify-cli 1.0.12 with a single specify executable. Verify your install and check what your machine is ready for:
specify --version
# specify 1.0.12

specify check
specify check prints a table of the 30+ supported coding agents — Claude Code, Copilot, Gemini CLI, Cursor, Codex CLI, and the rest — marking which ones are installed as CLIs on your machine. It needs nothing else: no account, no token, no network beyond the initial install.
One more useful command to know now: specify self check verifies whether you are running the latest CLI release. The ecosystem moves fast enough that checking before a new project is a good habit.
Step 2: Initialize your project#
Run specify init in a new or existing directory. In an interactive terminal it asks which agent you use; for scripts and automation, pass everything as flags. This is the exact command I ran to scaffold the demo project for this article:
specify init --here --force --non-interactive \
  --integration claude --ignore-agent-tools
The flags: --here scaffolds into the current directory instead of creating a new one, --force skips the confirmation when the directory isn't empty, --non-interactive never prompts (without it, a non-interactive run defaults to the Copilot integration), --integration claude picks Claude Code — copilot, gemini, codex, cursor, and generic are other common values — and --ignore-agent-tools skips the check for installed agent CLIs, which is what you want in a sandbox or CI machine.
The scaffold lands two things in your project. First, agent commands wired for your chosen integration — for Claude Code these arrive as skills under .claude/skills/:
.claude/skills/
├── speckit-analyze/        # cross-artifact consistency report
├── speckit-checklist/      # quality checklists for requirements
├── speckit-clarify/        # structured ambiguity resolution
├── speckit-constitution/   # project principles
├── speckit-converge/       # assess drift, append remaining work
├── speckit-implement/      # execute the task list
├── speckit-plan/           # implementation plan from spec
├── speckit-specify/        # feature specification
├── speckit-tasks/          # task list from plan
└── speckit-taskstoissues/  # convert tasks to GitHub issues
Second, the runtime infrastructure under .specify/: memory/constitution.md (your project's constitution), templates/ (the spec, plan, task, and checklist templates the agent fills in), scripts/, and workflows/. Project files are scaffolded from assets bundled inside the CLI package, so initialization needs no network and the templates always match the installed version.
One naming detail that trips people up: the commands are hyphenated skills in Claude Code (/speckit-constitution) but most other agents expose the traditional dotted slash commands (/speckit.constitution). Same workflow, different invocation surface — the rest of this tutorial uses the dotted form and notes the Claude equivalent where it matters.
Step 3: Ratify the constitution#
The constitution is the one artifact you write mostly yourself. It lives at .specify/memory/constitution.md and holds the project's non-negotiable principles — the rules every future spec, plan, and implementation must satisfy. Run /speckit.constitution (/speckit-constitution in Claude Code) in your agent and it interviews you about your principles, then fills the template. The template's shape, which I verified from a fresh scaffold:
# [PROJECT_NAME] Constitution

## Core Principles

### [PRINCIPLE_1_NAME]
[PRINCIPLE_1_DESCRIPTION]

...

## [SECTION_2_NAME]
[SECTION_2_CONTENT]

## Governance
[GOVERNANCE_RULES]

**Version**: [CONSTITUTION_VERSION] | **Ratified**: [RATIFICATION_DATE] | **Last Amended**: [LAST_AMENDED_DATE]
The template's own examples show the intended flavor: Library-First ("every feature starts as a standalone library"), CLI Interface ("text in/out protocol: stdin/args → stdout, errors → stderr"), Test-First (NON-NEGOTIABLE) ("TDD mandatory: tests written → user approved → tests fail → then implement"). Principles can be marked non-negotiable; governance states that the constitution supersedes all other practices and that amendments require documentation, approval, and a migration plan.
Here is a filled constitution for our worked example, changelog-gen — written to actually constrain the agent, not to decorate the repo:
# changelog-gen Constitution

## Core Principles

### I. Library-First
The changelog engine (parsing, grouping, rendering) is a standalone,
independently testable library. The CLI is a thin wrapper over it.
No organizational-only libraries.

### II. CLI Interface
Text in/out: stdin/args → stdout, errors → stderr. Exit 0 only when a
changelog was written. Support `--json` for machine consumption.

### III. Test-First (NON-NEGOTIABLE)
TDD mandatory: tests written → user approved → tests fail → then implement.
Red-Green-Refactor strictly enforced.

### IV. Conventional Commits Only
Only `feat:`, `fix:`, `docs:`, and similar conventional types are parsed.
Non-conventional history is an error, never silently skipped.

## Additional Constraints
- Output must follow the Keep-a-Changelog format.
- Single-file distribution: zero runtime dependencies.

## Governance
Constitution supersedes all other practices. Amendments require
documentation, approval, and a migration plan. All PRs must verify
compliance; complexity must be justified.

**Version**: 1.0.0 | **Ratified**: 2026-09-27 | **Last Amended**: 2026-09-27
Write fewer, stronger principles. Three to five non-negotiables that you would enforce in code review beat twenty vague aspirations — and remember the template stamps a version and ratification date on every revision, so the constitution itself is a versioned contract the agent can be held to.
Step 4: Write the feature spec#
Now describe what you want to build — what, not how. Run /speckit.specify with a one-paragraph feature description and the agent produces spec.md from the template. The template forces a structure that is doing real methodological work:
- User stories, prioritized P1/P2/P3 — and each story must be independently testable: implementing just one story still yields a viable slice of functionality. This is the template's own rule, and it is the difference between a spec and a wish list.
- Acceptance scenarios in Given/When/Then under each story — concrete enough to become tests later.
- Edge cases as an explicit section, not an afterthought.
[NEEDS CLARIFICATION: ...]markers anywhere the agent refuses to guess — these feed Step 5.
A worked excerpt for changelog-gen's first story:
# Feature Specification: changelog-gen

**Feature Branch**: `001-changelog-gen`

**Created**: 2026-09-27

**Status**: Draft

**Input**: User description: "Generate a CHANGELOG.md from
conventional-commit git history"

## User Scenarios & Testing *(mandatory)*

### User Story 1 - Generate a changelog from history (Priority: P1)

A maintainer runs `changelog-gen` in a repo and gets a CHANGELOG.md in
Keep-a-Changelog format, grouped Added / Fixed / Changed.

**Why this priority**: The core value. Without it, nothing else matters.

**Independent Test**: Run on a repo with known commits; diff the output
against a hand-written expected changelog.

**Acceptance Scenarios**:
1. **Given** a repo with `feat:` and `fix:` commits since the last tag,
   **When** the user runs `changelog-gen`,
   **Then** a CHANGELOG.md is written with the commits grouped under
   Added and Fixed.
2. **Given** no previous tag exists, **When** the user runs
   `changelog-gen`, **Then** the full history is used and the tool says
   so in its output.

### Edge Cases

- What happens when a commit message doesn't follow Conventional
  Commits? → [NEEDS CLARIFICATION: fail with an error, or skip with
  a warning?]
- How does the system handle a repo with no git history?
Notice what is absent: no mention of Python or Rust, no parsing library, no file layout. The spec says what the user gets and how you will know it works. The 001- branch prefix is the template's convention for feature branches — sequential numbering keeps parallel features from colliding.
Step 5: Clarify and analyze before you plan#
Spec Kit ships three optional quality commands, and their placement in the workflow is deliberate:
/speckit.clarify— run before planning. It collects every[NEEDS CLARIFICATION]marker in the spec and interviews you with structured questions until each is resolved into a written answer. For changelog-gen, this is where "fail with an error, or skip with a warning?" becomes a recorded decision instead of a guess the agent makes at 2 a.m./speckit.checklist— run after planning. It generates custom quality checklists that validate requirements completeness, clarity, and consistency — the template calls them "unit tests for English."/speckit.analyze— run after tasks are generated but before implementation. It performs a cross-artifact consistency and coverage analysis: does every user story in the spec have tasks? Does the plan contradict the constitution? This is the last cheap moment to catch drift, because the next step writes code.
Skipping these is the most common way people get "spec-driven" results that are no better than prompting. The five minutes clarify takes is the whole point of the method: decisions recorded in the spec propagate everywhere downstream for free.
Step 6: Draft the implementation plan#
With the spec settled, run /speckit.plan. This is where how gets decided — and where the constitution gate fires. The plan template opens with a Technical Context section (language, dependencies, storage, testing, target platform, performance goals, constraints), then a Constitution Check that must pass before Phase 0 research begins and is re-checked after design. For changelog-gen, the check would confirm that Test-First is honored (tests before implementation tasks), that the CLI is a thin wrapper over a standalone library, and that only conventional commits are parsed.
The plan produces a feature directory with a fixed layout — this is from the actual template, verified against a fresh scaffold:
specs/001-changelog-gen/
├── plan.md          # this file: summary, technical context, structure
├── research.md      # Phase 0 output: decisions investigated and resolved
├── data-model.md    # Phase 1 output: entities and their relationships
├── quickstart.md    # Phase 1 output: how to build and run the feature
├── contracts/       # Phase 1 output: interfaces between components
└── tasks.md         # Phase 2 output (created by /speckit.tasks, not plan)
Phases are explicit: Phase 0 is research (resolve unknowns, record decisions), Phase 1 is design (data model, contracts, quickstart), Phase 2 is the task list. The plan is the only artifact that talks about technology choices — if a library choice is wrong, you find out here, in a document, before any code exists.
Step 7: Generate the task list#
/speckit.tasks converts the plan into tasks.md: ordered, checkable steps the agent will execute one by one. The template enforces a strict format — [ID] [P?] [Story] — where [P] marks tasks that can run in parallel (different files, no dependencies) and [Story] ties each task back to a user story from the spec. Tasks are grouped so each user story can be implemented, tested, and delivered independently, in priority order. The phase structure from the real template:
## Phase 1: Setup (Shared Infrastructure)
- [ ] T001 Create project structure per implementation plan
- [ ] T002 Initialize project with dependencies
- [ ] T003 [P] Configure linting and formatting tools

## Phase 2: Foundational (Blocking Prerequisites)
...core infrastructure that MUST be complete before any user story...

## Phase 3: User Story 1 (Priority: P1)
...tests first (if Test-First is in the constitution), then implementation...

## Phase N: Polish & Cross-Cutting Concerns
Two rules from the template are worth internalizing: the sample tasks it ships with must be replaced — they are illustration only, and the command regenerates them from your spec's stories, your plan's entities, and your contracts. And tests are optional unless the spec or constitution demands them — which is exactly why you put Test-First in the constitution back in Step 3.
Step 8: Implement, review, converge#
Only now does code get written. Run /speckit.implement in your agent and it executes the task list, checking items off as it goes. Your job during implementation is the one the method is designed to make tractable: review each completed task against the spec, not against your fuzzy memory of what you wanted. The acceptance scenarios from Step 4 are the review criteria, written down before the code existed.
For existing projects — the brownfield case — there is /speckit.converge: it assesses the codebase against the spec, plan, and tasks, and appends whatever is still missing as new tasks. And /speckit.taskstoissues converts the task list into GitHub issues when you want the work tracked in the open.
A realistic expectation to set: the first time you run this loop, the agent's spec will be thinner than you hoped and the plan will need your edits. That is fine — editing a plan is cheap, editing code is not. The loop gets better as your constitution accumulates the decisions you keep re-making, which is the real compounding asset of the method.
Which approach should you use?#
Spec Kit is the reference implementation, but it is not the only way to do spec-driven development — and the honest answer depends on what you are building and how you work:
- Use the Spec Kit CLI when you want the enforced machinery: the constitution gate, the clarify interview, the cross-artifact analysis, and integrations for the agent you already use. It is the fastest path to the full workflow and the best-documented one, with the templates always matching the installed version.
- Write the four documents by hand when your repo already has conventions the scaffold would fight. Some teams deliberately adopt "the workflow, not the wrapper":
constitution.md,spec.md,plan.md,tasks.mdas plain files, in order, no CLI. You lose the gates; you keep zero tooling and full control of the layout. - Consider the alternatives when the philosophy differs from what you need. BMAD-METHOD is orchestration-first — specialized agent roles and an agile loop rather than a spec-first pipeline. OpenSpec is proposal-first with delta markers, built for brownfield iteration. AWS Kiro structures specs as requirements/design/tasks with EARS-format statements. All are MIT-licensed and open; the choice is about which discipline your team will actually follow.
- Skip the whole thing when the work is a one-file script or a well-understood change. A spec for renaming a variable is process theater. The method pays off for 0-to-1 features, multi-session work, and anything where "what did we decide?" gets asked more than once.
One more honest note: garbage in, garbage out. A vague spec produces a vague plan produces vague code, and no template fixes that — the clarify step only works if you engage with it. Spec Kit moves the hard thinking earlier; it does not remove it.
The takeaway#
The insight behind spec-driven development is that AI coding agents are excellent at implementation and terrible at deciding what to implement. Every ambiguity in your prompt is a decision you delegated by accident. Spec Kit's contribution is making the non-accidental path cheap: a CLI that scaffolds the artifacts, commands that write the spec with you, gates that refuse to plan around marked ambiguity, and a task list that turns implementation into execution rather than invention.
Install it with one command, ratify a constitution with three to five real principles, and run your next feature through the loop — spec, clarify, plan, tasks, implement. When the agent surprises you, the surprise will be in the code's quality, not in what the code does. That is the whole point.