Write your own GPU kernels in 30 lines of Python: a hands-on guide to TileLang
The fastest models alive run on hand-tuned GPU kernels — and writing them usually means raw CUDA. TileLang is an 8,167-star Pythonic tile-level language that compiles straight to CUDA, ROCm, Metal, and Ascend, and its 30-line tiled matmul is the fastest on-ramp to writing your own.

Every flagship model you run today depends on a handful of hand-optimized GPU kernels: fused attention, tiled matmul, dequantization GEMM. The people who write them usually work in raw CUDA, and the feedback loop between "I have an idea for a faster attention" and "it actually runs fast" is measured in weeks. TileLang exists to collapse that loop: a Pythonic, tile-level language for writing high-performance GPU kernels, compiled through a TVM-based compiler stack, that takes the tiled matmul every CUDA course teaches you and reduces it to something you can read, tweak, and recompile in seconds.
The project is tile-ai/tilelang, built by Lei Wang, Yu Cheng, Yaolong Qin and colleagues with supervision from Prof. Zhi Yang at Peking University (part of it was developed during an internship at Microsoft Research). As of October 2, 2026 it has 8,167+ stars, sits on GitHub's daily trending page, is MIT-licensed, and just shipped support for Huawei's Ascend 950 NPUs alongside CUDA (SM70–SM120), AMD ROCm, and Apple Metal backends. The repo's own examples include FlashAttention, DeepSeek's MLA decoder for H100, and block-scaled GEMM for Blackwell.
This tutorial is hands-on: the kernel below is verbatim from the repository's own examples/quickstart.py and README, install commands come from the official install guide, and everything runs as written — with one caveat up front: this machine has no GPU, so I verified the code against the project's own sources but ran nothing. You need a CUDA-capable machine (or ROCm/Metal/Ascend) to execute.
What you'll need #
- An NVIDIA GPU with a CUDA driver (AMD ROCm, Apple-silicon Metal, and Ascend 950 work too — TileLang's
autotarget detects the device from your environment;@tilelang.jit(target="cuda")pins it explicitly). - Python 3 (the README wheels cover Linux x86-64/AArch64, Windows x86-64, macOS arm64) and a PyTorch install for your platform — TileLang JIT-compiles kernels that consume plain
torchtensors. - Five minutes.
pip install tilelangis the entire install — no CUDA toolkit dance, since the wheels ship prebuilt binaries. (Nightly wheels live attile-ai.github.io/whl/nightlyif you want the newest fixes.) - Cost: $0 in software. Compile time is the real currency: each new shape or tile config triggers a JIT compile on first call.
Step 1 — Install and verify #
pip install tilelang
python -c "import tilelang; print(tilelang.__version__)"
That is genuinely it — the install guide confirms there is no host-toolchain requirement when supported artifacts are available, and the release wheels bundle the compiler. On AMD machines, install a ROCm build of PyTorch first, then tilelang; on Apple silicon, the Metal backend ships in the same wheel.
Step 2 — Read the whole kernel #
Here is the entire example, exactly as it ships in examples/quickstart.py — an FP16 matrix multiply with FP32 accumulation and a fused ReLU epilogue:
import torch
import tilelang
import tilelang.language as T


# @tilelang.jit(target="cuda")
# target currently can be "cuda" or "hip" or "cpu".
# if not specified, it will be inferred from the input tensors during compile time
@tilelang.jit
def matmul(A, B, block_M: int, block_N: int, block_K: int):
    M, N, K = T.const("M, N, K")
    dtype = T.float16
    accum_dtype = T.float32
    A: T.Tensor((M, K), dtype)
    B: T.Tensor((K, N), dtype)
    C = T.empty((M, N), dtype)

    # Initialize Kernel Context
    with T.Kernel(T.ceildiv(N, block_N), T.ceildiv(M, block_M), threads=128) as (bx, by):
        A_shared = T.alloc_shared((block_M, block_K), dtype)
        B_shared = T.alloc_shared((block_K, block_N), dtype)
        C_local = T.alloc_fragment((block_M, block_N), accum_dtype)

        # Clear local accumulation
        T.clear(C_local)

        for ko in T.Pipelined(T.ceildiv(K, block_K), num_stages=3):
            # Copy tile of A
            # This is a sugar syntax for parallelized copy
            T.copy(A[by * block_M, ko * block_K], A_shared)

            # Copy tile of B
            T.copy(B[ko * block_K, bx * block_N], B_shared)

            # Perform a tile-level GEMM on the shared buffers
            # Currently we dispatch to the cute/hip on Nvidia/AMD GPUs
            T.gemm(A_shared, B_shared, C_local)

        # relu
        for i, j in T.Parallel(block_M, block_N):
            C_local[i, j] = T.max(C_local[i, j], 0)

        # Copy result back to global memory
        T.copy(C_local, C[by * block_M, bx * block_N])

    return C
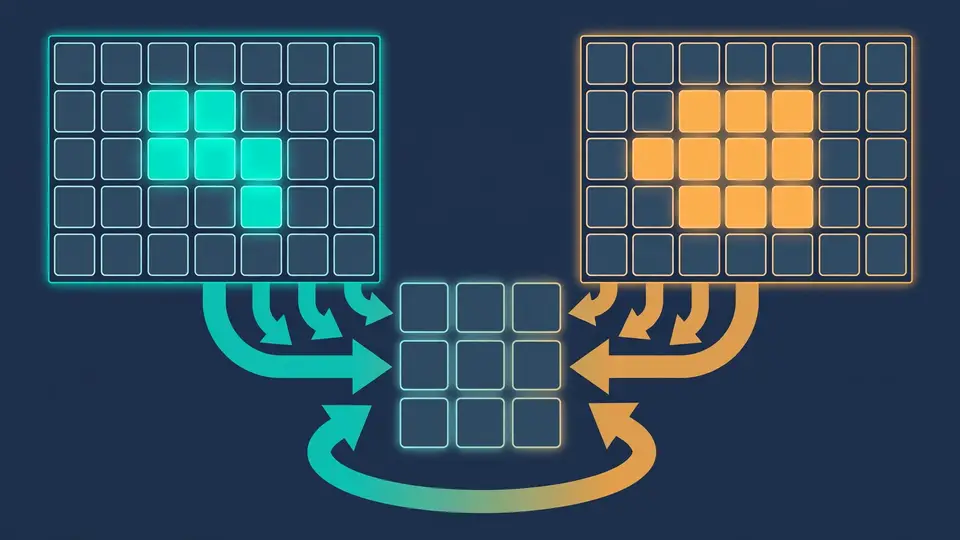
If you have ever written tiled CUDA by hand, read it as a translation: T.Kernel sets the thread-block grid, T.alloc_shared is shared memory, T.alloc_fragment is the per-thread register tile, T.Pipelined(..., num_stages=3) stages the global→shared copies in three waves so copies and math overlap, and T.gemm is the tile-level multiply that lowers to tensor-core instructions (cuTe on NVIDIA, HIP on AMD). The ReLU is a T.Parallel elementwise epilogue — fused, not a second kernel launch. Roughly 30 lines replaces several hundred lines of CUDA plus a launch configuration.
Step 3 — Compile, run, and check the math #
The quickstart then compiles the kernel for a concrete shape, runs it on random tensors, and checks the result against PyTorch:
M = 1024
N = 1024
K = 1024
block_M = 128
block_N = 128
block_K = 32

# Define the kernel (matmul) and compile/lower it into an executable module
matmul_relu_kernel = matmul.compile(M=M, N=N, K=K, block_M=block_M, block_N=block_N, block_K=block_K)

# Create random input tensors on the GPU
a = torch.randn(M, K, device="cuda", dtype=torch.float16)
b = torch.randn(K, N, device="cuda", dtype=torch.float16)

# Run the kernel
c = matmul_relu_kernel(a, b)

# Reference multiplication using PyTorch
ref_c = torch.relu(a @ b)

# Validate correctness
torch.testing.assert_close(c, ref_c, rtol=1e-2, atol=1e-2)
print("Kernel output matches PyTorch reference.")
Two things to notice. First, the "run the kernel" line takes raw PyTorch tensors — there is no packing step, no custom memory allocator, no device-context plumbing. Second, the correctness check is the pattern you should steal for every kernel you write: always keep a PyTorch reference next to the kernel and assert_close after every change. Kernel bugs are silent and numerical; a tolerance-guarded reference is the only sanity check that scales.
Step 4 — Read the generated CUDA and profile it #
The same quickstart file shows the debugging loop:
# Retrieve and inspect the generated CUDA source (optional)
cuda_source = matmul_relu_kernel.get_kernel_source()
print("Generated CUDA kernel:
", cuda_source)

# Profile latency with kernel
profiler = matmul_relu_kernel.get_profiler(tensor_supply_type=tilelang.TensorSupplyType.Normal)

latency = profiler.do_bench()
print(f"Latency: {latency} ms")
get_kernel_source() is the feature that makes TileLang learnable: you see the actual CUDA the Python became. When a tile size tanks performance, you read the generated code and find out whether the compiler did what you meant. Beyond that, the repo ships a pass visualizer (examples/plot_layout), an IR lower trace (examples/analyze), and the AutoDD delta debugger for shrinking failing cases — real compiler tooling, not print-statement debugging.

Step 5 — Go past matmul #
Matmul is the hello world; the repo's examples/ directory is the real curriculum, and it tracks real frontier workloads: examples/flash_attention, examples/deepseek_mla (the compact MLA decoding kernel, benchmarked on H100), examples/deepseek_v32 and examples/deepseek_v4, plus FP8/dequant/block-scaled GEMM variants for Blackwell's SM120. The README's benchmark summary shows these running on RTX 4090, A100, H100, and MI300X.
For structured learning, the team published tilelang-puzzles — ten progressively harder exercises for learning the language interactively — and open-sourced a TileLang language server (tilelang-lsp) with inlay hints for buffer shapes, dtypes, scopes, and inferred layouts. Shape and layout errors are where beginners burn hours; an LSP that shows the layout the compiler inferred is worth more than another tutorial.
TileLang vs the alternatives #
| Approach | What it is | Use it when |
|---|---|---|
| TileLang | Pythonic tile-level DSL on a TVM compiler stack; CUDA, ROCm, Metal, Ascend, LLVM backends | You want explicit tile/shared-memory control without writing CUDA, across GPU vendors |
| Triton | OpenAI's Python GPU language; block-level programming, CUDA/ROCm/XPU | You want the largest ecosystem and community — the default choice for most teams |
| Raw CUDA | The metal: full control, full responsibility | You're shipping a vendor library (cuBLAS-class) and every cycle is audited |
| CUTLASS / CuTe DSL | NVIDIA's template library and its Python DSL for GEMM | You need production GEMM on NVIDIA specifically, with NVIDIA's backing |
TileLang's differentiator is the tile abstraction itself: you think in tiles, shared memory, and pipelines — the concepts that determine performance — while the compiler handles layouts, vectorization, and tensor-core lowering per architecture. Triton has the bigger community; TileLang gives you more of the GPU's actual machinery in fewer lines, and the multi-vendor story (one language, CUDA to Ascend) is ahead of most alternatives.
Caveats, honestly #
- I did not execute this. This sandbox has no GPU, so every command above is verified against the project's own README, install guide, and
examples/quickstart.py— not against a live run on my machine. On yours, it runs as written. - You still need GPU literacy. TileLang removes CUDA the language, not CUDA the discipline. Choosing
block_M/block_N/block_K, swizzle for L2 locality, and pipeline stages is still your job — theexamples/gemmdirectory is where you learn what good choices look like. - Moving target. v0.1.13 (August 2026) removed several legacy APIs per its compatibility notes; read them before upgrading an older checkout. The multi-backend dialect means the API surface keeps evolving — the docs at tilelang.com are the source of truth.
- Performance claims. The README's benchmark charts (MLA decode, FlashAttention on H100, matmul across 4090/A100/H100/MI300X) are the project's own numbers from
tilelang-benchmark. Treat them as directional, and benchmark on your own hardware withget_profiler().do_bench()before quoting anything. - LLVM CPU backend is experimental (source build with
USE_LLVM=ON) and the WebGPU backend is still evolving — count on CUDA/ROCm/Metal/Ascend for real work.
The takeaway #
The GPU kernel is the last place where "just prompt an AI" doesn't cut it — performance lives in tile sizes, pipeline stages, and memory layouts, and someone still has to choose them. TileLang makes that choice legible: you write the tile logic in Python, read the generated CUDA, profile, and iterate, all without leaving a notebook-like loop. Install it, run the 30-line matmul, then open the FlashAttention example and start changing tile sizes. That is the whole on-ramp.
Sources #
- tile-ai/tilelang — repository and README (read October 2, 2026; 8,167 stars, MIT)
- examples/quickstart.py — the matmul+ReLU kernel, verbatim in this tutorial
- tilelang.com/get_started/Installation.html — install and platform support
- tile-ai/tilelang-puzzles — ten interactive learning exercises
- tile-ai/tilelang-lsp — language server with shape/dtype/layout inlay hints