Turn raw footage into final.mp4 with one chat command: a hands-on guide to video-use
Drop raw footage in a folder, chat with your coding agent, get final.mp4 back. A hands-on guide to installing browser-use's 27,500-star video-use skill, running your first edit, and how its transcript-first pipeline works.
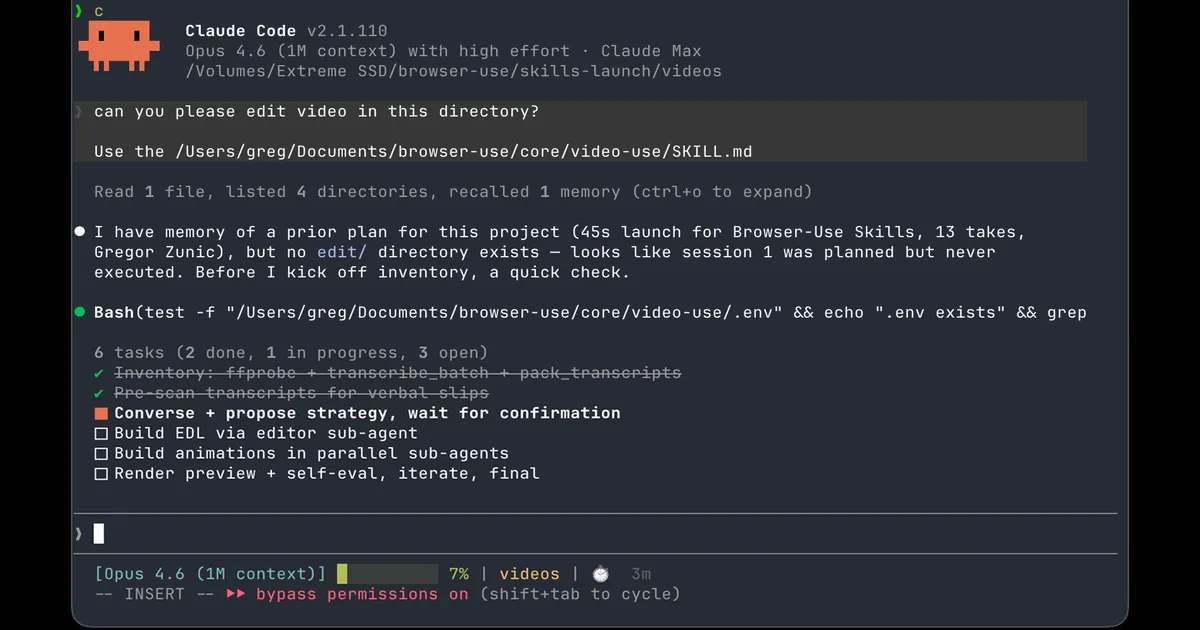
Video editing is one of the last creative jobs that still resists automation: thirty takes of a talking head, filler words to cut, subtitles to burn, color to fix — and an hour in Premiere for every five minutes of finished video. video-use, from the team behind the 60,000-star browser-use project, takes a different approach: it does not ship an app. It ships a skill that turns the coding agent you already use into a video editor. Drop raw footage in a folder, chat with Claude Code, get final.mp4 back. The repo holds 27,500+ stars and an MIT license, and everything below is verified against its README and docs.
The pitch is simple enough to be suspicious — so this tutorial walks through exactly how to install it, what to type, and, most usefully, what the agent is actually doing under the hood. The core trick: the LLM never watches your video. It reads it.
What you’ll need #
- A coding agent with shell access: Claude Code, Codex, Hermes, Openclaw — anything that can run commands and read files.
ffmpegandffprobeon yourPATH(hard requirement — this is what actually renders the video).- An ElevenLabs API key — transcription runs through ElevenLabs Scribe. Per the README, without a key “nothing transcribes”. Grab one at elevenlabs.io/app/settings/api-keys.
- A folder of raw takes: talking heads, interviews, tutorials, travel footage — the skill makes zero assumptions about content type.
- About ten minutes. The README’s commands below use
brew(macOS); on Linux swap in your package manager for the ffmpeg line.
Step 1 — Install the skill #
The manual install is four moves: clone, symlink the repo into your agent’s skills directory, install Python deps, wire up ffmpeg and the API key. Verbatim from the README:
# 1. Clone and symlink into your agent's skills directory
git clone https://github.com/browser-use/video-use ~/Developer/video-use
ln -sfn ~/Developer/video-use ~/.claude/skills/video-use   # Claude Code
# ln -sfn ~/Developer/video-use ~/.codex/skills/video-use  # Codex

# 2. Install deps
cd ~/Developer/video-use
uv sync                      # or: pip install -e .
brew install ffmpeg          # required
brew install yt-dlp          # optional, for downloading online sources

# 3. Add your ElevenLabs API key
cp .env.example .env
$EDITOR .env                  # set ELEVENLABS_API_KEY=<your-key>
The Python deps are the usual suspects — requests, librosa, matplotlib, pillow, numpy — pulled in by uv sync. No console scripts to install; the helpers are invoked directly as python helpers/<name>.py.
Step 2 — The one-prompt alternative #
If you would rather not touch the shell at all, the repo ships a setup prompt you paste straight into your agent:
Set up https://github.com/browser-use/video-use for me.

Read install.md first to install this repo, wire up ffmpeg, register the skill with whichever agent you're running under, and set up the ElevenLabs API key — ask me to paste it when you need it. Then read SKILL.md for daily usage, and always read helpers/ because that's where the editing scripts live. After install, don't transcribe anything on your own — just tell me it's ready and wait for me to drop footage into a folder.
The agent handles the clone, dependencies, and skill registration, and asks you exactly once — for the ElevenLabs key. Then it waits for footage.
Step 3 — Your first edit #
Point your agent at a folder of raw takes and give it one instruction:
cd /path/to/your/videos
claude   # or codex, hermes, etc.
Then in the session:
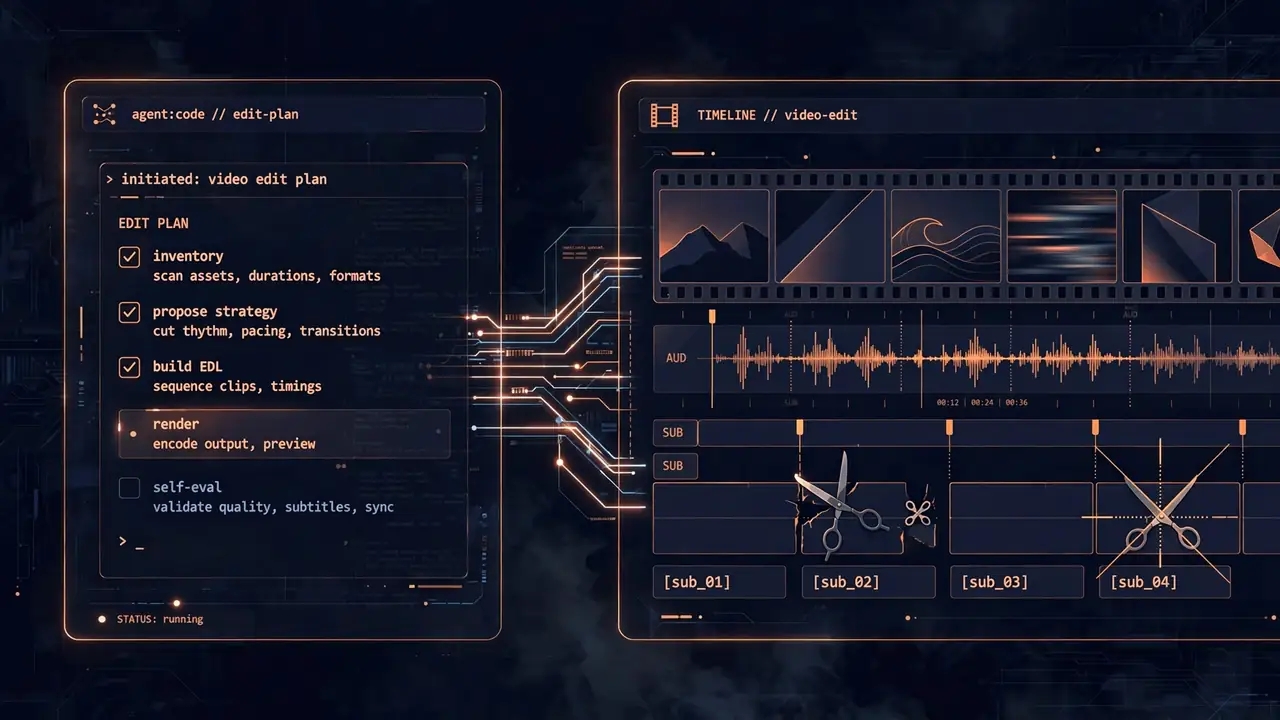
> edit these into a launch videoThe skill’s design rules force a specific rhythm: ask → confirm → execute → self-eval → persist. The agent inventories your sources, proposes an editing strategy, and waits for your OK before cutting anything. When it is done, the output lands in edit/final.mp4 next to your sources — everything it produces lives under /edit/, so the skill directory itself stays clean. Session memory persists in project.md, so next week’s session picks up where this one left off.
Step 4 — Under the hood: the LLM reads the video #
This is the part worth understanding, because it is why the thing works at all. Feeding video frames to an LLM is brutally expensive — the README’s own math: 30,000 frames × 1,500 tokens = 45M tokens of noise. video-use compresses the footage into two layers that give the model everything it needs to cut with word-boundary precision:
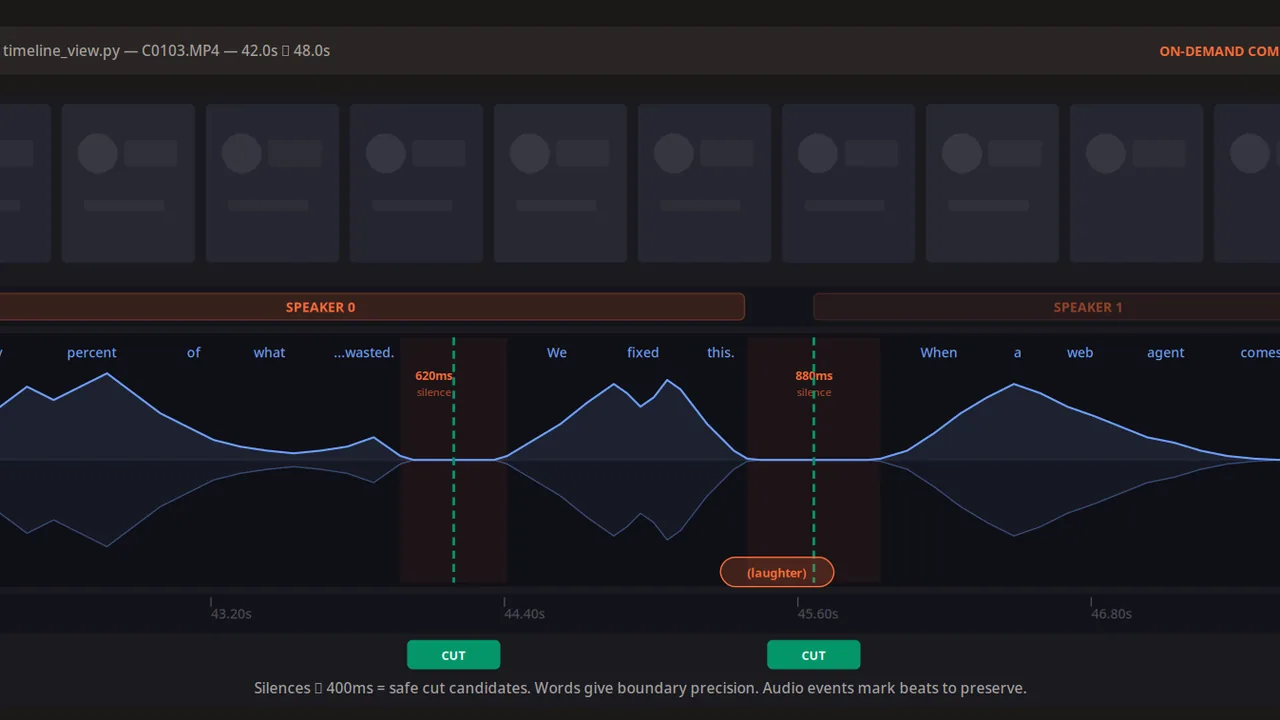
Layer 1 — the transcript (always loaded). One ElevenLabs Scribe call per source produces word-level timestamps, speaker diarization, and audio events like (laughter), (applause), (sigh). All takes are packed into a single ~12KB takes_packed.md — the model’s primary reading view:
## C0103 (duration: 43.0s, 8 phrases)

 [002.52-005.36] S0 Ninety percent of what a web agent does is completely wasted.

 [006.08-006.74] S0 We fixed this.
Layer 2 — the visual composite (on demand). A helper called timeline_view renders a filmstrip + waveform + word-labels PNG for any time range. It is only called at decision points — ambiguous pauses, retake comparisons, cut-point sanity checks. Total cost: 12KB of text plus a handful of PNGs instead of 45M tokens. Same idea as browser-use giving a model a structured DOM instead of screenshots, but for video.
The pipeline itself runs:
Transcribe ──> Pack ──> LLM Reasons ──> EDL ──> Render ──> Self-Eval
 │
 └─ issue? fix + re-render (max 3)
The self-eval loop is the unusual bit: after rendering, the agent runs timeline_view on the rendered output at every cut boundary — catching visual jumps, audio pops, and hidden subtitles — and you only see the preview after it passes. If something is wrong it fixes the edit decision list and re-renders, up to three attempts.
Step 5 — Make it yours #
Out of the box the skill cuts filler words (umm, uh, false starts) and dead space between takes, drops 30ms audio fades at every cut so you never hear a pop, and burns 2-word UPPERCASE subtitle chunks. Color grades come as warm-cinematic or neutral-punch, or any custom ffmpeg chain. To push further:
- Subtitles: the default style is fully customizable — change chunk size, casing, font, and position in the render helper.
- Grades: swap in your own ffmpeg color chains per segment.
- Animation overlays: the agent spawns parallel sub-agents — one per animation — using HyperFrames, Remotion, Manim, or PIL for lower thirds, kinetic text, and diagrams.
- Style memory: corrections and preferences land in
project.md, so the second video you cut already knows your subtitle style and grade.
What you built #
A repeatable, agent-driven editing pipeline: raw takes in, strategy proposal, approval gate, edit decision list, rendered final.mp4, and an automated self-evaluation pass at every cut boundary before you ever see the preview. Your taste is encoded in project.md and your subtitle/grade defaults, so each successive video starts closer to finished. For creators who shoot more than they edit — which is nearly all of them — the unit of work drops from an evening in a timeline to a single chat command plus one review pass.
Honest limitations #
- The ElevenLabs key is non-negotiable and paid. Transcription is the pipeline’s foundation and it runs on a commercial API — check Scribe pricing at elevenlabs.io before you commit. Your footage’s audio is also sent to ElevenLabs’ servers, so think twice before feeding it anything confidential.
- The agent never sees the video. Cuts come from speech boundaries and silence gaps, with
timeline_viewPNGs consulted only at decision points. For visually-driven edits — cutting on an exact reaction frame, matching action across angles — you will still be the director. - Self-eval caps at three attempts. If the render still fails its own checks after the third re-render, the problem comes back to you.
- ffmpeg on PATH, always. The skill renders with ffmpeg directly; a broken or missing install fails the whole pipeline, not just a step.
- Animation tooling is per-project. HyperFrames, Remotion, and Manim are invoked when you ask for animated overlays — they are not a bundled install.
The takeaway #
video-use is interesting less as a video tool than as a pattern: take a workflow that is 90% structured drudgery (transcribe, find the filler, mark the silences, burn the subtitles) and give the agent a text view of the problem instead of the raw media. The 45M-tokens-to-12KB compression is the whole trick, and it generalizes — any media workflow where the decisions can be made from a compact representation is a candidate for the same treatment. For now, though, the immediate payoff is concrete: your next talking-head video costs you one chat command and a review pass.
Exact commands reference #
# install
git clone https://github.com/browser-use/video-use ~/Developer/video-use
ln -sfn ~/Developer/video-use ~/.claude/skills/video-use
cd ~/Developer/video-use && uv sync
brew install ffmpeg yt-dlp
cp .env.example .env   # then set ELEVENLABS_API_KEY

# use
cd /path/to/your/videos
claude
# > edit these into a launch video
# output: /path/to/your/videos/edit/final.mp4