Track anything on live video with tamserve: hands-on with the SAM 2 serving engine
Meta's SAM 2 tracks anything you point at — one video at a time. tamserve, nine days old and already on the Hacker News front page, is the serving engine it was missing: one copy of the model follows every object on every camera. This tutorial installs it, tracks a ball through a six-second clip on CPU, and reports the measured error — 0.1 pixels.
- The project: aryamandarda/tamserve, 261 stars, 14 forks, Apache-2.0, created November 11, 2026 — Show HN November 16, Hacker News front page #18 on November 19 with 119 points. Version 0.3.3.
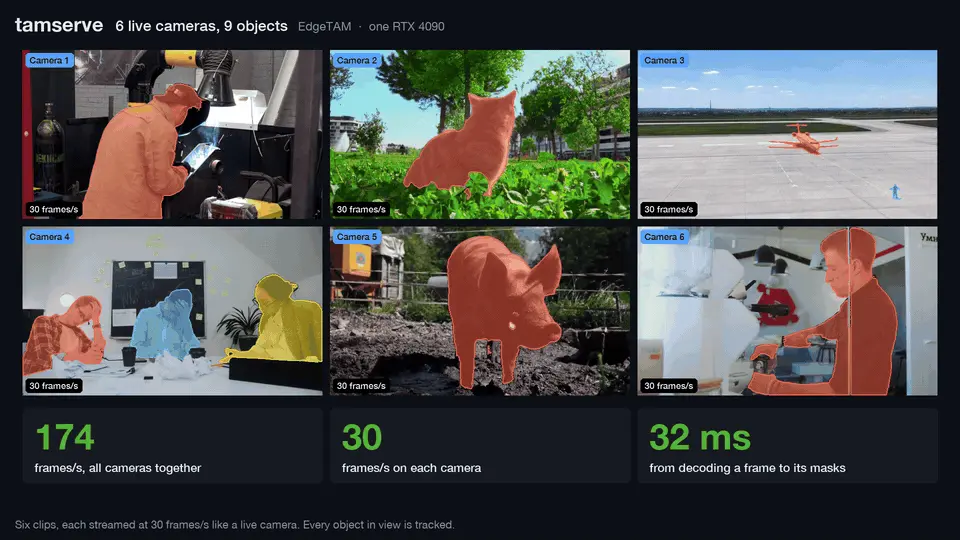
- The engine: one EdgeTAM model copy serves every camera; every object is a row in one batch; per-object memory capped at the prompt frame + last 6 frames + 15 summaries. Project's own RTX 4090 numbers: 8 cameras in 2.2 GB (stock: 8.6 GB), 323 fps total (stock: 280), DAVIS 2017 accuracy 0.8685 (stock: 0.8686).
- Verified here: 60-frame clip, mean centroid error 0.1 px, max 0.3 px, zero empty masks, 6.82 s/frame on CPU; add() and drop() verified on a 12-frame two-ball clip; first model load 35.8 s, second 4.6 s.
- The honest limit: CPU runs at seconds per frame — live video needs a GPU. Track-by-name (Tracker/PeopleTracker) needs SAM 3: 3.5 GB of gated weights, a Hugging Face login, and Meta's licence — not run here. No backward tracking, no mask nudging without re-seeding.
- The cost: free, Apache-2.0, no account, no API key. Install is about 900 MB on disk, mostly the CPU build of PyTorch (~800 MB); the EdgeTAM model is ~54 MB on first run.

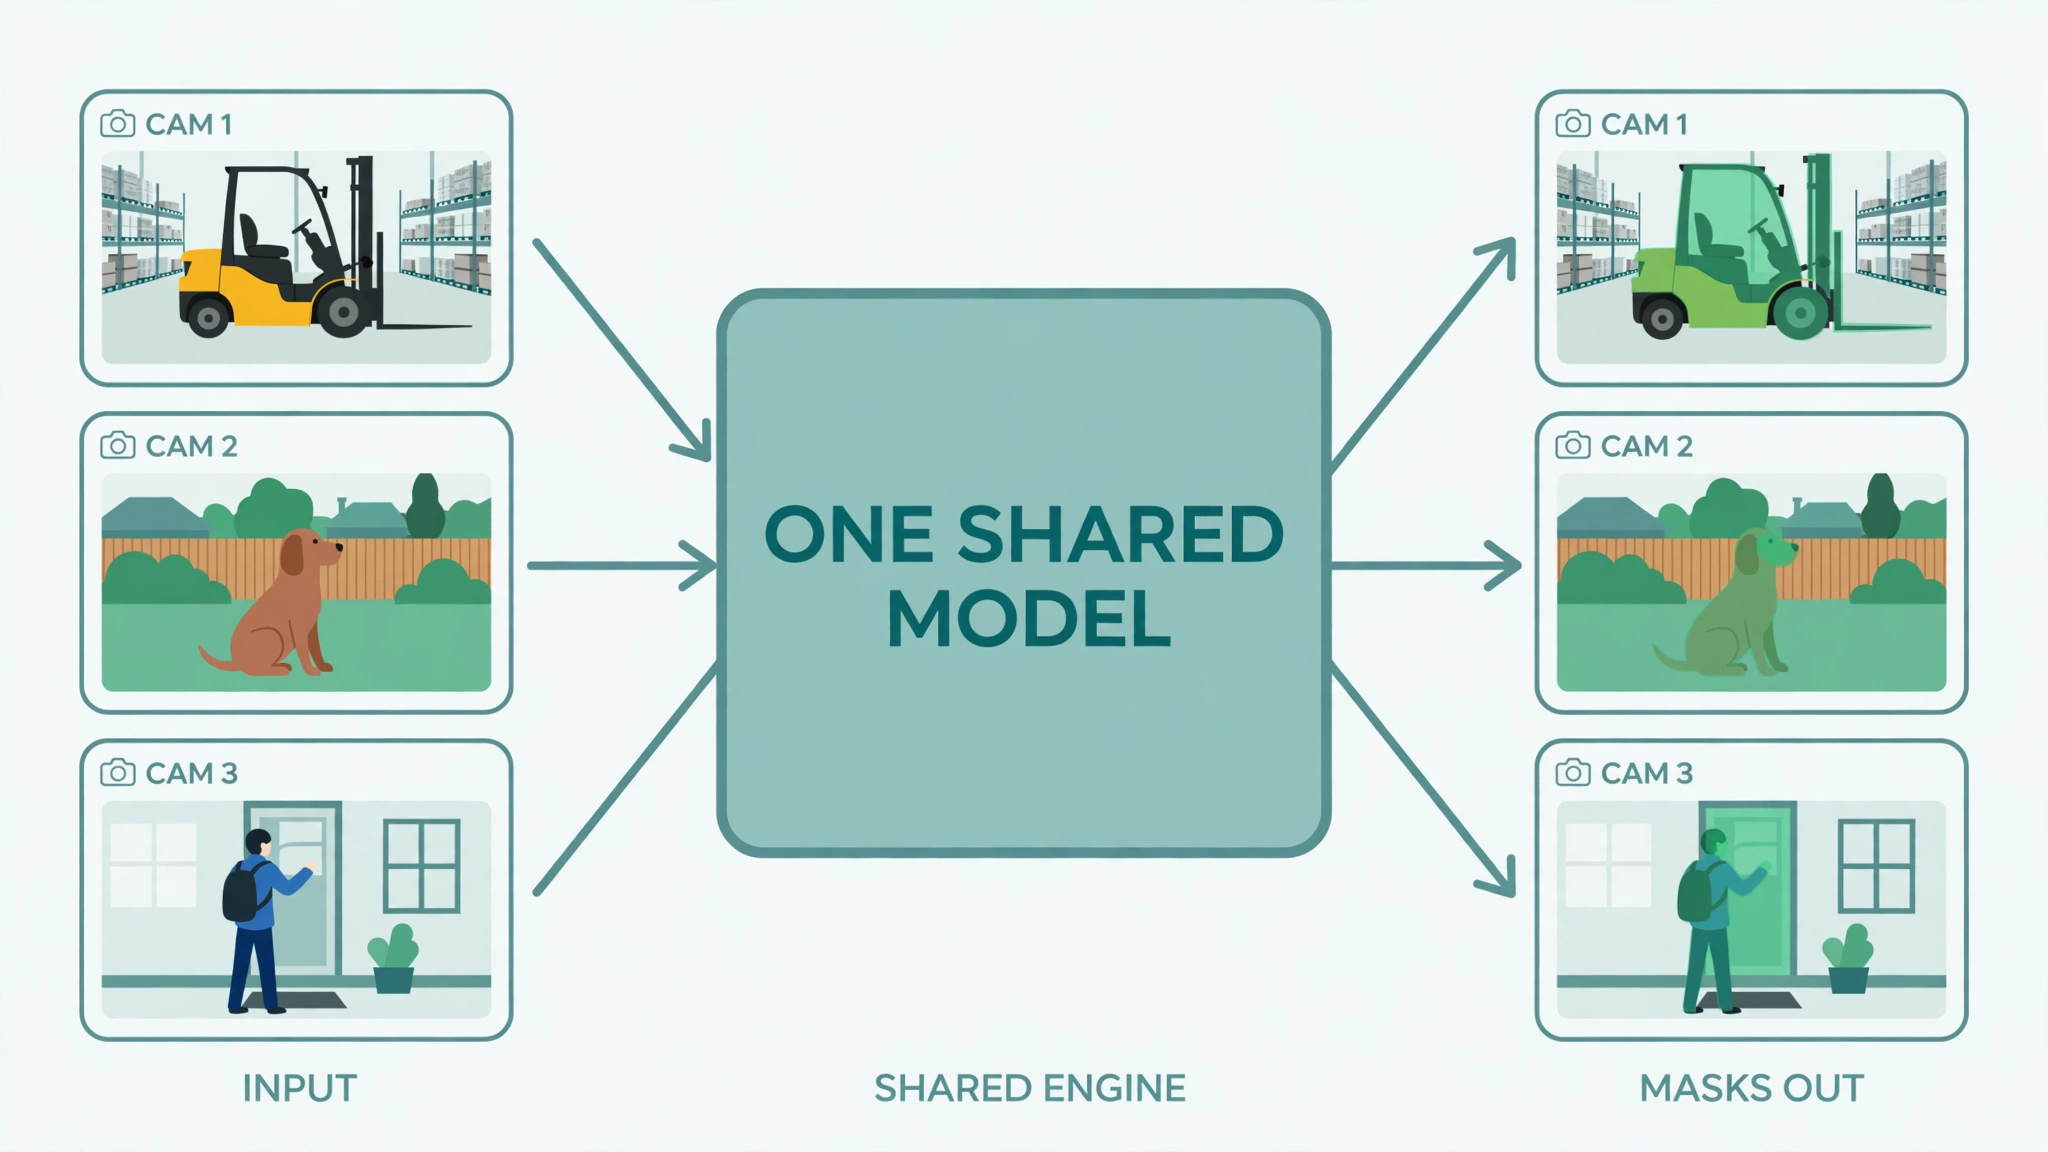
SAM 2 will track anything you point at — one recorded video at a time. Put it on several cameras and the usual answer is a copy of the model per camera: memory piles up with every copy, and with every minute of video. tamserve is the serving engine those models were missing: one copy of the model tracks every object on every camera, for as long as the cameras run.
The project is nine days old. Aryaman Darda created it on November 11, 2026; by November 20 it had 261 stars and 14 forks, and a Show HN post that reached the Hacker News front page at #18 on November 19 with 119 points. The reason it is moving that fast is a measurement, not a demo: on one RTX 4090, against EdgeTAM's own code, tamserve tracks eight cameras in 2.2 GB where stock needs 8.6 GB, at 323 frames a second against 280 — and the masks are the same to within rounding on DAVIS 2017 (0.8685 against 0.8686). Those numbers are the project's own, from its results doc; this tutorial re-runs the small end of the claim on a CPU and reports what actually happened.
You will install tamserve, generate a six-second test clip, track a moving ball through all sixty frames, turn the masks into a video you can watch, and then start a second object mid-clip and drop it. Everything below ran on a plain Linux VM with no GPU. The timings are CPU timings, and the honest version of them is stated where it matters: this is a GPU tool that happens to run on CPU for short clips.
What you will need#
- Python 3.10 or newer. This tutorial ran with Python 3.12.3.
- About 900 MB of disk for the install. The CPU build of PyTorch takes about 800 MB on disk; tamserve and its other dependencies take the rest. The EdgeTAM model is another 54 MB on first run.
- OpenCV for reading and writing video files:
pip install opencv-python-headless. - No account, no API key, no GPU for this tutorial. A GPU is what makes tamserve fast enough for live video; on CPU it runs at a few seconds per frame, which is fine for a six-second clip and nothing longer.
- About 15 minutes wall-clock, most of it the first model load and the CPU tracking run.
Step 1 — Install it#
Create a virtual environment and install tamserve. On a machine with an NVIDIA GPU, pip install tamserve pulls the CUDA build of PyTorch and you are done. On a CPU-only machine, install the CPU build of PyTorch first, or pip will fetch the CUDA wheel anyway:
python3 -m venv .venv
source .venv/bin/activate
pip install --index-url https://download.pytorch.org/whl/cpu torch torchvision
pip install tamserve opencv-python-headless
Verify the install:
python -c "import tamserve; print('tamserve OK')"Expected output:
tamserve OKThe install pulls torch 2.6 or newer, torchvision, numpy, tqdm, hydra-core, iopath, pillow, and timm — version 0.3.3 here. Nothing else is needed for the point-and-track path this tutorial uses. The first time you load a model, tamserve downloads the EdgeTAM source and its 54 MB checkpoint into ~/.cache/tamserve, pinned to one version and SHA-verified before it loads. Set the TAMSERVE_CACHE environment variable to move that directory.
Step 2 — Make a test clip#
Real footage works too, but a synthetic clip makes the check exact: you know where the ball is in every frame, so you can measure the tracker's error in pixels. Save this as make_clip.py and run it:
"""Generate the test clip: a red ball crossing a static scene (320x240, 10fps, 6s)."""
import cv2
import numpy as np

W, H, FPS, N = 320, 240, 10, 60
R = 26
out = cv2.VideoWriter("test.mp4",
                      cv2.VideoWriter_fourcc(*"mp4v"), FPS, (W, H))
rng = np.random.default_rng(7)
# static background: vertical gradient + fixed texture dots
bg = np.zeros((H, W, 3), dtype=np.uint8)
for y in range(H):
    bg[y, :, :] = (90 + y // 3, 95 + y // 3, 100 + y // 3)
for _ in range(40):
    cx, cy = rng.integers(0, W), rng.integers(0, H)
    cv2.circle(bg, (int(cx), int(cy)), 3, (70, 75, 80), -1)
centers = []
for i in range(N):
    x = int(40 + (280 - 40) * i / (N - 1))
    y = int(120 + 30 * np.sin(2 * np.pi * i / N))
    centers.append((x, y))
    frame = bg.copy()
    cv2.circle(frame, (x, y), R, (40, 40, 220), -1)  # BGR red
    cv2.circle(frame, (x, y), R, (20, 20, 160), 2)
    out.write(frame)
out.release()
np.save("centers.npy", np.array(centers))
print("wrote test.mp4, 60 frames; first center", centers[0], "last", centers[-1])
Expected output:
wrote test.mp4, 60 frames; first center (40, 120) last (280, 116)Check the file:
ffprobe -v error -show_entries format=duration -show_entries stream=width,height,r_frame_rate -of default=nw=1 test.mp4width=320
height=240
r_frame_rate=10/1
duration=6.000000Step 3 — Track your first object#
Save this as track_test.py. It loads EdgeTAM on the CPU, reads the clip, seeds the tracker with one box around the ball in the first frame, steps through all sixty frames, and writes an annotated video with the mask tinted green:
"""Track the ball through test.mp4 with tamserve on CPU; overlay masks; report."""
import time
import cv2
import numpy as np

from tamserve import Box, Engine, build_video_predictor

t0 = time.time()
predictor = build_video_predictor("cpu")  # first run downloads EdgeTAM (~54 MB)
print(f"predictor loaded in {time.time() - t0:.1f}s")
engine = Engine(predictor)

cap = cv2.VideoCapture("test.mp4")
frames = []
while True:
    ok, f = cap.read()
    if not ok:
        break
    frames.append(cv2.cvtColor(f, cv2.COLOR_BGR2RGB))
cap.release()
print(f"read {len(frames)} frames of {frames[0].shape}")

centers = np.load("centers.npy")
R = 26
x0, y0 = centers[0]
seeds = {"cam": {"ball": Box(int(x0 - R), int(y0 - R), int(x0 + R), int(y0 + R))}}

out = cv2.VideoWriter("tracked.mp4",
                      cv2.VideoWriter_fourcc(*"mp4v"), 10, (320, 240))
rows = []
t1 = time.time()
for i, fr in enumerate(frames):
    masks = engine.step({"cam": fr}, seeds if i == 0 else None)
    m = masks["cam"]["ball"]
    ys, xs = np.where(m)
    area = int(m.sum())
    cx, cy = (float(xs.mean()), float(ys.mean())) if area else (float("nan"), float("nan"))
    rows.append((i, area, round(cx, 1), round(cy, 1)))
    # overlay: green tint where the mask is
    vis = cv2.cvtColor(fr, cv2.COLOR_RGB2BGR)
    vis[m] = (vis[m] * 0.5 + np.array([0, 255, 0]) * 0.5).astype(np.uint8)
    out.write(vis)
out.release()
print(f"tracked {len(frames)} frames in {time.time() - t1:.1f}s "
      f"({(time.time() - t1) / len(frames):.2f}s/frame)")
for r in rows[::10]:
    print("frame", r[0], "mask px", r[1], "centroid", (r[2], r[3]),
          "true center", tuple(centers[r[0]]))
# accuracy summary
errs = [abs(r[2] - centers[r[0]][0]) + abs(r[3] - centers[r[0]][1]) for r in rows]
areas = [r[1] for r in rows]
print(f"mean centroid L1 error: {np.mean(errs):.1f}px; max: {np.max(errs):.1f}px")
print(f"mask area: mean {np.mean(areas):.0f}px (true disc ~{np.pi * R * R:.0f}px), "
      f"min {np.min(areas)}, max {np.max(areas)}")
print(f"empty masks: {sum(1 for a in areas if a == 0)} of {len(areas)}")
Three calls do the work. build_video_predictor("cpu") loads EdgeTAM, the default model. Engine(predictor) wraps it. engine.step({"cam": frame}, seeds) advances every tracked object by one frame and returns boolean masks at the frame's own size. Frames go in as H×W×3 uint8 RGB arrays — OpenCV gives you BGR, so convert. The box is in the frame's own pixels: Box(left, top, right, bottom). Pass the seeds only on the first frame; after that the engine remembers what it is tracking.
Run it:
python track_test.pyExpected output on the first run, with the model download included in the load time:
predictor loaded in 35.8s
read 60 frames of (240, 320, 3)
tracked 60 frames in 409.0s (6.82s/frame)
frame 0 mask px 2385 centroid (40.0, 119.9) true center (40, 120)
frame 10 mask px 2408 centroid (79.8, 145.0) true center (80, 145)
frame 20 mask px 2415 centroid (120.9, 145.0) true center (121, 145)
frame 30 mask px 2431 centroid (161.9, 120.0) true center (162, 120)
frame 40 mask px 2428 centroid (201.8, 93.9) true center (202, 94)
frame 50 mask px 2422 centroid (242.9, 93.9) true center (243, 94)
mean centroid L1 error: 0.1px; max: 0.3px
mask area: mean 2416px (true disc ~2124px), min 2385, max 2433
empty masks: 0 of 60
Read that as: the mask followed the ball across the whole clip, its centre never more than 0.3 pixels from the truth, and it never lost the object once. The mask area runs about 300 px over the solid disc because the drawn ball has a 2-pixel dark outline ring and the mask covers that too — the disc including the ring is about 2,463 px, so the mask sits within 2% of it. Two things to know before you run it yourself. First, 6.82 seconds per frame is the CPU price on this VM, a 4-thread box with no GPU. The same loop on the project's RTX 4090 runs at 219 frames a second for one camera, with compiling on. A repeat run of the same script on the same box took 499.8 seconds (8.33 s/frame) with byte-identical mask numbers, and the first load took 18.2 seconds instead of 35.8 — CPU timing moves with machine load and download speed; the masks do not. Second, you will see one warning on a CPU-only install:
UserWarning: cannot import name '_C' from 'tamserve_sam2'
Skipping the post-processing step due to the error above...
That is the compiled post-processing extension, which is not built for CPU-only installs. SAM 2's own install notes say the step is skipped and the results are unaffected, and the warning is safe to ignore. It appeared in this run and the masks came out exact anyway.
Step 4 — Watch the result#
track_test.py already wrote tracked.mp4 — the same sixty frames with the mask tinted green over the ball. Verify it:
ffprobe -v error -show_entries format=duration -show_entries stream=width,height -of default=nw=1 tracked.mp4width=320
height=240
duration=6.000000Open it in any player. The green tint should sit on the ball in every frame and nowhere else. If a frame shows green where the ball is not, the track has drifted — re-seed it with a fresh box on that frame, as the next step shows. In this run there was nothing to fix: the mask stayed on the ball for all sixty frames.
Step 5 — Add a second object mid-clip, then drop it#
Four operations cover the whole API: start tracking (a seed on step()), stop (drop()), fix a drifted track (seed the same name again), and start something on a frame you already processed (add()). The last one matters because step() moves everything forward by one frame — calling step() again with the same frame would advance the rest twice. add() starts the new object on that frame and leaves the rest alone. Save this as track_add_drop.py:
"""Verify add() + drop(): two balls, second starts mid-clip, then dropped."""
import time
import cv2
import numpy as np

from tamserve import Box, Engine, build_video_predictor

W, H, N, R = 320, 240, 12, 22
# two balls: A crosses left->right, B crosses right->left lower down
frames = []
for i in range(N):
    f = np.full((H, W, 3), (110, 110, 115), dtype=np.uint8)
    ax, ay = int(30 + 260 * i / (N - 1)), 80
    bx, by = int(290 - 260 * i / (N - 1)), 180
    cv2.circle(f, (ax, ay), R, (40, 40, 220), -1)   # red A (BGR)
    cv2.circle(f, (bx, by), R, (220, 40, 40), -1)   # blue B (BGR)
    frames.append(cv2.cvtColor(f, cv2.COLOR_BGR2RGB))

t0 = time.time()
engine = Engine(build_video_predictor("cpu"))
print(f"predictor loaded in {time.time() - t0:.1f}s")
t1 = time.time()
for i, fr in enumerate(frames):
    if i == 0:
        masks = engine.step({"cam": fr}, {"cam": {"A": Box(30 - R, 80 - R, 30 + R, 80 + R)}})
    elif i == 6:
        # start B on the frame just processed, without advancing A twice
        masks = engine.add({"cam": fr}, {"cam": {"B": Box(290 - 260 * 6 // 11 - R, 180 - R, 290 - 260 * 6 // 11 + R, 180 + R)}})
        print("frame 6 add() ->", {k: int(v.sum()) for k, v in masks["cam"].items()})
    elif i == 10:
        engine.drop("cam", "B")
        masks = engine.step({"cam": fr})
        print("frame 10 drop(B) -> tracked now:", sorted(masks["cam"].keys()))
    else:
        masks = engine.step({"cam": fr})
    if i in (0, 5, 9, 11):
        print(f"frame {i}: " + ", ".join(
            f"{k}={int(v.sum())}px centroid=({np.where(v)[1].mean():.0f},{np.where(v)[0].mean():.0f})"
            for k, v in masks["cam"].items()))
print(f"{N} frames in {time.time() - t1:.1f}s; add()/drop() OK")
Expected output:
predictor loaded in 4.6s
frame 0: A=1517px centroid=(30,80)
frame 5: A=1527px centroid=(148,80)
frame 6 add() -> {'B': 1517}
frame 9: B=1519px centroid=(77,180), A=1546px centroid=(242,80)
frame 10 drop(B) -> tracked now: ['A']
frame 11: A=1552px centroid=(290,80)
12 frames in 67.3s; add()/drop() OK
Note the second load took 4.6 seconds — the model was cached. B starts at frame 6 with a full mask, both balls are tracked together at frame 9 with their centroids where the clip puts them, and after drop("cam", "B") only A remains. The names are yours: camera ids and object ids are plain strings.
How it works#
The speed comes from batching, not from a smaller model. For every frame, a SAM 2-style tracker encodes the image, looks each object up in its memory of recent frames, draws the mask, and writes the frame into memory. tamserve runs those same four stages once per step, over every object on every camera — every object is a row in one batch, the way vLLM batches chat requests. Each object keeps only the memory the model actually reads: the frame it was prompted on, its last six frames, and a short summary of its last fifteen, however long the camera has run. That cap is why memory stays flat: 0.28 GB for an 800-frame video against 9.8 GB for stock, in the project's measurements. The model itself is untouched, which is why the accuracy matches stock to the third decimal on DAVIS 2017.
When to use this vs the alternatives#
- Stock SAM 2 / EdgeTAM code. Use it when you have one recorded video and need what tamserve deliberately leaves out: tracking backwards in time, or nudging a mask with an extra click. For everything live or multi-camera, stock costs a model copy per camera and memory that grows with the video.
- SAM 3's own tracker. It finds things by name itself, which tamserve's engine cannot do alone. But it handles one video at a time, takes about 101 ms per frame against the Tracker's 41 ms, and its memory grows with the video — in the project's test it ran out of memory at frame 423 of a 3,000-frame clip. Use SAM 3's tracker for a single video; use tamserve's Tracker when the same words have to be followed on many cameras or for a long time.
- Detector-plus-tracker pairs (YOLO with ByteTrack or SORT). Boxes, not masks, and a different failure mode: they lose identity when objects cross and re-acquire. They are the lighter tool when a bounding box is enough and you need CPU real-time. When you need the exact outline of each object, tamserve is the one that gives it to you without a model copy per camera.
- Cloud video analytics. Managed, priced per minute, and your footage leaves the machine. tamserve is local, Apache-2.0, no account, and the only network call is the one-time model download.
The takeaway#
tamserve does one thing: it turns a single-video tracker into a multi-camera serving engine, without touching the model. The verified part of this tutorial is the small end — point at a ball, follow it for six seconds on CPU, 0.1-pixel mean error, no lost frames. The part that makes it worth your time is the other end: one model copy, every camera, flat memory, and a track-by-name layer (Tracker and PeopleTracker) that trades a few points of accuracy for less than half the cost of SAM 3's own tracker. The honest boundary is the licence and the download: track-by-name needs SAM 3's gated 3.5 GB weights and a licence acceptance on Hugging Face, and that path was not run here. Install it, point at something in your own footage, and watch the mask stay on it.
How this tutorial was verified#
Every command in this tutorial was run on a Linux VM on November 20, 2026, with Python 3.12.3, against tamserve 0.3.3 at commit 9c133a53955a78b721621a15f151cdfe3643cba8 (cloned November 20). PyTorch was the CPU build, 2.15.0+cpu; OpenCV was opencv-python-headless 5.1.0.95. The test material — a 60-frame synthetic clip with a red ball crossing a static scene, and a 12-frame two-ball clip — is the author's own, written for this tutorial. Results: the 60-frame run tracked all frames with mean centroid error 0.1 px and max 0.3 px, mask area mean 2,416 px, zero empty masks, in 409.0 seconds (6.82 s/frame); the 12-frame run verified add() starting a second object mid-clip and drop() removing it, in 67.3 seconds. The first model load took 35.8 seconds including the EdgeTAM download; the second took 4.6 seconds. Every script was then re-run verbatim from a fresh install after a VM restart: the 60-frame run took 499.8 seconds (8.33 s/frame) and the 12-frame run 110.8 seconds, with byte-identical mask numbers in both cases. The CPU-only _C warning appeared and the masks were exact regardless. The GPU speed and accuracy figures, the SAM 3 Tracker and PeopleTracker numbers, and the Router are the project's own, from its README and results doc — the SAM 3 path was not run here because its weights are 3.5 GB, gated behind a Hugging Face licence acceptance, and the Router needs more than one GPU. No account, API key, or GPU was used at any point.