Make product promos with your coding agent: hands-on with video-shotcraft's 124-shot Remotion library
video-shotcraft gives Claude Code and Codex a 124-card library of tuned camera moves, a complete 36-second promo template, and a browser workbench — every frame drawn by code from your own screenshots. This tutorial installs the skill, renders the template, and walks one shot card end to end, with every command verified.
- The numbers: 21,241 stars and 1,957 forks on GitHub, Apache-2.0; 124 shot recipe cards covering 150 shots; the shot library was rebuilt in the October 2026 refresh; on GitHub's TypeScript daily trending page on November 18, 2026.
- What it is: an agent skill for Claude Code and Codex — not a video generator. The agent captures your real pages and animates them in Remotion, so the result is sharp, on-brand, and editable.
- Verified here, no keys: skill install (exit 0), template
npm ci(187 packages, 31s), still frame 150 (21s), a 3-second clip (19s), the full 36.2-second film (4m47s, 20.2 MB), and the Motion Workbench answering HTTP 200. - The template: Ink Press, 1920×1080 at 30 fps, 1,085 frames, ten shots, sound effects only. It ships with another product's screenshots — replace them before distributing any film.
- Costs: the skill is free; Claude Code and Codex need paid plans; Remotion is free for personal use and small teams, and companies may need a paid licence.

Most AI video tools generate footage. video-shotcraft does the opposite. It hands your coding agent a library of 124 tuned camera moves, a complete 36-second promo template, and a browser workbench for editing the result — then renders every frame from your own product screenshots with Remotion. Nothing is generated, nothing is stock: the film is your interface, choreographed.
The project has 21,241 stars and 1,957 forks on GitHub, and it appeared on GitHub's TypeScript daily trending page on November 18, 2026. The October refresh rebuilt the shot library into its current form: 124 recipe cards covering 150 shots, each with a working Remotion implementation and a motion preview. This tutorial installs the skill, renders the bundled template with your own hands, and walks through one shot card in full — so you know exactly what the agent is doing when you hand it the brief.
One thing to know up front: the skill itself is free and Apache-2.0 licensed, but the agent-driven workflow needs Claude Code or Codex, which run on paid plans. Everything in this tutorial except the agent's creative run was verified in a sandbox with no keys: the install, the template render, a three-second clip, two still frames, and the workbench boot.
1. What it is, and why it is trending#
video-shotcraft is an agent skill, not an app. You install it into Claude Code or Codex, describe the film you want, and the agent does the production work: it captures your real pages, picks shots from the library, storyboards the film, animates it in Remotion, cuts it to the beat, adds sound design, checks every frame, and hands you a finished MP4 you can keep editing.
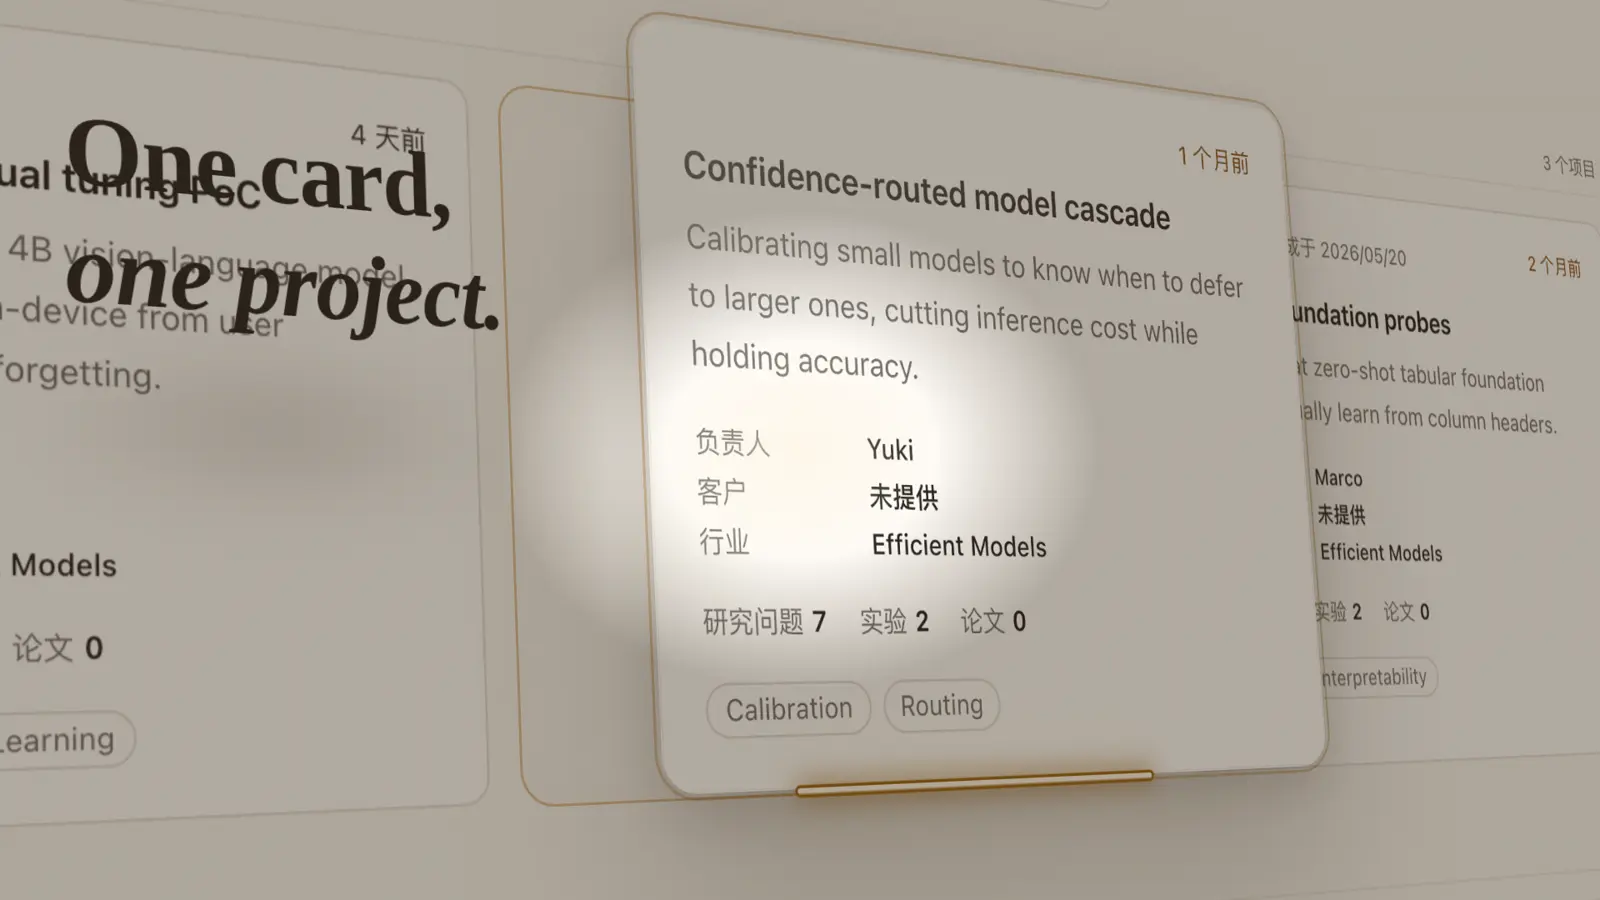
The idea that makes it different is the shot card. Each of the 124 cards is a single, named camera move with a written recipe: intent, exact parameters, known pitfalls, sound cues, and a pointer to the tuned demo source. spotlight-hero-card, for example, is a 172-frame opening: a tungsten spotlight sweeps a darkened page, locks onto one card, the card rises, hovers, and reseats while a champagne light beam traces its outline twice. The card gives you the numbers — camera zoom from 0.8 to 2.6, a 34-degree side angle, the spotlight locking at frame 34, the card landing at frame 142, a 30-frame hold — and the demo code in demos/opening/spotlight-hero-card/ is the tuned implementation. The skill's rule is explicit: read the card and the demo source before writing anything, because the parameters in the demo are the accumulated tuning. Writing a shot from the card name alone throws that work away.
The cards are organized into ten categories: typography (22), UI entrance (21), effects (15), transition (15), interaction (11), opening (11), camera (10), rhythm (8), outro (6), and data (5). A gallery site lets you browse all 150 motion previews and copy card names straight into your prompt.
Why it is catching on now: AI video generators produce footage you cannot edit, and their output drifts off-brand. video-shotcraft produces code. Every frame is drawn from your screenshots and copy, so the result is sharp, on-brand, and fully editable — and the film ships as a Remotion project, not a flat file. For a product team that already lives in a coding agent, that is a much better trade than prompting a video model and hoping.
2. What you'll need#
- Claude Code or Codex on a paid plan. The skill runs inside the agent; the agent does the creative work. (The README is explicit that Claude Code needs a paid Claude plan.)
- Node.js 22 or newer and npm. Remotion rendering, the template, and the workbench all run on Node. Verified here with Node 24.22.1.
- ffmpeg and ffprobe for frame checks and final quality checks. Verified present on the test machine.
- About 500 MB of disk for the template dependencies (312 MB) plus the headless browser Remotion downloads (92 MB).
- No API keys for the skill itself, the template render, or the sound-effect search tool. A Freesound account is not required to search; downloads are CC0 or CC BY previews.
- A product with pages worth filming. The skill's core rule is that recreating an existing page must use real screenshots, not hand-drawn mockups. You need a running product or site the agent can capture.
One licensing note, from the skill's own documentation: the film you make is yours, free for commercial use, with no forced attribution. The one thing to check yourself is Remotion's own licence — free for personal use and small teams, with companies possibly needing a paid licence.
3. Step 1: Install the skill#
The fastest path is the skills CLI:
npx -y skills@latest add Vincentwei1021/video-shotcraft --allVerified in the sandbox: the command exits 0 and installs the skill under .agents/skills/video-shotcraft/, with SKILL.md byte-identical to the repository's. The CLI also reports symlinking into Claude Code, but that symlink did not materialize in this sandbox — the project-local install is what was verified, and it is the location the agent reads.
The manual path, straight from the README, also works and was verified with a read-back:
git clone https://github.com/Vincentwei1021/video-shotcraft.git
cd video-shotcraft
ln -s "$(pwd)" ~/.claude/skills/video-shotcraft   # Claude Code
ln -s "$(pwd)" ~/.codex/skills/video-shotcraft    # Codex
Or skip the tooling entirely and hand your agent the link in chat: Install this skill for me: https://github.com/Vincentwei1021/video-shotcraft.
Confirm the install by checking the entry point exists and is the real thing: SKILL.md is 286 lines and opens with the skill's description of the production pipeline — 124 shot cards, the Ink Press template, beat sync, and sound design. If you see that, the agent can use it.
4. Step 2: Pick one of three modes#
For a full promo, the skill offers three modes that do not mix. Choose before the agent starts, because each one reads different files and asks different questions.
- Template. You want something very close to the bundled Ink Press film. The agent reads
template/TEMPLATE.mdand swaps your screenshots, copy, and brand into the existing ten-shot structure. Fastest path, least creative freedom. If you name the Ink Press template explicitly, the skill treats the mode as already chosen and starts. - Free creation. You want a new style and you trust the agent's judgment. It reads
references/pipeline.md— an eight-stage pipeline from product understanding through visual direction, shot mapping, storyboarding, capture, implementation, sound, and independent final review — and works through it without stopping for approval at each stage. - Co-creation. You want a say at each decision. The agent reads
references/guided-free-creation.mdand pauses for confirmation at the product brief, the requirements decisions, the visual direction, the shot mapping, and the final storyboard, then continues into the pipeline from the capture stage.
If you give the agent a project path, URL, or screenshots without choosing, it does a small read-only product check first — positioning, main features, page visuals, what can be shown — then recommends a mode and asks you to confirm. It will not default to the template just because the template exists.
There is also a fourth use that skips the modes entirely: a single shot. Pick a card from the gallery by name — Use the deck-deal-flyin and row-embed shot cards to present this feature — and the agent reads those cards and their demo source and builds just that effect into your video. That is the lowest-commitment way to try the library.
5. Step 3: Render the bundled template yourself#
Before asking the agent to make anything, render the template yourself. It proves the toolchain works on your machine, and it shows you exactly what the template film looks like. The template is Ink Press: a 36.2-second, 1920×1080, 30 fps promo (1,085 frames, ten shots) in a paper-and-amber style, with sound effects and no background music track.
cd video-shotcraft/template
npm ci
npx remotion browser ensure
npx remotion still src/index.ts AiflPromo out/qa/f150.png --frame=150 --concurrency=1
npx remotion render src/index.ts AiflPromo out/promo.mp4 --concurrency=1
Verified results, on a two-core sandbox with Node 24: npm ci installed 187 packages (Remotion 4.0.484, React 19.2.7) in 31 seconds. remotion browser ensure downloaded the 92 MB chrome-headless-shell binary. The still at frame 150 rendered in 21 seconds as a 1920×1080 PNG — a real frame of the spotlight shot, inspected and confirmed. A three-second test clip (frames 0–89) rendered in 19 seconds as a 3.05-second H.264/AAC MP4, 362 KB. And the full film rendered end to end: all 1,085 frames in 4 minutes 47 seconds, producing a 36.2-second, 1920×1080 H.264/AAC MP4 of 20.2 MB.
Three headless-Linux notes, all from the README and confirmed by the run:
- Pass
--concurrency=1. On a low-core machine, Remotion refuses higher concurrency with a "Maximum for --concurrency is 2" error. One is the safe value here. - Use the headless shell, not system Chrome. Recent Chrome builds dropped the old headless mode, so pointing Remotion at a system Chromium fails to launch.
remotion browser ensurefetches the right binary; if your network blocks it, pass--browser-executable=<path-to-chrome-headless-shell>. - The still command is your QA loop. The skill's workflow renders a still per shot after every change (
npx remotion still … --frame=150), archives them underout/qa/, and only renders the full film after the stills pass. Adopt that habit; it is much cheaper than re-rendering the film to check one shot.
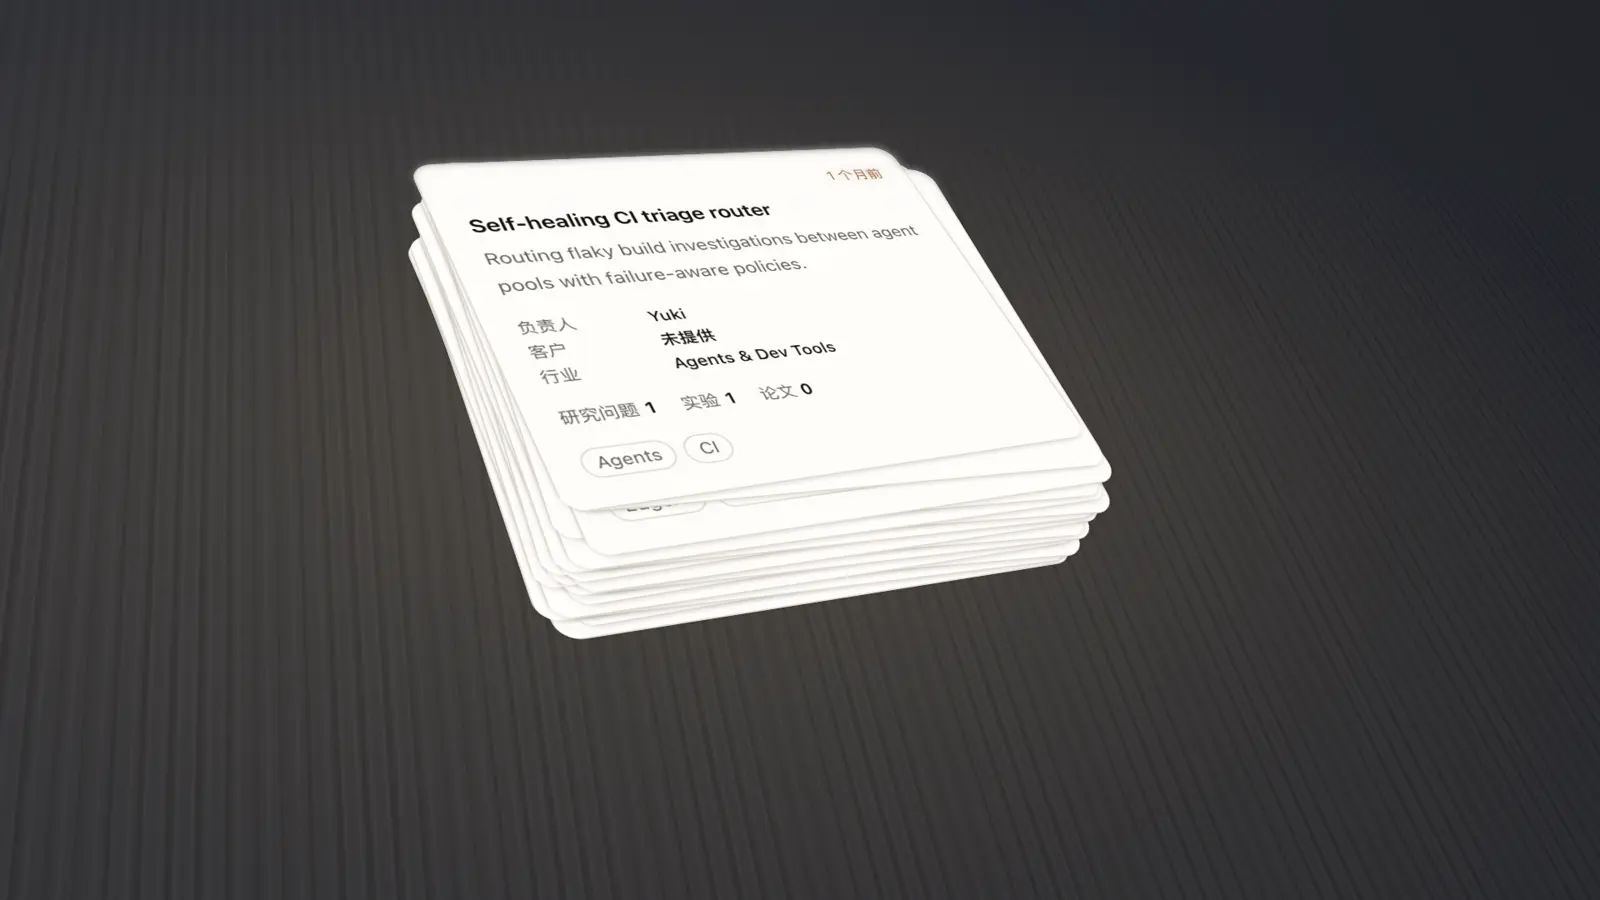
What you will see when the template runs: the bundled screenshots come from an internal research-management tool with Chinese interface text. That is the template's demo product, not yours — the template documentation is explicit that you must replace the whole set with your own product's screenshots before distributing any film made from it. Treat the bundled footage as a rendering test, not as shippable content.
6. Step 4: Read one shot card before you use it#
Open references/shots/opening/spotlight-hero-card.md and read it end to end. It is the best single document for understanding what "tuned" means here. The card specifies the full 172-frame arc: lights dim to 6–14% brightness, the spotlight visits three intermediate stops, locks onto the card at frame 34, the camera pushes from zoom 0.8 to 2.6 at a 34-degree side angle, the card rises with overshoot, hovers with a 4-pixel sine bob, and reseats at frame 142 with a champagne outline beam tracing two laps — fast and bright first, slower and weaker second. Then a 30-frame hold.
It also records the failures that produced those numbers: opening with a multi-card dance was tried and discarded; per-card glints were rejected twice as cheap; the dark field has to live in page space, not screen space, or the mask cannot follow the perspective. The sound section pins effects to frames: a low clunk at frame 2, a big whoosh at frame 56, a sparkle at frame 68, a snap at frame 142.
Then read the reference implementation at demos/opening/spotlight-hero-card/SpotlightHeroCard.tsx. The card is the semantics and the parameter table; the demo is the tuned truth — easing curves, timing ratios, the exact moment the mask switches from a round light pool to a card-shaped soft hole. Adapt the demo, do not rewrite it from the description.
To use a single shot in your own Remotion project, copy the demo's component and its shared pieces from demos/_fixtures/ into your project, swap the screenshots and copy for your product, and keep the timing and easing values intact. The card's known pitfalls are marked as non-negotiable — the quality standard only goes up, never down.
7. Step 5: Edit the film in the Motion Workbench#
After delivery, the skill opens the Motion Workbench — a CapCut-style editor in the browser that splits the finished film into shot, transition, caption, and effects tracks. You can edit copy, font sizes, and colors, move, trim, or speed-ramp clips, and drag in any of the 150 library shots, then export with Remotion. Preview and render are frame-identical.
node workbench/scripts/open.mjs <film-project-dir> # serves http://localhost:5198Verified in the sandbox: the workbench's dependencies install cleanly (265 packages), the open script links the template project and indexes it — 150 demo cards, 38 project assets, 5 background-music tracks — and the dev server answers HTTP 200 at http://localhost:5198/?import=project.
One environment gotcha, found the hard way: the first boot failed because Vite's file watcher hit the sandbox's inotify limit (ENOSPC on the watch call). That is a property of this sandbox, not of the project. The fix is polling mode:
CHOKIDAR_USEPOLLING=1 node workbench/scripts/open.mjs <film-project-dir>On a normal developer machine the plain command works. If you run it in a container or a shared sandbox and the server exits immediately, polling is the first thing to try. The film project needs a src/workbench.ts manifest for the workbench to split it into tracks — the template ships one; the workbench documentation covers the format for films built from scratch.
8. Step 6: Sound design from Freesound#
The template ships with 11 historical sound effects, but new films are supposed to source their own. The skill's tool for that is assets/scripts/sfx-source.py — standard-library Python, no API key, no login:
python3 assets/scripts/sfx-source.py search whoosh --license cc0 --limit 3
python3 assets/scripts/sfx-source.py search --help
The search interface is verified: search takes a query plus --license cc0|by, --min-duration, --max-duration, --limit, --pages, and --output; get downloads chosen sounds and writes a manifest with licences and credits; analyze measures the decoded audio. One honest caveat: the live Freesound lookup returned HTTP 403 from this sandbox, so the search itself could not be exercised end to end here. The tool reported the failure cleanly instead of crashing, and the search path is the standard one — on a normal connection it works. Default to CC0 sounds; CC BY is allowed when you are prepared to credit the source, and the tool generates the credits file for you.
The sound rules in the skill are worth reading even if you never touch the tool. Effects use film vocabulary — whoosh, impact, riser, sparkle, transition — never game-UI sounds. Every effect is pinned to a frame, and the finale always closes riser → impact → sparkle. If you add background music, the template delivers two versions from the same timeline: with music and without (sound effects kept), toggled by a bgm input property.
9. When to use this vs alternatives#
| Approach | Use it when | Watch out for |
|---|---|---|
| video-shotcraft | You have a real product with pages to show, you work in Claude Code or Codex, and you want an editable, on-brand promo | Needs a paid agent plan; the agent's creative run is the part you cannot test for free |
| AI video generators (Higgsfield, Runway, Veo) | You need generated footage, a consistent character, or a cinematic scene that does not exist yet | Output is a flat file; you cannot re-edit a shot, and brand consistency is a fight |
| ffmpeg-skill | You need to cut, caption, reframe, or loudness-normalize existing video with an agent | It edits video; it does not storyboard or direct a promo from your pages |
| Hand-rolled Remotion | You want full control and you already know Remotion | You rebuild the shot vocabulary, the QA loop, and the sound design from scratch |
| cinecode | You want a short film made entirely in code as a creative exercise | A different project with a different goal — a film, not a product promo with a shot library |
The deciding question is what your source material is. If the film is about your product's real interface, video-shotcraft's code-drawn approach wins on sharpness and editability. If the film is about something that does not exist yet — a character, a place, a scene — a generator is the right tool and this skill is the wrong one.
10. The takeaway#
video-shotcraft is not a video generator with a skill wrapper. It is a production method — 124 tuned shots, a complete template, a QA loop built on still frames, and a workbench for editing — packaged so a coding agent can run it. The parts that matter were all verified here without an agent in the loop: the install exits cleanly, the template renders real frames in seconds, a three-second clip encodes correctly, and the workbench serves. The one part that cannot be verified for free is the agent's creative run itself, which needs a paid Claude Code or Codex plan — budget for that before you promise anyone a film.
Start with the template render in Step 3. If that works on your machine, install the skill, pick the template mode, and give the agent your product's URL. Your first film will be a reskin of Ink Press — and that is the point. The template is the shortest path to a good result; the shot library is where the second film gets interesting.