OpenSRE hands-on: the open-source agent that reads your failed CI run and opens the fix
Your CI tells you a build broke. It does not tell you why, or how to fix it — so the build gets re-run, the flaky check piles up, and main stays red until a senior engineer has time to investigate. OpenSRE is the open-source CLI agent that does that investigation: it reads the failed run, traces the cause, and pushes a fix to the pull request for you to review. This tutorial installs it, signs in, runs the CI reliability demo, and wires it into a headless CI job.
opensre doctor reports the setup state, and the unauthenticated error tells you exactly what to run next. The hosted model needs only a free account sign-in — no LLM key. The honest limit: it is public alpha, and the live agent turn needs your own account or provider key, so the run up to that point was verified here and the agent turn itself is documented from the project's docs.- The project: Tracer-Cloud/opensre, 13,686 stars, 1,928 forks, 4,439 commits, 227 releases, Apache-2.0, created January 13, 2026 — on GitHub's daily trending list on November 21, 2026.
- What it does: reads a failed GitHub Actions run, separates CI-caused failures from code-caused ones, and pushes a fix to the PR branch for review; also reports what unreliable CI costs (failure rate, developer hours lost, how long main stays red) and can run a scheduled reliability agent.
- Verified here: installer ran clean on Linux (tarball 150.4 MB, version 0.1.2026.11.18+main.29d9ba6, Python 3.13.18);
--help,ask --help,integrations --help,login --help,doctor, andaccount statusall run and their output is quoted below. - The honest limit: public alpha — core workflows are usable for early exploration but not yet fully stable, and APIs and integrations may evolve. No live agent turn was run in this sandbox: that needs your own signed-in account or provider key, which this tutorial does not have. Everything up to that point was run, and the agent steps are taken from the project's own docs.
- The cost: free, Apache-2.0. The hosted model comes with the free account sign-in; the bring-your-own-provider path bills at the provider's rates. Telemetry is opt-out with
OPENSRE_NO_TELEMETRY=1.

Every team with a CI pipeline knows the shape of this failure. A check goes red, the notification says the build failed, and the actual cause is buried in a log three clicks deep — a flaky test, a changed dependency, a runner that ran out of disk. Someone re-runs the build, it passes, and the real cause waits for the next time it fails. OpenSRE exists for the investigation in between: an open-source agent that reads the failed run, checks the recent commits and deploys, correlates logs, metrics, and traces, and either explains the cause with evidence or pushes a fix to the pull request for review.
The project is Tracer-Cloud/opensre. It has 13,686 stars and 1,928 forks, 4,439 commits across 227 releases, and it sits on GitHub's daily trending list as of November 21, 2026. It is Apache-2.0, self-hosted, and designed to run with your own models. The part that matters for this tutorial is the CLI: one binary, one sign-in, and a first prompt that offers a demo analysis of your own repository's CI history. Everything below was run on a plain Linux VM with no GPU — the install, the version check, the doctor diagnostic, and the exact error you get before signing in are all quoted from those runs.
What you will need#
- macOS or Linux (Windows works too, via PowerShell). The prebuilt Linux binaries need glibc 2.35 or newer — Ubuntu 22.04 or comparable. This tutorial ran on Linux x86_64.
- A terminal open in a code project. A Git repository is recommended: the full workflow demonstration runs against your own repo's CI history.
- A GitHub account. The CI work reads your repository's GitHub Actions history, and the hosted model, Slack and Telegram answers, and hosted-gateway prompts all wait for a connected GitHub account.
- An OpenSRE account (free). Sign-in is by email or another enabled provider, in the browser. It activates the hosted model, so you need no LLM key for the interactive shell.
- About 150 MB of download, and about 20 minutes. The Linux x86_64 tarball is 150.4 MB. No GPU, no Docker, no provider key for the signed-in path.
Step 1 — Install it#
On macOS or Linux, run the installer. The -gh flag also installs the GitHub CLI, which OpenSRE's GitHub tools use:
curl -fsSL https://install.opensre.com | bash -s -- -ghOn Windows, in PowerShell:
& ([scriptblock]::Create((irm https://install.opensre.com/install.ps1))) -ghThe installer fetches the latest build from main without requiring sudo, verifies the checksum, and installs to ~/.local/bin by default. If opensre is not found afterwards, open a new terminal or add the bin directory the installer prints to your PATH. Verify the install:
opensre --version
opensre version
Expected output — this is the exact output from the run for this tutorial, on November 21, 2026:
opensre, version 0.1.2026.11.18+main.29d9ba6
opensre 0.1.2026.11.18+main.29d9ba6
Python  3.13.18
OS      linux (x86_64)
Two things are worth knowing here. First, the version string carries the build date and the commit: 0.1.2026.11.18+main.29d9ba6 matches the repository's current commit, 29d9ba6, so you can confirm the installer gave you the latest main build. Second, the binary bundles its own Python 3.13 — you do not need a Python environment, and nothing else is installed. opensre update checks for a newer main build later, and opensre uninstall removes the binary and all its local data (pass --yes to skip the confirmation prompt).
Step 2 — Sign in and connect GitHub#
Run opensre with no arguments. The welcome screen asks you to sign in or create an account, and the browser opens the OpenSRE sign-up page, where you can use email or another enabled provider. Signing in activates the OpenSRE-hosted model, so you need no LLM key. Back in the terminal, OpenSRE confirms the session with the web app.
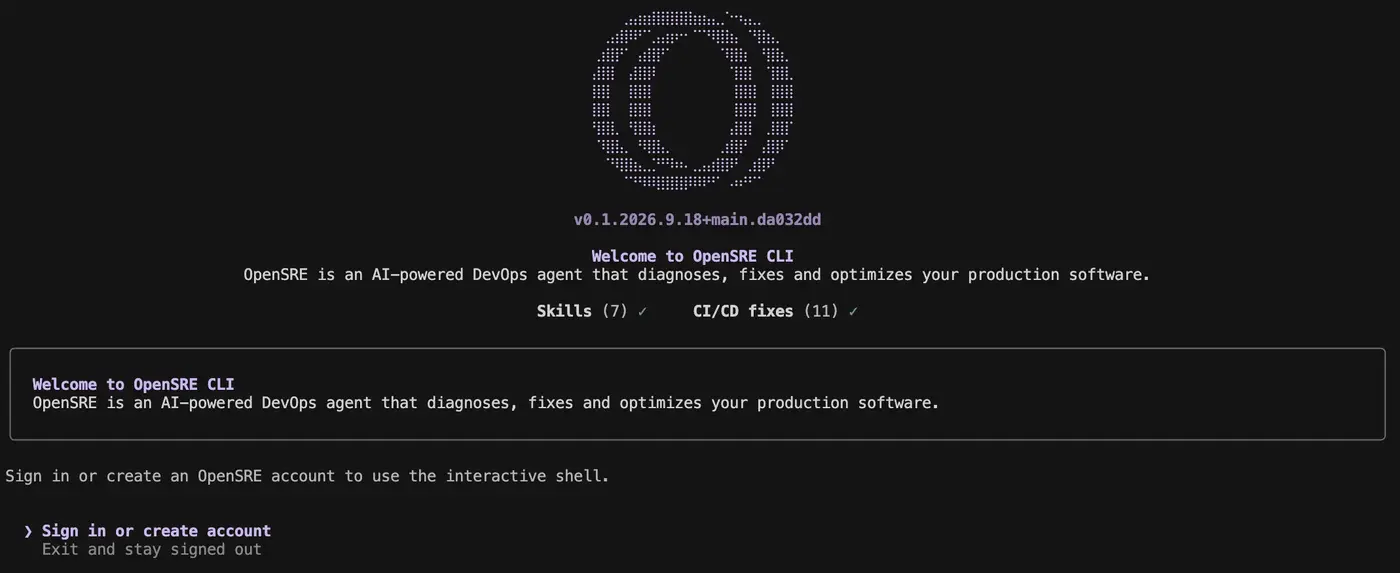
If GitHub is not connected yet, the shell shows Connect GitHub to continue instead of the prompt. Choose Open the dashboard to connect GitHub, connect your own account (or ask a workspace admin to connect one for everyone), then choose I've connected GitHub, continue. The shell opens once the app confirms the connection. If the sign-in screen comes back instead, run opensre account status — it names what is wrong with the session (expired, revoked, or the web app unreachable).
Before signing in, account status reports exactly this, which is also how you can confirm you are starting from a clean machine:
opensre account status✗ Not signed in
detail No OpenSRE account is signed in.On a server, over SSH, or in a container — anywhere the terminal runs on a different machine from your browser — the browser cannot hand the sign-in back to the terminal. OpenSRE prints a link and asks for a code instead: open the link in a browser on any device and sign in, confirm that you started the sign-in, then choose Show sign-in code and paste the code at the Code: prompt. OpenSRE switches to this automatically over SSH (SSH_CONNECTION, SSH_CLIENT, or SSH_TTY is set) and on Linux with neither DISPLAY nor WAYLAND_DISPLAY set. To choose yourself, run opensre account login --paste-code, or --no-paste-code to keep the browser redirect. The code works once, only in the terminal that started the sign-in, and expires five minutes after it is shown. Paste it only into a terminal you started yourself, and never send it to anyone. Connecting GitHub works the same way over SSH.
Step 3 — Run the health check#
Before asking the agent anything, run the diagnostic. It surfaces setup issues in one screen:
opensre doctorOn a fresh, unsigned-in machine it reports something like this — the output below is the real result from the run for this tutorial, with the colour codes stripped:
OpenSRE Doctor
  ✓  python             Python 3.13.18
  ⚠  env_file           .env not found
  ⚠  llm_provider       provider=anthropic, auth missing (ANTHROPIC_API_KEY is not configured.)
  ⚠  integrations       /home/hatch/.opensre/integrations.json not found — run 'opensre integrations setup'
  ⚠  agent_capabilities network requests is unavailable in this environment (probe returned unavailable)
  ✓  buzz_cli           not configured (optional)
  ✓  version            0.1.2026.11.18+main.29d9ba6
  4 warnings — fix and rerun opensre doctor
Read the warnings in order. .env not found is expected on a fresh install — the file holds provider keys and integration settings, and you do not need one if you signed in. llm_provider … auth missing is the same story: it means no provider key is configured, which is fine on the signed-in path, where the hosted model is used instead. integrations … not found is the prompt to do Step 5. The agent_capabilities warning is specific to this sandbox — raw network access is blocked here, so the agent cannot make direct network requests; on a normal machine that line does not appear, and configured integrations cover outbound HTTP anyway. A clean run after sign-in and integration setup should show the first three lines green and the version line unchanged. If doctor reports a problem you do not understand, fix what it names and rerun it — that loop is the intended use.
Step 4 — Your first CI/CD analysis#
The first time the interactive shell opens, it asks what OpenSRE should do first. Pick the CI/CD analysis of one of your repositories. It reads the last 30 days of GitHub Actions history and reports how reliable your CI is and how much developer time it costs. It needs GitHub access — connect it in the OpenSRE app through OAuth or its token-entry form, and run opensre account login to load that connection on the machine. If the connection is missing, the flow offers the app setup link. Type /demo to open the menu again at any time, or start with opensre --skip-onboarding to skip it and go straight to the prompt.
Inside the shell, describe the problem in plain language — that is the interface. The shell accepts questions about incidents, slow deploys, and failing checks, and it calls the tools it needs while it works. The slash commands are the control surface: /help lists commands, /status shows the current setup, /effort changes reasoning effort, /cost shows spend, /sessions and /resume manage sessions, /compact shortens the context, /new starts fresh, and /exit closes the shell. Ctrl+C cancels an in-flight turn without losing session state. The shell needs a TTY — it will not open through a pipe or a CI job, which is what the headless command in Step 6 is for.
Once you are signed in, the one-shot form of a question is:
opensre ask "why did checkout latency increase today?"That example is from the project's own FAQ. OpenSRE reasons across your connected systems, calling the tools it needs, and prints the answer. Each run is saved as a resumable session unless you pass --ephemeral, and a finished run prints a session ID you can follow up on with opensre ask --resume <session-id> "…" .
Step 5 — Connect your stack#
OpenSRE connects to more than 60 tools and services. The ones that matter first are the ones your incidents live in: GitHub for the CI history, your observability platform for the logs and metrics, and Slack or Telegram for the summary. Set each one up by name:
opensre integrations setup github
opensre integrations setup datadog
opensre integrations setup slack
Then verify the connections actually work:
opensre integrations verify
opensre integrations verify datadog
The setup command accepts one service name — the full list, verified from opensre integrations setup --help on the installed binary, is: alertmanager, aws, betterstack, coralogix, datadog, grafana, honeycomb, mariadb, mongodb_atlas, slack, opensearch, rds, vercel, github, gitlab, sentry, mongodb, discord, postgresql, twilio, azure_sql, incident_io, signoz, jenkins, tracer, telegram, whatsapp, mysql, dagster, redis, pagerduty, tempo, posthog_mcp, sentry_mcp, groundcover, smtp, temporal, helm, posthog, rocketchat, servicenow, railway, azure, kubernetes, buzz, new_relic, google_docs, and neon. The full catalogue is wider than that list — Grafana covers Loki, Mimir, and Tempo; AWS covers S3, Lambda, EKS, EC2, CloudTrail, and Bedrock; the database set includes ClickHouse, MySQL, Snowflake, RDS, Supabase, and Neon; the data-platform set includes Airflow, Kafka, Prefect, RabbitMQ, Dagster, and Temporal; and the incident set includes PagerDuty, Jira, Alertmanager, incident.io, and ServiceNow.
One precedence rule matters: integrations connected in the web app are also used by every signed-in shell and CLI, and they take precedence over local setup for the same service. So connect a service once in the app and every signed-in machine picks it up; use local setup for services only one machine needs. Inside the shell, the same commands work with a slash: /integrations setup <service>, /integrations list, /integrations verify.
Step 6 — Run it headless from a script or a CI job#
opensre ask is the headless form: one agent turn, print the response, exit. The read-only tasks — the CI reliability analysis and the health scan — run headless as they are. Fixing a PR or scheduling an agent uses tools that need approval, and a headless run has nobody to approve, so you authorize the tool the task uses, for that run only:
opensre ask "fix the failing checks on PR 412" --allowed-tool github_pushEach --allowed-tool covers one tool; a task that needs two takes the flag twice. A machine that is not signed in needs LLM_PROVIDER and a provider key plus a GitHub token in the environment. The flag names are verified from opensre ask --help on the installed binary; the tool names themselves come from the task — an unknown tool name is rejected before the agent starts, so a typo fails fast instead of failing mid-run. The full option set is:
opensre ask --helpUsage: opensre ask [OPTIONS] PROMPT
Run one configured OpenSRE agent request and exit.
Options:
--allowed-tool TOOL Authorize a registered tool for this invocation. Repeat as needed.
--dangerously-bypass-approvals Authorize every approval-gated tool for this invocation.
-i, --context-file PATH Attach a UTF-8 text file as untrusted context. Repeat as needed.
--resume SESSION Continue a previous ask session by ID or unambiguous prefix.
--ephemeral Do not persist this invocation or print a resumable session ID.
-h, --help Show this message and exit.Three details from the docs are worth building into any script. First, JSON output: put the global --json option before ask — opensre --json ask "…" — and you get one JSON object with status, response, session_id, questions, denied_tools, and error. Second, exit codes: 0 the agent completed, 1 setup or agent execution failed, 2 invalid arguments, 3 a tool required approval and was denied, 4 the agent needs structured user input (resume the returned session with the answer), 130 interrupted with SIGINT, 143 terminated with SIGTERM. Third, context files: attach an alert, a log excerpt, or a deployment note with -i — up to 16 files, each up to 64 KiB, 128 KiB combined, UTF-8 only; files are treated as untrusted context, not operator instructions, so review them for secrets before running. Set OPENSRE_PROMPT_LOG_DISABLED=1 to disable prompt and response logging, including for ephemeral requests.
Do not use --dangerously-bypass-approvals casually. It authorizes every approval-gated tool for that invocation, and the root -y flag does not authorize agent tools — the bypass flag is the only way to do it headless, and it belongs only in a trusted environment where the prompt and the connected integrations are controlled. The flag does not bypass operating-system permissions or sandboxing.
Finally, here is what happens if you run ask with no auth at all — no sign-in, no provider key. This is the exact output from the run for this tutorial:
opensre ask "why did the checkout-api deploy fail?"No API key is set for anthropic. Run `opensre login anthropic` to add one, or `opensre onboard` to rerun setup. To use the OpenSRE-hosted model instead, sign in with `opensre account login`.The command exits with status 1 before the agent runs and prints the command that fixes the setup. That is the behaviour to expect on a fresh machine, and it is also the fastest way to confirm your install is healthy: if you see this message, the binary works and only the auth is missing.
How it works#
When a CI run fails, an alert arrives, or you ask a question, OpenSRE runs the same six-step loop:
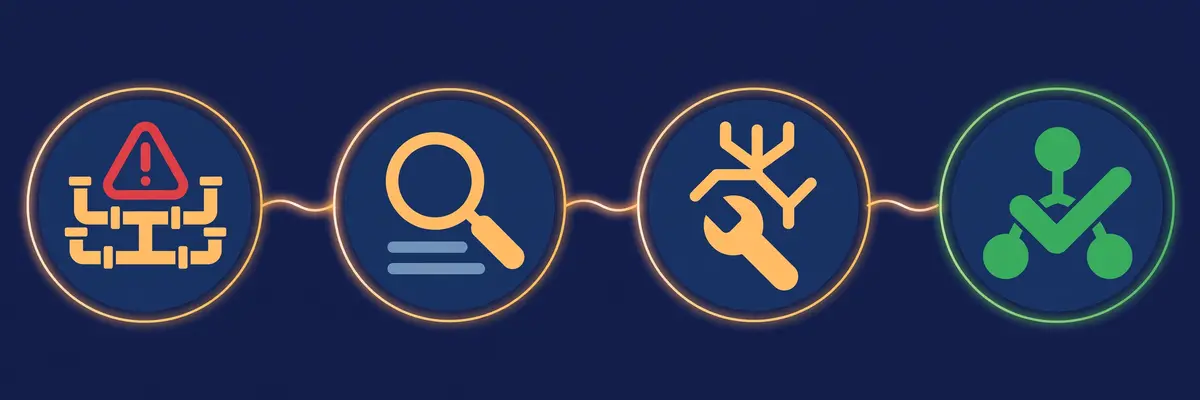
- Fetches the relevant context: failing checks and CI logs, recent commits and deploys, and correlated logs, metrics, and traces.
- Masks sensitive identifiers, optionally, before any external LLM call.
- Reasons across your connected systems in a tool-calling loop, testing hypotheses and separating CI-caused failures from code-caused ones — a flaky runner is not a broken test, and fixing the wrong one wastes the next hour.
- Answers with an evidence-linked response in the conversation.
- Fixes the cause and pushes it to the PR branch for you to review, or suggests next steps and, optionally, executes remediation actions.
- Posts a summary directly to Slack, PagerDuty, or Telegram — no context switching.
The CI side has five capabilities, and the table is the honest way to pick between them:
| Capability | Reads | Writes | Runs where |
|---|---|---|---|
| CI reliability analysis | 30 days of Actions runs for one repository | A report in the shell | Your machine |
| Health scan | Open PRs and branch heads across your organizations | Nothing | Your machine |
| Fix a PR | Failing checks and logs of one PR or branch | A commit on the PR branch, or a fresh repair branch | Your machine |
| Reliability agent | The last 7 days, every weekday morning | A report in the shell inbox | Your machine, as a scheduled loop |
| Repair loop | One PR's failing checks | Up to three repair pushes within ten minutes | Your machine, or the hosted gateway |
Where the results go: analysis reports print in the shell, and the scheduled agent also saves the raw figures under ~/.opensre/ci_reliability_reports/. A repair pushes to the pull request's own branch and reports the commit and the check results; /loops show <task-id> prints a finished repair's report with its evidence links. The banner's CI/CD fixes counter shows how many distinct repairs pushed checks that passed.
When to use this vs the alternatives#
- Managed incident platforms (PagerDuty, incident.io, and the like). They page well and they cost per seat, per month, forever. OpenSRE is the self-hosted, open-source complement: it does the investigation and the fix, on your infrastructure, with your models. It also talks to those platforms — PagerDuty and incident.io are integrations, not competitors — so the usual shape is OpenSRE investigating and the platform you already pay for still doing the paging.
- Asking a plain LLM chat about a failed build. A chat has no repo, no CI history, and no tools: you paste the log, it guesses. OpenSRE fetches the failing checks, the recent commits, and the correlated logs itself, and it can act on what it finds. The difference is the context it gathers before it answers, and the fix it can push after.
- GitHub's own failure summaries and re-runs. They tell you that a check failed, and re-running sometimes makes it pass. They do not separate a CI-caused failure from a code-caused one, they do not correlate the failure with a deploy, and they do not open a fix. Use the re-run button when you already know the failure is flaky; use OpenSRE when you do not know why it failed.
- Writing your own failure-handling scripts. A script can grep a log for a known string and re-run a job. It cannot test a hypothesis it has not been told about, and every new failure mode is another branch in the script. OpenSRE's tool-calling loop is the general version of that script — slower to set up, but it handles the failure you did not predict. Keep the script for the one failure you see every week; use the agent for the rest.
- The self-hosted gateway, for teams. If the CLI is not enough, the same repository deploys as a Docker image in
web,gateway, orschedulermode, withLLM_PROVIDERand a provider key. The OpenSRE Cloud managed gateway is the hosted version: an organization admin provisions it in the web app, and signed-in shell users can check, start, or stop it without handling infrastructure credentials locally. There is also a gateway AMI and systemd path (make build-gateway-image, thenmake deploy-gateway) for a Telegram-only gateway. Bring your own provider key here: setLLM_PROVIDERto anthropic, openai, openrouter, trustedrouter, deepseek, gemini, bedrock, or azure, plus the matching key — for exampleANTHROPIC_API_KEYwhenLLM_PROVIDER=anthropic.
The takeaway#
OpenSRE does one thing: it turns a red CI check from a notification into an investigation with an outcome. The verified part of this tutorial is the ground floor — the installer runs clean, the binary reports its version and its setup state, and the unauthenticated error tells you exactly what to run next. The part that makes it worth your time is the layer above that: a signed-in shell that reads 30 days of your Actions history and tells you what unreliable CI is costing, a headless command with real exit codes and JSON output that fits into the CI job it is watching, and a repair loop that pushes a fix to the branch instead of leaving the failure for the next person. The honest boundary is the alpha label and the account: core workflows are usable but not yet fully stable, and the agent itself needs your signed-in account or your provider key. Install it, run doctor, sign in, and point it at the repository whose CI you trust least.
How this tutorial was verified#
Every install and CLI command in this tutorial was run on a Linux x86_64 VM on November 21, 2026, against the repository at commit 29d9ba6 (4,439 commits, 227 releases). The installer was run with the -gh flag; it downloaded the 150.4 MB Linux x86_64 tarball from the main-build release, verified the checksum, and installed OpenSRE v0.1.2026.11.18+main.29d9ba6 (Python 3.13.18). opensre --version, opensre version, opensre --help, opensre ask --help, opensre integrations --help, opensre integrations setup --help, opensre login --help, opensre doctor, opensre account status, and the unauthenticated opensre ask were all run, and their output is quoted verbatim above. Star, fork, commit, release, and creation-date figures are from the GitHub repository page, read the same day; the install command, sign-in flow, demo menu, headless exit codes, context-file limits, and CI capability table are from the project's README and docs (quickstart, FAQ, headless CLI, and CI/CD overview pages, updated between September 28 and November 11, 2026). What was not run here: no live agent turn, no CI/CD demo analysis, and no repair loop — each needs a signed-in OpenSRE account, a connected GitHub account, or a provider key, and this tutorial had none of those. No account was created, no key was used, and no code was changed in any repository. The welcome-screen screenshot is the project's own docs image, from an older build (v0.1.2026.9.18).